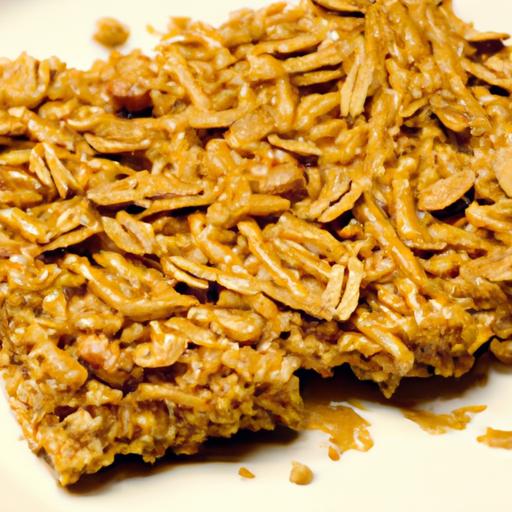
Peanut Butter Rice Krispies capture the ideal harmony between crunchy cereal and luscious creaminess, creating a treat that’s both nostalgic and irresistibly new. This beloved snack has roots in classic marshmallow bars but gets elevated by the rich, nutty depth of real peanut butter, making each bite a journey of textures and flavors that delight the senses. Whether you’re crafting these for a fast afternoon pick-me-up or a crowd-pleasing dessert, the secret to this recipe lies in selecting premium ingredients and mastering the delicate balance of heat and mixing.
Prep and Cook Time
- Preparation: 10 minutes
- Cooking: 10 minutes
- Total time: 20 minutes
Yield
Makes approximately 12 generous squares or 24 smaller bites
Difficulty Level
Easy – perfect for bakers of all skill levels, including beginners
Ingredients
- 6 cups Rice Krispies cereal
- 1 cup creamy peanut butter, preferably natural
- 3 tablespoons unsalted butter
- 1 (10 oz) bag mini marshmallows (or 4 cups regular marshmallows)
- 1 teaspoon pure vanilla extract
- 1/4 teaspoon fine sea salt (to enhance flavor)
- Optional mix-ins: ½ cup chopped roasted peanuts, ½ cup mini chocolate chips, or a sprinkle of flaky sea salt for topping
Instructions
- Prepare your pan: lightly grease a 9×13-inch baking dish or line it with parchment paper, leaving overhang on two sides for easy removal.
- Melt the butter and peanut butter: In a large saucepan over low heat, combine unsalted butter and creamy peanut butter. Stir gently and continuously untill melted and smooth, about 3-4 minutes.
- Add marshmallows: Gradually add the mini marshmallows to the peanut butter mixture. Stir constantly until fully melted and glossy,about 5 minutes.Remove from heat.
- Flavor with vanilla and salt: Stir in vanilla extract and sea salt. These add depth and balance the sweetness, giving the bars a sophisticated nutty backdrop.
- Fold in Rice Krispies: Immediately add the cereal and gently fold with a spatula until every grain is coated evenly. Work quickly for optimal texture.
- Customize now: If you want to add chopped peanuts or chocolate chips, fold them in gently at this stage to preserve the crunch.
- Press into pan: Using a buttered spatula or wax paper, press the mixture firmly and evenly into the prepared pan. Don’t press too hard or you’ll lose all the crunch.
- cool completely: Allow the bars to cool at room temperature, about 30 minutes, until firm enough to cut cleanly.
- Slice and serve: Use the parchment overhang to lift the slab out, than cut into desired squares or bars. Enjoy immediately or store in an airtight container for up to 3 days.
Tips for Success: Elevate Your Peanut Butter Rice Krispies
- ingredient quality matters: Using fresh peanut butter with natural oils intensifies richness and prevents graininess.
- Marshmallow melting: Keep heat low and stir often to avoid scorching the marshmallows, which would alter both texture and flavor.
- For extra crunch: Toast a handful of peanuts and sprinkle on top just before cooling for a delightful toasted finish.
- Make-ahead amiable: Store leftovers tightly wrapped or in a sealed container to maintain freshness and crunch.
- Gluten-free option: Ensure the Rice Krispies cereal is gluten-free (some versions contain malt flavoring). Substitute accordingly.
- Flavor twists: Swap vanilla for almond extract or swirl in dark chocolate for an upscale spin.
Serving Suggestions
These bars shine on their own but become an instant party favorite when embellished thoughtfully. For an elevated presentation, consider placing the squares on a rustic wooden board, then lightly dusting them with powdered sugar or drizzling tempered dark chocolate over the top. Pair them with cold milk or a cup of robust coffee to contrast the creamy peanut butter notes with a bitter edge.
For a fun twist,serve peanut butter Rice Krispies alongside fresh fruit slices such as apples or bananas,allowing guests to add a refreshing bite between each crunchy,decadent mouthful.
| nutrient | Per Serving (1 Bar) |
|---|---|
| Calories | 190 |
| Protein | 5g |
| Carbohydrates | 24g |
| Fat | 8g |

For more tried-and-true snack recipes featuring peanut butter, check out our Creamy Peanut Butter Energy Bites. To dive deeper into the nutritional benefits and uses of peanut butter, the Healthline Peanut Butter Nutrition Guide offers an excellent resource.
Q&A
Q&A: Peanut Butter Rice Krispies – A Crispy, Nutty Delight Recipe
Q1: What makes Peanut Butter Rice Krispies different from traditional Rice Krispies treats?
A: While classic Rice Krispies treats rely on marshmallows and butter for their signature chewy texture, Peanut Butter Rice Krispies add a rich, nutty depth to the mix. The peanut butter not only infuses the treats with a creamy,savory sweetness but also adds a lovely,slightly denser chew. This twist elevates the humble snack into a more decadent and satisfying delight.
Q2: Can I use crunchy or creamy peanut butter for this recipe?
A: Great question! Both crunchy and creamy peanut butter work wonderfully here, but they offer different experiences. Creamy peanut butter creates a smoother, more uniform texture, while crunchy peanut butter adds an extra layer of bite and nuttiness thanks to those delightful peanut bits. Feel free to choose based on whether you prefer silky or slightly textured treats.
Q3: What are the essential ingredients in this recipe?
A: The magic trio includes Rice Krispies cereal, peanut butter, and marshmallows. Butter often joins the party to help melt the marshmallows evenly and ensure everything binds together perfectly. Some variations sprinkle in a pinch of vanilla extract or a dash of salt to heighten the flavors, but at its core, these three main ingredients deliver that irresistible crispy and nutty combo.
Q4: Is it possible to make Peanut Butter Rice Krispies without marshmallows?
A: Absolutely! If marshmallows aren’t your thing or if you’re aiming for a healthier twist, you can substitute them with honey or maple syrup combined with additional peanut butter and a bit of coconut oil. However, keep in mind that marshmallows give the treats their classic chewy texture and sweetness, so alternatives might yield a slightly different consistency but still tasty results.
Q5: How can I prevent my Peanut Butter Rice Krispies from becoming too sticky or crumbly?
A: Balance is key! Melt your peanut butter and marshmallows gently, mixing thoroughly to ensure even distribution. Avoid overcooking, which can make the mixture stiff and dry. Also, press the mixture firmly into your pan to help it set properly but don’t compact it too tightly as that could reduce the crispy texture. Using buttered hands or a lightly greased spatula to press the mixture helps prevent sticking without sacrificing texture.
Q6: Can I add extra ingredients to customize my Peanut Butter Rice Krispies?
A: Definitely! Chopped peanuts, mini chocolate chips, dried fruit, or a sprinkle of sea salt make fantastic additions. For a fun twist, try drizzling melted chocolate over the top or folding in some toasted coconut flakes. These extras bring new dimensions of flavor and texture, turning your nutty crispy treats into customized delights.
Q7: What’s the best way to store Peanut Butter Rice krispies?
A: To keep them fresh and crispy, store the treats in an airtight container at room temperature for up to 3-5 days. Avoid refrigeration, as it can make them hard and less enjoyable. If you want to prep them ahead, wrap individual bars in parchment or wax paper to prevent sticking and help with easy grab-and-go snacking.
Whether you’re a peanut butter fanatic or just love a crispy, sweet treat, Peanut Butter Rice Krispies offer a perfect blend of textures and flavors. Ready to whip up this nutty delight? Grab your bowl and get stirring-crispy happiness awaits!
Key Takeaways
Whether you’re craving a quick snack or a fun treat to share, these Peanut Butter Rice Krispies bring together the perfect harmony of crispy crunch and rich nuttiness.Easy to make and utterly satisfying, this recipe transforms simple pantry staples into a delightful bite that’s hard to resist. So next time you want to turn ordinary Rice krispies into something unusual, give this nutty twist a try – your taste buds will thank you!
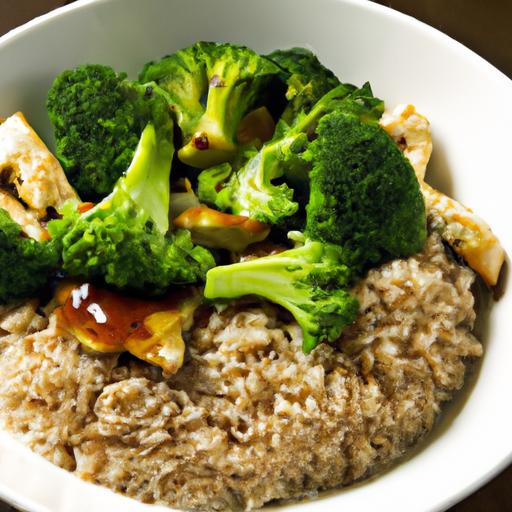
Savory Teriyaki Chicken Rice Bowls with Vibrant Broccoli offer a delightful balance of sweet, savory, and fresh flavors that awaken the senses and satisfy the soul. Inspired by classic Japanese comfort food, this recipe delivers an authentic experience through a perfectly balanced teriyaki sauce, crisp-tender broccoli, and a comforting rice base. Whether it’s a weeknight dinner or a casual get-together,this bowl brings an inviting warmth and sophistication to the table.
Prep and cook time
- Readiness: 15 minutes
- Cooking: 20 minutes
- Total Time: 35 minutes
Yield
Serves 4 generous portions
Difficulty Level
Easy to Medium - approachable for all home cooks
Ingredients
- For the Teriyaki Sauce:
- 1/2 cup low-sodium soy sauce
- 1/4 cup mirin (sweet rice wine)
- 2 tbsp sake (or dry white wine)
- 3 tbsp brown sugar, packed
- 2 cloves garlic, finely minced
- 1 tsp fresh ginger, grated
- 1 tbsp cornstarch mixed with 2 tbsp cold water (slurry)
- For the Chicken and Broccoli:
- 1 lb boneless, skinless chicken thighs or breasts, cut into bite-sized pieces
- 1 large head of broccoli, cut into small florets
- 2 tbsp vegetable oil (divided)
- Salt and freshly ground black pepper, to taste
- Rice Base:
- 2 cups Japanese short-grain rice, rinsed thoroughly
- 2 1/2 cups water
- Pinch of salt
- optional Garnishes:
- Toasted sesame seeds
- Thinly sliced green onions
- Pickled ginger slices
- Shredded nori (seaweed)
Instructions
- start with the rice: Rinse 2 cups of Japanese short-grain rice under cold water until the water runs clear. This removes excess starch and prevents the rice from becoming gummy. Soak the rice for 15 minutes if possible, then drain.In a medium pot, combine rice with 2 ½ cups water and a pinch of salt. Cover and bring to a boil. Once boiling, reduce heat to low and cook for 15 minutes without lifting the lid. Remove from heat and let steam for 10 minutes. Fluff with a fork before serving.
- Craft the teriyaki sauce: In a small saucepan,combine soy sauce,mirin,sake,brown sugar,minced garlic,and grated ginger. Over medium heat, stir until the sugar dissolves and the mixture begins to shimmer. Add the cornstarch slurry slowly, stirring constantly, and cook until the sauce thickens to a glossy glaze-about 2 minutes. Remove from heat and set aside.
- Prepare the broccoli: Bring a large pot of salted water to a rolling boil. Drop in broccoli florets and blanch for 1-2 minutes until vibrant green and just tender-crisp. Immediately transfer broccoli to an ice water bath to halt cooking and preserve color. Drain well and pat dry before plating.
- Cook the chicken: Heat 1 tablespoon of vegetable oil in a large non-stick skillet over medium-high heat. Season chicken pieces lightly with salt and pepper. Sauté chicken in a single layer, ensuring not to crowd the pan, cooking for 4-5 minutes per side, or until golden brown and cooked through. Remove the chicken and set aside.
- Toss chicken with sauce: In the same skillet, lower heat to medium. Pour in the prepared teriyaki sauce and return chicken to the pan. Toss carefully to coat each piece in the luscious sauce, heating through for 1-2 minutes. Remove from heat.
- Assemble the bowl: Divide the steamed rice evenly among four bowls. Arrange the glossy teriyaki chicken atop the rice,then nestle the vibrant,crisp broccoli florets alongside. Garnish with toasted sesame seeds, sliced green onions, and optional pickled ginger for bursts of flavor and texture.
Chef’s Notes & Tips for Success
- Broccoli variance: For a nuttier flavor and added crunch, lightly sauté the blanched broccoli in a splash of sesame oil before plating.
- Rice alternatives: Substitute Japanese rice with jasmine or basmati for a slightly different aroma profile, but note texture will be less sticky.
- Chicken choice: Use chicken thighs for juiciness; chicken breasts can work if careful to avoid drying out.
- Make-ahead: Teriyaki sauce can be prepared up to 3 days in advance and refrigerated tightly sealed.
- Vegetarian option: Swap chicken with firm tofu, pressed and pan-fried, for a plant-based twist.
Serving suggestions
Present your bowls with a light drizzle of extra teriyaki sauce and a pinch of sesame seeds for eye-catching contrast and texture. Pair with a simple miso soup or crispy gyoza on the side for a complete Japanese-inspired meal. A chilled green tea or a crisp sake elevates the dining experience exceptionally well. For an added pop of color and freshness,sprinkle thin strips of nori or a squeeze of fresh lime.

| Nutrient | Per Serving |
|---|---|
| Calories | 520 kcal |
| Protein | 38 g |
| Carbohydrates | 55 g |
| Fat | 12 g |
Explore more Japanese-inspired dishes in our Japanese Comfort Food Recipes collection. For an in-depth understanding of authentic teriyaki sauces and cooking techniques, visit Just One Cookbook.
Q&A
Q&A: Savory teriyaki Chicken Rice Bowls with Vibrant Broccoli
Q1: What makes this Teriyaki Chicken Rice Bowl recipe stand out from othre chicken dishes?
A1: This recipe is all about the perfect harmony between sweet, savory, and fresh. The teriyaki sauce is rich and glossy, coating tender chicken pieces that are caramelized just right. Paired with fluffy rice and vibrant, crisp-tender broccoli, each bite dances with layers of flavor and texture. It’s comfort food elevated with a splash of color and nutrition.
Q2: Can I use a homemade teriyaki sauce, or should I buy it pre-made?
A2: While store-bought teriyaki sauce is convenient and tasty, making your own is highly rewarding. A simple combination of soy sauce,mirin,sake (or a splash of rice vinegar),brown sugar,and fresh ginger can create a luscious sauce that’s customizable to your sweetness and saltiness preferences. Plus, homemade sauce means no hidden preservatives!
Q3: How do you ensure the broccoli stays vibrant and crisp instead of mushy?
A3: The trick is quick cooking-either blanching the broccoli in boiling water for 1-2 minutes and then shocking it in ice water or steaming it just until bright green and tender-crisp. This method locks in the color, nutrition, and that delightful crunch, balancing the softness of the chicken and rice perfectly.
Q4: What type of rice works best in this bowl?
A4: Traditionally, short-grain Japanese rice or medium-grain rice pairs beautifully with teriyaki dishes, as their slightly sticky texture holds the sauce well.Though,jasmine or basmati rice can work if you prefer a fluffier consistency. For a healthier twist, try brown rice or cauliflower rice to add fiber and extra nutrients.
Q5: Are there any easy ways to make this recipe gluten-free?
A5: Absolutely! Simply swap out regular soy sauce for tamari or a gluten-free soy sauce alternative. Also, double-check any pre-made sauces or mirin substitutes to ensure they don’t contain gluten. This way,your teriyaki chicken rice bowl remains just as flavorful without compromising dietary needs.
Q6: Can I meal prep thes bowls for the week?
A6: These bowls are meal prep pleasant! Cook the chicken, rice, and broccoli separately, then assemble in containers. Keep the teriyaki sauce separate to drizzle before eating, preserving freshness and texture. When reheating, microwave gently to avoid overcooking the broccoli, or reheat the chicken and rice and add steamed broccoli fresh if you prefer.Q7: What are some fun topping ideas to elevate the bowl even more?
A7: Sprinkle toasted sesame seeds or thinly sliced green onions on top for an extra burst of flavor and crunch. For a bit of zing, add pickled ginger or a drizzle of spicy mayo. Crunchy roasted seaweed flakes or a handful of chopped peanuts can also add texture and depth to your bowl.
With its balance of savory-sweet sauce, tender chicken, fresh broccoli, and fluffy rice, this Teriyaki Chicken Rice Bowl is more than a meal-it’s a celebration of vibrant flavors and simple, wholesome cooking. Perfect for weeknight dinners or meal prepping your way through a busy week!
In Summary
As the sweet and savory aroma of teriyaki chicken mingles effortlessly with the vibrant crunch of steamed broccoli, this rice bowl becomes more than just a meal-it’s a celebration of balance and flavor. Whether you’re seeking a quick weeknight dinner or a nutritious lunch that energizes your day, these bowls prove that wholesome ingredients can come together in a symphony of taste and texture. So next time you crave something both comforting and bright, let this teriyaki chicken rice bowl inspire your kitchen creativity and nourish your body with every colorful bite.
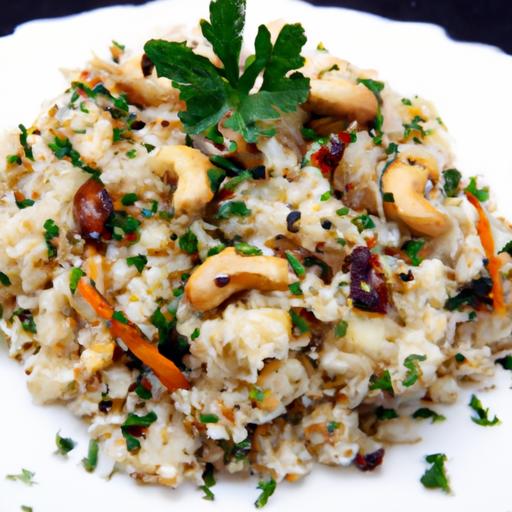
Nutty Cauliflower Rice Pilaf: A Herb-Infused Delight
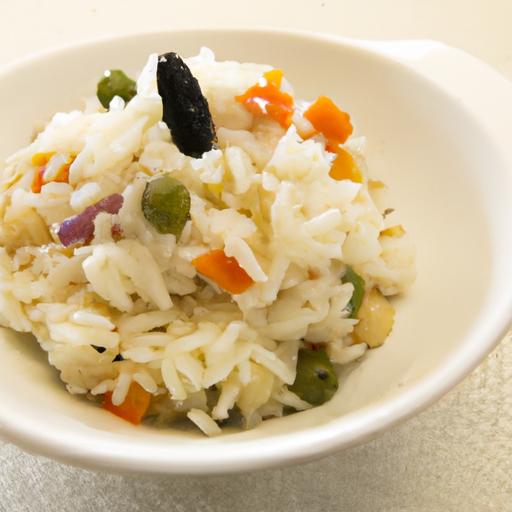
Nutty cauliflower rice pilaf offers a vibrant harmony of textures and aromas,transforming humble cauliflower into a festivity of flavors. Rooted in Mediterranean and Middle Eastern culinary traditions, this dish brings together the earthiness of toasted nuts and the freshness of fragrant herbs to create a versatile, healthy side or a satisfying vegetarian main course. Whether you’re looking to impress at a dinner party or enjoy a nutrient-packed weeknight meal, this herb-infused delight will captivate your palate with every bite.
Prep and Cook Time
- Readiness: 15 minutes
- Cooking: 20 minutes
- Total Time: 35 minutes
Yield
Serves 4 as a side dish
Difficulty Level
Easy to Medium – perfect for cooks at any skill level eager to build confidence with vegetable-forward dishes.
Ingredients
- 1 large head of cauliflower,grated or pulsed into rice-sized bits
- 1/2 cup raw almonds,roughly chopped
- 1/4 cup pine nuts
- 3 tbsp extra-virgin olive oil
- 1 small onion,finely diced
- 2 garlic cloves,minced
- 1 tsp ground cumin
- 1/2 tsp turmeric
- 1/4 cup fresh parsley,finely chopped
- 2 tbsp fresh dill,chopped
- 1 tbsp fresh mint,chopped
- Juice of 1 lemon
- Salt and freshly ground black pepper,to taste
- 1/4 cup low-sodium vegetable broth
Instructions
- Prepare the cauliflower rice: Remove all leaves and core from the cauliflower. Using a box grater or food processor, pulse into rice-sized granules. Avoid over-processing to prevent mushiness.
- Toast the nuts: Heat 1 tablespoon of olive oil in a large nonstick skillet over medium heat. Add almonds and pine nuts, stirring frequently until golden brown and fragrant, about 4-5 minutes. Remove nuts and set aside.
- Sauté aromatics: In the same skillet, add remaining olive oil.Sauté diced onions until translucent and soft, about 5 minutes. Add garlic, cumin, and turmeric; stir constantly for 30 seconds to release their flavors without burning.
- Cook the cauliflower rice: Add the cauliflower rice to the pan, stirring well to coat with spices. Pour in the vegetable broth, cover, and simmer on low heat for 8-10 minutes, stirring occasionally to prevent sticking and to ensure even cooking. The cauliflower should become tender but remain fluffy-not mushy.
- Add nuts and herbs: Remove the lid and stir in the toasted nuts, chopped parsley, dill, and mint. Season generously with salt, pepper, and the lemon juice for brightness. Toss gently to combine all elements evenly.
- Final touch: Cook uncovered for another 2 minutes to allow excess moisture to evaporate. Adjust seasoning if needed.
- Serve warm: Transfer the pilaf to a serving bowl. garnish with extra fresh herbs and a drizzle of olive oil or a squeeze of lemon if desired.
Choosing the Perfect Nuts and Herbs to Elevate Your Cauliflower Rice Pilaf
Opting for quality nuts such as raw almonds and delicate pine nuts adds a luxurious crunch and buttery note that toasting only enhances. The toasty aroma will instantly uptick the dish’s complexity. Herbs like fresh parsley, dill, and mint offer a bright, green freshness that balances the nuttiness and adds layers of invigorating fragrance. For an extra herbaceous punch, try adding a few sprigs of thyme or a handful of chopped cilantro, adapting the herb blend to your taste.
Mastering the Cooking Technique for Fluffy and Flavorful Pilaf
Achieving perfectly fluffy cauliflower rice relies on gentle cooking and the proper moisture level. Avoid overcrowding the pan; this allows water to evaporate rather than steam the cauliflower too much. Simmering with just enough vegetable broth infuses flavor without saturating the grains. Covering the pan briefly helps tenderize the rice evenly while stirring occasionally prevents clumping. The result is a pilaf that’s tender yet distinct,with each morsel lightly coated in spice and infused herb flavor.
Innovative Pairings and Serving Suggestions for Every Occasion
This versatile nutty cauliflower rice pilaf complements a wide array of mains and moods. Serve it alongside grilled lemon-garlic chicken or herb-seared salmon for balanced nutrition and taste. For plant-based options, pair it with roasted chickpeas or spiced lentils. At brunch, spoon it into baked avocado halves or lightly stuff it into pita pockets with hummus and fresh veggies. Garnishing with pomegranate seeds or crumbled feta adds vibrant color and a tangy twist, perfect for festive tables.
Tips for Storing and Reheating to Preserve Freshness and Texture
Store any leftovers in an airtight container in the refrigerator for up to 3 days. To reheat, gently warm the pilaf in a skillet over low heat with a splash of water or broth to restore moisture, stirring frequently to maintain fluffiness. Avoid microwaving too long to prevent sogginess. For freezing, cool completely, portion into freezer-safe containers, and consume within 1 month. Thaw overnight in the fridge and reheat slowly using the stovetop method to preserve texture and the flavors of the toasted nuts and fresh herbs.
Chef’s Notes
- For added depth, try swapping almonds with chopped walnuts or pecans, which bring earthier tones.
- Experiment with herbs: basil and tarragon add sweet, aromatic notes that change the flavor profile.
- If you prefer a more robust spice, add a pinch of smoked paprika or mild chili flakes.
- To make vegan pilaf, ensure vegetable broth is used and avoid any dairy-based garnishes.
- Make-ahead tip: Prepare the cauliflower rice and toast nuts in advance for quicker assembly.
Serving Suggestions
Present this herb-infused nutty cauliflower rice pilaf in colorful earthenware bowls, finishing with a bright lemon wedge and fresh herb sprigs for visual contrast. A light drizzle of extra-virgin olive oil or a dollop of Greek yogurt on the side can accentuate the dish’s creaminess. Pair it with a crisp white wine or sparkling water with a cucumber garnish for a refreshing complement.

| Nutrient | Per Serving |
|---|---|
| Calories | 210 kcal |
| Protein | 6 g |
| Carbohydrates | 14 g |
| fat | 15 g |
For a complementary vegetable side,explore our Roasted Mediterranean Vegetables. To understand the health benefits of nuts and herbs, visit the Healthline nuts benefits guide.
Q&A
Q&A: Nutty Cauliflower Rice Pilaf - A Herb-Infused Delight
Q: what makes Nutty Cauliflower Rice Pilaf a standout dish?
A: It’s the perfect marriage of hearty texture, fresh herbs, and a satisfying crunch from toasted nuts. This pilaf transforms humble cauliflower rice into a vibrant, flavorful meal that delights the senses and nourishes the body.
Q: Why use cauliflower rice rather of regular rice?
A: Cauliflower rice offers a low-carb, gluten-free alternative that’s packed with vitamins and fiber. It cooks quickly and absorbs flavors beautifully, making it an ideal canvas for the aromatic herbs and nutty additions in this pilaf.
Q: Which nuts work best for this pilaf,and why?
A: Toasted almonds,pine nuts,and walnuts are top choices. They add layers of flavor and a delightful crunch, balancing the soft texture of the cauliflower while contributing healthy fats and protein.
Q: What herbs elevate this dish from simple to stunning?
A: Fresh parsley, cilantro, and dill infuse the pilaf with bright, fresh notes. these herbs awaken the palate and complement the nuttiness, creating a herbaceous harmony that’s both refreshing and fragrant.
Q: Can this pilaf be served as a main dish or a side?
A: Absolutely! Its satisfying texture and robust flavors allow it to shine as a vegetarian main. Pair it with grilled meats or roasted vegetables as a side to add a vibrant pop of flavor to any meal.
Q: How do you ensure the cauliflower rice doesn’t get soggy?
A: After pulsing cauliflower florets into rice-sized pieces, it’s key to dry them well using a clean kitchen towel. Sautéing over medium-high heat also helps evaporate excess moisture,keeping the pilaf fluffy and light.
Q: Is this recipe flexible for different dietary preferences?
A: Definitely. It’s naturally vegan, gluten-free, and easily adaptable. Swap nuts according to allergies or preferences, and adjust herbs to your favorite flavors. The pilaf embraces creativity!
Q: What’s a pro tip for maximizing flavor in this dish?
A: Toast your nuts and sauté your herbs slightly before combining everything.This releases essential oils and intensifies their aroma, turning the pilaf into an herb-infused delight that’s bursting with taste.
Ready to embark on a nutty, herbaceous culinary adventure? Nutty Cauliflower Rice Pilaf invites you to savor health and flavor in every forkful-a dish that’s as vibrant as it is indeed nourishing!
Final Thoughts
as the fragrant aroma of toasted nuts mingles with the vibrant herbs in this Nutty Cauliflower Rice Pilaf, it becomes clear that healthy eating need not be mundane. This dish proves that cauliflower can step beyond its humble reputation,transforming into a flavorful,colorful centerpiece that delights both the palate and the senses. Whether served as a side or savored on its own, this herb-infused creation invites you to explore new textures and tastes-reminding us that nourishment and indulgence can beautifully coexist in every bite. so next time you seek a dish that’s as nourishing as it is indeed enchanting, let this pilaf inspire your kitchen adventures and elevate your mealtime experience.
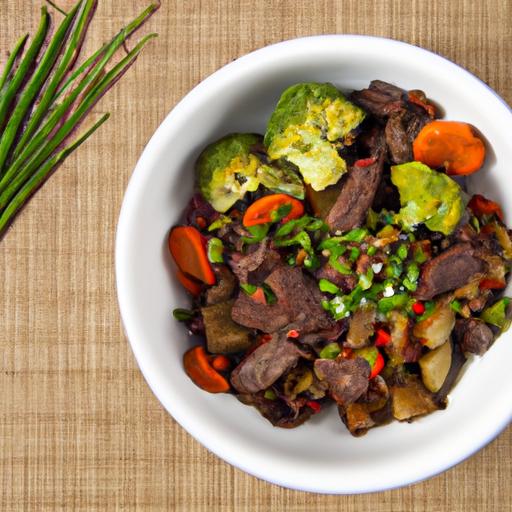
Fuel Up Right: Cauliflower Rice Bowl with Beef & Veggies begins with an inspired selection of ingredients designed to maximize flavor, texture, and nutrition in one vibrant bowl. This dish brings together tender, juicy beef, fluffy cauliflower rice, and a colorful medley of fresh vegetables for a nourishing meal that fuels your body and delights the senses. Whether you’re looking for a low-carb,nutrient-dense option or a speedy,wholesome lunch,this bowl is a versatile winner.
Prep and Cook Time
- Preparation: 15 minutes
- Cooking: 20 minutes
- Total Time: 35 minutes
Yield
- serves 4
Difficulty Level
- Easy to Medium
Ingredients
- 1 lb lean ground beef or sirloin, trimmed and thinly sliced
- 4 cups cauliflower rice (about half a medium cauliflower, pulsed in a food processor)
- 1 tbsp avocado oil or olive oil
- 1 cup diced red bell pepper
- 1 cup snap peas, trimmed and halved
- 1 medium carrot, julienned or grated
- 1/2 cup green onions, thinly sliced
- 2 cloves garlic, minced
- 1 tbsp fresh ginger, grated
- 3 tbsp low-sodium soy sauce or tamari
- 1 tsp toasted sesame oil
- Salt and black pepper to taste
- Optional garnish: sesame seeds, fresh cilantro, lime wedges
Instructions
- Prepare the cauliflower rice: Pulse cauliflower florets in a food processor untill they resemble grains of rice. Pat dry with a kitchen towel to remove excess moisture for fluffier texture.
- Cook the beef: Heat 1 tablespoon of avocado oil in a large skillet over medium-high heat. Add the beef, seasoning lightly with salt and pepper. Sauté until browned and just cooked through, about 5-7 minutes. remove from skillet and set aside to rest, preserving that tender juiciness.
- Sauté aromatic veggies: Reduce heat to medium. In the same skillet, add garlic and ginger; cook until fragrant, about 1 minute. Toss in red bell pepper, snap peas, and carrot. Stir-fry gently for 4-5 minutes,retaining their crisp,vibrant bite.
- Cook cauliflower rice: add the cauliflower rice to the skillet with veggies. Stir continuously for 3-4 minutes until warmed through and slightly softened, but still with some bite.
- combine and season: Return the cooked beef to the skillet. Pour in soy sauce and drizzle sesame oil. Toss everything together, allowing flavors to meld. Adjust seasoning with salt and pepper to taste.
- Finish and garnish: Remove from heat,sprinkle with green onions and optional sesame seeds. Serve promptly with lime wedges and fresh cilantro for a zesty touch.
Tips for Success
- Use fresh, high-quality beef for the best flavor and tenderness. For ground beef, look for lean to reduce grease and keep your bowl light.
- do not overcook cauliflower rice; it should remain fluffy with a slight crunch to mimic real rice texture.
- feel free to swap veggies depending on season or preference-zucchini ribbons, baby corn, or bok choy make excellent alternatives.
- For an extra protein boost, add a soft-poached egg on top just before serving.
- To make ahead, keep the beef and cauliflower rice separate, then combine and heat gently when ready to serve to maintain optimal texture.
Serving Suggestions
Present this bowl in a wide, shallow bowl to showcase its colorful layers. garnish with luminous green cilantro, a sprinkle of nutty sesame seeds, and a squeeze of fresh lime juice to awaken the flavors. Pair with a side of pickled ginger or a simple miso soup for a balanced and sophisticated meal that nurtures your body and delights your palate.
| Nutrient | Per Serving |
|---|---|
| Calories | 320 kcal |
| Protein | 28 g |
| Carbohydrates | 12 g |
| Fat | 14 g |
Discover more wholesome recipes and tips for balanced meals on our Healthy Eating page. For expert insights on cooking techniques to retain beef’s tenderness, check out Serious Eats guide.

Q&A
Q&A: Fuel Up Right with the Cauliflower Rice Bowl featuring Beef & Veggies
Q1: Why choose cauliflower rice instead of regular rice for this bowl?
A1: Cauliflower rice is a nutrient-packed, lower-carb alternative to conventional rice. It offers a subtle flavor that lets the star ingredients-juicy beef and vibrant veggies-shine. Plus, it’s rich in fiber and antioxidants, making your meal both satisfying and guilt-free.
Q2: What cuts of beef work best in this cauliflower rice bowl?
A2: For tender, flavorful results, go with flank steak, sirloin, or ribeye thinly sliced against the grain. These cuts absorb marinades well and cook quickly, keeping your bowl juicy and perfectly protein-packed.
Q3: How can I boost the veggie factor in this dish without overpowering the flavors?
A3: Choose colorful veggies like bell peppers,snap peas,carrots,and spinach for a balance of crunch,sweetness,and earthiness. lightly sauté or steam them to retain nutrients and texture-think vibrant bursts of freshness with every bite!
Q4: What’s a simple marinade to make the beef extra tasty?
A4: A blend of soy sauce, garlic, ginger, a touch of honey, and a splash of lime juice creates a savory-sweet harmony that complements the beef perfectly. Let it soak for at least 30 minutes to infuse those bold flavors.
Q5: Can I make this cauliflower rice bowl vegan or vegetarian?
A5: Absolutely! Swap the beef for tofu, tempeh, or even hearty mushrooms like portobello or shiitake. Marinate and cook them similarly to keep that satisfying umami punch, and you’ll have a plant-powered powerhouse bowl.
Q6: How long does it take to prepare this bowl from start to finish?
A6: With some prep work upfront, you’re looking at about 30-40 minutes. Cauliflower rice is quick to sauté, and the beef and veggies come together fast-perfect for a nourishing weeknight dinner.
Q7: What makes this bowl a “Fuel Up Right” meal?
A7: It’s all about balanced energy-lean protein from beef, fiber and vitamins from veggies, and low-carb cauliflower rice to keep blood sugar steady. This bowl delivers sustained fuel for your body without weighing you down.Q8: Any tips to customize or spice up this bowl?
A8: Definitely! Try adding fresh herbs like cilantro or basil, a drizzle of sriracha or chili oil for heat, or a sprinkle of toasted sesame seeds for crunch. These small touches elevate flavor and keep every meal exciting.
–
Fueling right doesn’t have to be bland or complicated. With this Cauliflower Rice Bowl with Beef & Veggies, you get vibrant flavors, wholesome nutrition, and a satisfying meal that powers you through your day. Ready to dig in?
in Retrospect
As you’ve discovered, fueling your body right doesn’t have to mean sacrificing flavor or time. This cauliflower rice bowl with beef and veggies strikes the perfect balance-offering a nutritious, vibrant meal that energizes your day while delighting your taste buds. Simple, satisfying, and packed with wholesome ingredients, it’s a delicious reminder that healthy eating can be both accessible and exciting. So next time you’re craving a meal that feeds your body and soul, let this bowl inspire your kitchen creations and your wellness journey.
Perfectly baked rice recipes unlock a world where fluffy grains meet vibrant aromas, transforming humble rice into a culinary masterpiece. Understanding the science behind this harmony reveals how heat, moisture, and seasoning combine to produce layers of flavor and texture that delight every bite. Whether inspired by Middle Eastern Maqluba, Indian biryanis, or Mediterranean oven-baked pilafs, these dishes showcase regional nuances and signature ingredients that elevate simple rice beyond expectation.
Prep and Cook Time
- Preparation: 20 minutes
- Cooking: 45 minutes
- Total: 1 hour 5 minutes
Yield
Serves 4 generously
Difficulty Level
Medium – perfect for confident home cooks ready to elevate their rice game
Ingredients
- 2 cups basmati rice,rinsed and soaked for 30 minutes
- 3 tablespoons ghee or unsalted butter
- 1 large onion,thinly sliced
- 4 garlic cloves,minced
- 1 teaspoon ground cumin
- 1 teaspoon ground coriander
- ½ teaspoon turmeric powder
- 3 ¼ cups vegetable or chicken broth,hot
- Salt to taste
- Fresh herbs (cilantro or parsley),for garnish
- Optional: ½ cup toasted nuts (almonds or pine nuts) for texture and richness
Instructions
- Preheat your oven to 350°F (175°C). This steady oven heat gently finishes the rice, developing the iconic fluffy, dry texture that stovetop methods often miss.
- Drain the soaked rice thoroughly and set aside. Ensuring the rice is dry before baking prevents sogginess and encourages even cooking.
- In a large ovenproof pot or Dutch oven, melt the ghee over medium heat. Add the sliced onion and sauté until golden brown, about 7 minutes, stirring frequently to avoid burning.
- add the minced garlic, cumin, coriander, and turmeric. Sauté for an additional 1 minute until fragrant – this toasts the spices, unlocking deeper flavors.
- Stir in the drained rice, coating grains evenly with the spiced oil. Toast lightly for 2-3 minutes, stirring constantly to prevent sticking.
- Pour in the hot broth and season with salt to taste.Bring the mixture to a gentle simmer on the stovetop.
- Cover the pot tightly with a lid or aluminum foil, then place in the preheated oven.Bake for 35-40 minutes until rice is tender and has absorbed all the liquid.
- Remove from the oven and let the rice rest,covered,for 5-10 minutes.This resting phase allows steam to finish cooking the grains evenly and enhances the texture.
- Fluff the rice gently with a fork and transfer to a warm serving dish. Garnish with fresh herbs and toasted nuts if desired for a delightful crunch and color contrast.
Chef’s Tips for Success
- use long-grain rice like basmati or jasmine for the fluffiest results and fragrant aroma.
- Soak your rice to reduce cooking time and minimize broken grains – this simple step changes texture dramatically.
- Be precise with liquid ratios. Oven baking thrives on just enough broth to hydrate without making the rice mushy.
- Layer aromatics and spices early to infuse subtle, complex flavor throughout each grain.
- Experiment with signature regional add-ins: saffron threads soaked in warm water for Persian vibes, star anise and cinnamon for Chinese flair, or fried shallots and chili flakes for Southeast Asian twists.
- Make ahead: Baked rice holds well covered for a few hours and reheats beautifully with a splash of broth and steam to revive moisture.
Serving suggestions
Present your baked rice with vibrant sides like roasted vegetables, grilled meats, or yogurt-based sauces for refreshing contrast. A sprinkle of fresh herbs, a drizzle of citrus zest, or a handful of pomegranate seeds brightens both appearance and palate. Consider plating in rustic earthenware for a home-to-table touch that complements the warm earthiness of perfectly baked rice recipes.
| Nutrition | Per Serving |
|---|---|
| Calories | 320 kcal |
| Protein | 6 g |
| Carbohydrates | 62 g |
| Fat | 5 g |

for a deeper culinary journey into rice preparations, explore our Ultimate Persian Biryani guide. Expand your flavor horizons and cooking techniques alongside these perfectly baked rice recipes.
To understand the science behind starch gelatinization and heat transfer in grains, the ScienceDirect Food Chemistry journal offers excellent insights into rice chemistry and cooking processes.
Q&A
Q&A: Discover the Art and Flavor of Perfectly Baked Rice Recipes
Q1: What makes baked rice recipes stand out compared to other rice cooking methods?
A1: Baked rice transforms humble grains into a symphony of textures and aromas. Unlike boiling or steaming, baking allows the rice to absorb flavors slowly while developing a crisp, golden crust that adds delightful crunch. This method unlocks a depth of flavor and a visual appeal that regular stovetop cooking frequently enough can’t match.
Q2: Can you describe the ideal texture and flavor profile of perfectly baked rice?
A2: Perfectly baked rice strikes a balance between tender, fluffy grains and a slightly crisp or caramelized exterior. Flavor-wise, it should be harmoniously infused with the essence of herbs, spices, broth, or aromatic vegetables used in the baking process, offering layers of savory richness or subtle sweetness.
Q3: What are some key ingredients that elevate baked rice dishes?
A3: Aromatics like garlic, onions, and shallots create a fragrant base, while spices such as saffron, turmeric, or smoked paprika add complexity and color. Using broth instead of water imparts richness, and additions like toasted nuts, dried fruits, or fresh herbs bring bursts of flavor and texture that elevate the entire dish.
Q4: Are there any essential kitchen tools or techniques needed for perfect baked rice?
A4: A sturdy, oven-safe casserole or Dutch oven ensures even heat distribution. Pre-toasting the rice lightly in oil or butter before adding liquids enhances nuttiness. Covering the dish tightly to trap steam is crucial, as it gently cooks and hydrates the rice while baking. let the rice rest off heat for a few minutes to allow flavors to settle and grains to firm up.
Q5: how versatile are baked rice recipes, and can they cater to different dietary preferences?
A5: baked rice is incredibly versatile! it can be the star of a vegetarian or vegan meal by incorporating vegetables, legumes, or plant-based broths. Meat lovers can easily customize with chicken, seafood, or lamb. Gluten-free and dairy-free diets are naturally accommodated since rice is inherently free of those allergens, making baked rice a welcoming canvas for nearly everyone’s palate.
Q6: What cultural inspirations influence these baked rice recipes?
A6: Baked rice echoes global culinary traditions-from Spanish paellas and Middle Eastern maqluba to Italian timballo and Persian tahchin. Each culture brings its own signature spices, cooking vessels, and accompaniments, inviting food lovers to explore a rich world of taste through this simple yet elegant grain.
Q7: Any tips for beginners eager to try baking rice for the first time?
A7: Start with a straightforward recipe featuring familiar ingredients and a short baking time. Use a flavorful broth,cover the dish well,and resist the urge to peek too often-patience is key. Experiment with texture by adjusting liquid quantities slightly, and don’t be afraid to incorporate fresh herbs or a squeeze of lemon after baking to brighten the flavors.
Embarking on the adventure of perfectly baked rice invites you to savor more than just a side dish-it’s about cultivating a memorable experience of artful cooking and deep, comforting flavors with every golden bite.
Key Takeaways
As you close the lid on your next perfectly baked rice dish, remember that each grain holds a story-of tradition, technique, and taste woven together in harmonious balance. Whether you’re a seasoned chef or a curious home cook,exploring the art and flavor of baked rice invites you into a world where patience meets creativity,and simplicity transforms into something truly extraordinary. Embrace these recipes as your canvas, and let the gentle warmth of the oven turn humble ingredients into unforgettable meals that nourish both body and soul.The journey to mastering baked rice is as satisfying as the dishes themselves-so keep experimenting, savor each bite, and celebrate the timeless magic baked right into every mouthful.
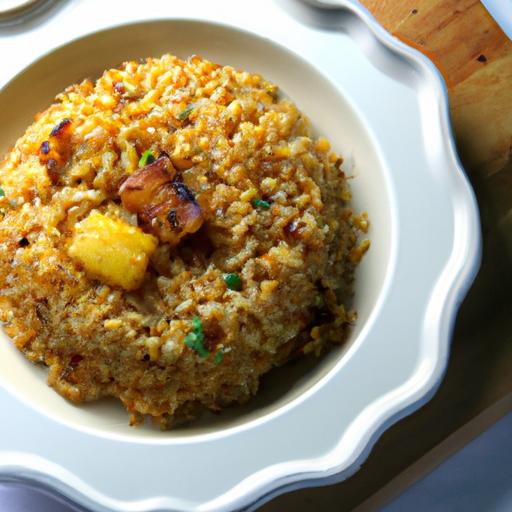
Golden Baked Rice is not just a dish; it’s a celebration of texture and flavor that transforms everyday rice into a crispy, comforting masterpiece. Achieving that coveted golden crust while maintaining tender, fluffy rice underneath is an art form cherished across cultures. Whether you’re craving a nostalgic comfort meal or a modern twist on a classic staple,mastering this crispy texture elevates your culinary game and invites endless creative possibilities.
Prep and Cook time
- Preparation: 15 minutes
- Cooking: 45 minutes
- Total: 1 hour
yield
Serves 6 generously
Difficulty Level
Medium – approachable with some attention to detail
Selecting the Best Rice Varieties for Golden Baked Rice Success
Choosing the right rice is foundational to perfecting golden baked rice. medium-grain rice varieties like Arborio or Calrose are exceptional-they offer a creamy yet tender texture that crisps beautifully without becoming mushy. For a nuttier bite, try short-grain japonica rice, which holds its shape and provides an irresistibly chewy crust. Avoid long-grain rice as it tends to stay too loose and less cohesive for forming a golden crust.
Ingredients
- 2 cups medium-grain rice, rinsed and drained
- 4 cups chicken or vegetable broth (for richer flavor)
- 1 medium onion, finely chopped
- 3 cloves garlic, minced
- 2 tablespoons olive oil or unsalted butter
- 1 teaspoon smoked paprika
- 1/2 teaspoon turmeric (for warm golden color)
- Salt and cracked black pepper, to taste
- 1 cup shredded sharp cheddar or Gruyère cheese (optional)
- 1/4 cup fresh herbs (parsley, thyme, or chives), finely chopped
- 1/3 cup toasted nuts (pine nuts or almonds, optional)
- 1 tablespoon lemon zest (optional, for brightness)
Instructions
- Preheat your oven to 375°F (190°C). Grease a 9×13-inch baking dish with olive oil or butter to encourage an even, crispy base.
- Heat olive oil or butter in a large skillet over medium heat. Add the chopped onion and sauté until translucent and fragrant, about 5 minutes. Stir in garlic and cook for an additional minute.
- Add rinsed rice to the skillet, stirring to coat grains in the aromatics and fat.Cook for 2-3 minutes until rice begins to look glossy.
- Season with smoked paprika,turmeric,salt,and cracked black pepper. Stir to evenly distribute the spices.
- Pour in the broth and bring it to a gentle boil. Reduce heat, cover, and simmer for 15 minutes until most of the liquid is absorbed but rice is still slightly al dente.
- Transfer the rice mixture to your prepared baking dish and spread evenly for consistent browning.
- Sprinkle shredded cheese evenly on top if using. This enhances flavor and encourages a golden, bubbly crust.
- Bake uncovered for 25-30 minutes or until the edges develop a deep golden-brown crust. For extra crispiness, switch to the broiler in the final 2-3 minutes – but watch carefully to avoid burning.
- Remove from the oven and let it rest for 5 minutes; this helps the crispy crust set and makes slicing easier.
- Before serving,garnish with fresh herbs,lemon zest,and toasted nuts for added texture and luminous flavor contrasts.
Expert Tips for Baking and Serving Golden Baked Rice
- Achieving Crispy texture: Use a well-oiled baking dish and consider adding a small splash of broth to wet the surface before baking. This steams the top layer slightly yet helps build a crunchy bottom crust.
- Flavor Infusions: Incorporate infusions like saffron threads soaked in warm broth or a drizzle of browned butter before baking for a nutty depth.
- Toppings to Elevate: Try crispy fried shallots, toasted breadcrumbs, or crumbled cooked bacon for irresistible toppings.
- Make-ahead: Assemble the rice base a day ahead; keep refrigerated and bake just before serving for freshness with convenience.
- Alternative Cheeses: Parmesan,feta,or even a smoky mozzarella transform the flavor profile beautifully-feel free to experiment.
Serving Suggestions
golden baked rice pairs exquisitely with roasted vegetables, grilled chicken, or a zesty salad to balance the crunch. Serve straight from the dish onto warm plates, topped with a scattering of fresh herbs and a wedge of lemon for an inviting pop of color. Invite guests to customize with hot sauce, yogurt, or a drizzle of herb oil to create an interactive and satisfying experience.
| Nutrient | Per Serving |
|---|---|
| Calories | 320 kcal |
| Protein | 8 g |
| Carbohydrates | 45 g |
| Fat | 9 g |
Explore more crispy rice bowl recipes for inspired comfort food variations. For cooking techniques exploring rice chemistry, visit the Cook’s Illustrated guide to perfect rice.

Q&A
Q&A: Golden Baked Rice – A crispy Comfort Food Reinvented
Q1: What exactly is Golden Baked Rice?
A: Golden Baked Rice is a delicious twist on traditional rice dishes, where fluffy grains are transformed by baking into a crispy, golden crust. Think of it as comfort food with a crunchy crown – the perfect marriage of softness and crispiness that elevates simple rice into a standout dish.
Q2: How is Golden Baked Rice different from regular rice dishes?
A: Unlike steamed or boiled rice, Golden Baked Rice is baked in the oven until the top and sometimes the edges turn a stunning amber hue and develop a satisfying crunch. This textural contrast creates a unique eating experience – soft interior, crispy exterior – that reinvents how we enjoy a staple grain.
Q3: What ingredients are typically used in Golden Baked Rice?
A: At its core, the dish relies on cooked rice, butter or oil, and a touch of seasoning such as salt, pepper, and sometimes herbs or cheese for extra flavor and richness. Variations may include vegetables, proteins, or spices, making it highly versatile and customizable.
Q4: Is Golden Baked Rice healthy?
A: It can be! By using wholesome ingredients like brown rice, adding vegetables, and moderating the amount of fat, Golden Baked Rice becomes a nourishing comfort food. Plus, baking rather than frying reduces oil usage, making it a lighter alternative to greasy rice preparations.
Q5: Can Golden Baked Rice be served as a side dish or a main course?
A: absolutely! It shines as a side dish accompanying roasted meats or sautéed vegetables. But give it a culinary upgrade by mixing in hearty ingredients like beans, mushrooms, or chicken – it transforms effortlessly into a comforting main event.
Q6: Any tips for achieving the perfect crispy crust?
A: Yes! Spread the rice in an even layer in a well-buttered or oiled baking dish, and bake at moderate-high heat.For extra crunch, sprinkle a bit of cheese or breadcrumbs on top before baking. Don’t forget to allow the rice to rest for a few minutes after baking to let the crust set beautifully.
Q7: What inspired the reinvention of this classic comfort food?
A: The idea emerged from a desire to breathe new life into humble rice, turning it into something more texturally exciting. Taking inspiration from crispy paella socarrat and golden baked casseroles, chefs and home cooks alike have embraced this technique to create a nostalgic yet novel comfort food experience.Q8: Where can someone start experimenting with Golden Baked Rice at home?
A: Start simple! Use leftover cooked rice, toss it with butter, salt, and your favorite seasonings, then bake until golden. From there, get creative by adding cheeses, herbs, or diced veggies. It’s a forgiving dish, perfect for culinary exploration with delicious results.
Closing Remarks
As the comforting warmth of golden baked rice fills your kitchen, you’re reminded that even the simplest ingredients can be transformed into a celebration of texture and flavor. This crispy twist on a beloved staple not only satisfies the soul but also invites endless creativity-whether layered with savory spices, folded with fresh herbs, or crowned with melting cheese. Golden baked rice is more than just a dish; it’s a delicious invitation to reinvent comfort food, one crispy bite at a time. So next time you crave something familiar yet fresh, let golden baked rice be your go-to canvas for culinary exploration.
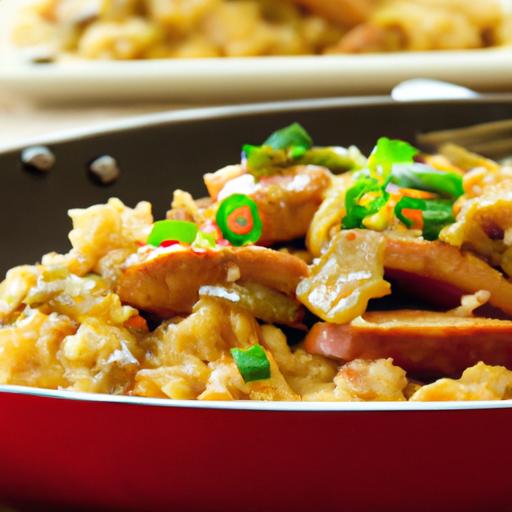
Flavor-Packed Cajun Sausage & Rice Skillet: Quick One-Pan Meal
embark on a culinary journey with this Flavor-Packed Cajun Sausage & Rice Skillet that captures the soul of Southern cooking in one vibrant, hearty dish. Rooted in the rich traditions of Cajun cuisine, this one-pan meal delivers smoky, spicy sausage flavors harmonized with a perfectly crafted rice base and fresh, crisp vegetables. Whether you’re chasing the bold spirit of Louisiana’s bayous or simply craving a fuss-free, satisfying dinner, this recipe brings bold spices and effortless comfort straight to your table.
Prep and Cook Time
- Planning: 15 minutes
- Cooking: 30 minutes
- Total: 45 minutes
Yield
Serves 4 generous portions,ideal for family dinners or meal prep.
Difficulty Level
Easy – Perfect for weeknight cooks wanting big flavor without fuss.
Ingredients
- 1 lb Cajun smoked sausage, sliced into ½-inch rounds
- 1½ cups long-grain white rice, rinsed
- 3 cups low-sodium chicken broth
- 1 medium yellow onion, finely chopped
- 1 red bell pepper, diced
- 1 green bell pepper, diced
- 2 cloves garlic, minced
- 1 cup fresh okra, sliced (optional for authentic touch)
- 2 tablespoons Cajun seasoning blend (smoked paprika, cayenne, thyme, oregano, garlic powder)
- 2 tablespoons olive oil or vegetable oil
- ¼ cup fresh parsley, chopped
- 2 scallions, sliced thin
- Salt & pepper to taste
Instructions
- Heat the skillet: Place a large, heavy-bottomed skillet over medium-high heat and add 1 tablespoon of olive oil. Once shimmering,add the sliced Cajun sausage and sauté until browned and crispy on edges,about 6-7 minutes. Remove sausage and set aside.
- Prepare the vegetables: In the same skillet, add the remaining oil. toss in onion, red and green bell peppers, stirring frequently enough until soft and fragrant, about 5 minutes. Stir in the garlic and okra, cooking for an additional 2 minutes to release their fresh aroma.
- Toast your rice: Add the rinsed rice to the skillet, stirring continuously for 2-3 minutes until grains look translucent at the edges, helping bring out a nutty flavor and keeping the rice fluffy.
- Season boldly: Sprinkle the Cajun seasoning across the rice and vegetables,stirring evenly to coat everything with that signature spice blend. Season with salt and pepper as needed.
- Add broth and simmer: Carefully pour in the chicken broth, scraping the pan to deglaze and lift those flavorful browned bits. Return the sausage to the skillet. Bring to a boil, then reduce heat to low and cover tightly.
- Cook to perfection: Let the rice simmer gently for 18-20 minutes, avoiding the urge to stir. This ensures a tender rice base infused with all the robust sausage and vegetable flavors.
- Finish with fresh herbs: Once cooking is complete and liquid absorbed, fluff the rice gently with a fork. Sprinkle with fresh parsley and scallions for a burst of brightness and an inviting pop of color.
- Serve immediately: Plate your skillet masterpiece hot, garnished with an extra pinch of Cajun seasoning or a lemon wedge to brighten.
Chef’s Notes: Tips for Success
- Spice control: Adjust the heat level of your Cajun seasoning or swap out cayenne for smoked paprika for milder warmth.
- Sausage swap: Andouille or kielbasa are perfect substitutes, adding unique smoky nuances.
- Rice tips: Rinsing your rice before cooking removes excess starch for a non-sticky, fluffy texture.
- Make-ahead magic: This dish reheats beautifully and stores well for up to 3 days, making it perfect for meal-prepping busy weeks.
- Veggie variations: Feel free to add diced tomatoes or swap okra with zucchini for a fresher crunch.
- Quick cleanup: Use a non-stick skillet or line your pan with a silicone mat to minimize scrubbing. Let the skillet soak in warm soapy water while eating to loosen any stuck bits.
Serving Suggestions
This Flavor-Packed Cajun Sausage & Rice skillet shines as a standalone meal or alongside a simple leafy green salad tossed in a citrus vinaigrette to cut through the richness. Garnish with a few fresh sprigs of parsley,a wedge of lime or lemon for added zest,and a sprinkle of chopped scallions for visual contrast and fresh crunch. For an extra indulgent touch, pair it with warm crusty bread or a dollop of creamy coleslaw to cool the palate.
| Nutrient | Per Serving |
|---|---|
| Calories | 450 kcal |
| Protein | 22 g |
| Carbohydrates | 40 g |
| Fat | 18 g |
Discover more quick one-pan meals hear to keep your weeknights flavorful and simple. For science-backed info about the health benefits of spices like paprika and cayenne, visit this authoritative study from NIH.

Q&A
Q&A: Flavor-Packed Cajun Sausage & Rice Skillet – Your Next Quick One-Pan Meal
Q1: What makes this Cajun Sausage & Rice Skillet so special?
A1: It’s a vibrant one-pan wonder that combines smoky, spicy Cajun sausage with tender rice and colorful veggies. The magic lies in the bold Cajun seasoning that turns simple ingredients into a mouthwatering, hearty meal that’s both quick and fuss-free.
Q2: How long does it take to prepare and cook this dish?
A2: From chopping to the final simmer, you’re looking at about 30 minutes. Perfect for busy weeknights when you want somthing satisfying without hours in the kitchen.
Q3: Can I customize the vegetables in this recipe?
A3: Absolutely! While bell peppers, onions, and celery create the classic “holy trinity” base, feel free to add in corn, tomatoes, or even spinach for extra color and nutrition. The key is to balance textures and flavors.
Q4: What type of sausage works best for this skillet?
A4: A spicy Cajun or smoked Andouille sausage will deliver authentic flavor, but you can use any smoked sausage you like. For a milder version, opt for chicken sausage with Cajun seasoning added separately.
Q5: Is this recipe gluten-free?
A5: Yes! As long as your sausage is gluten-free (many are,but always check labels),and you use plain rice,this dish is naturally gluten-free and perfect for those with dietary restrictions.
Q6: Can I make this dish ahead of time?
A6: You can prepare it up to a day in advance and refrigerate. When reheating, add a splash of broth or water to keep the rice moist. This meal also freezes well for easy future dinners.
Q7: How spicy is the Cajun seasoning in this recipe?
A7: The heat level can be adjusted! the recipe calls for a balanced Cajun spice blend that’s flavorful without overwhelming heat. Increase or decrease cayenne pepper to match your spice preference.
Q8: What sides or drinks pair well with this Cajun skillet?
A8: Keep it simple with a side of leafy greens or a crisp coleslaw.For drinks,think refreshing: a cold beer,iced tea,or a citrusy cocktail complements the bold,spicy flavors beautifully.
Q9: Any tips for getting perfectly cooked rice in a one-pan skillet?
A9: Patience is key! After sautéing the sausage and veggies, add rice and broth, bring it to a boil, then reduce to low heat and cover. Avoid lifting the lid until the liquid is fully absorbed for fluffy, tender rice every time.
Q10: Can this dish be made vegetarian or vegan?
A10: Sure can! Swap sausage for plant-based sausage or seasoned tofu, and use vegetable broth instead of chicken broth. Amp up the Cajun spices to keep that bold, smoky flavor alive.
In Conclusion
With its bold Cajun spices, savory sausage, and vibrant medley of rice and veggies, this Flavor-Packed Cajun Sausage & Rice Skillet transforms an everyday dinner into a celebration of Southern-inspired comfort. Quick to prepare and requiring just one pan, it’s the perfect solution for busy weeknights when flavor shouldn’t be sacrificed for convenience. Give your taste buds a little adventure and let this skillet meal bring a burst of warmth and zest straight to your table-simple, satisfying, and utterly unforgettable.
Peanut butter Rice Krispies combine the nostalgic crunch of classic cereal treats with the rich,nutty depth of peanut butter,creating a harmony of textures and flavors that satisfy every craving. Originating as a fun twist on childhood favorites, this recipe elevates a simple snack into an irresistible delight suitable for all ages. Whether you’re making these for a family gathering or a quick indulgence, mastering the balance of sweetness and crunch will take your treat to the next level.
Prep and Cook time
- Planning: 10 minutes
- Cooking: 5 minutes
- Cooling: 15 minutes
- Total Time: 30 minutes
Yield
Approximately 12 generous squares (serves 6-8)
Difficulty Level
Easy – Perfect for beginners and seasoned snack-makers alike
Ingredients
- 4 cups Rice Krispies cereal
- 1 cup creamy natural peanut butter (no added sugar or salt for balanced flavor)
- 1/2 cup unsalted butter
- 1 1/2 cups mini marshmallows
- 1/4 cup honey or maple syrup (optional, adjust to taste)
- 1 teaspoon pure vanilla extract
- 1/4 teaspoon fine sea salt
- 1/2 cup chopped roasted peanuts (for added crunch)
Instructions
- Prepare Your Pan: Line a 9×9-inch square baking pan with parchment paper, allowing some overhang for easy removal later. Set aside.
- Melt Butter and Peanut butter: In a large saucepan over low heat, combine the unsalted butter and creamy natural peanut butter. Stir gently until fully melted and smooth, about 3-4 minutes. Avoid high heat to prevent separation.
- Add Sweetness and Flavor: Stir in the mini marshmallows, honey (or maple syrup), and vanilla extract. Continue stirring until the marshmallows are wholly melted, creating a luscious, glossy mixture. This step ensures a sticky yet pliable binding agent.
- incorporate the Cereal: Remove the pan from heat. Promptly add the Rice krispies cereal and sea salt. Gently fold the mixture with a spatula, ensuring every flake is coated but not crushed-preserving that essential crunch.
- Layer in Crunch: Fold in the chopped roasted peanuts carefully, distributing them evenly for bursts of nutty texture throughout.
- Press and Set: Transfer the mixture to your prepared pan. Using a clean, slightly damp spatula or your hands, press the mixture firmly and evenly into the pan, compacting without crushing the cereal.
- Cool and Cut: Allow the mixture to cool at room temperature for 15 minutes or pop it in the fridge for 10 minutes to firm up. once set, lift from the pan using parchment overhang and slice into squares or bars.
Tips for Success
- For a thicker, chewier texture, add an extra 1/4 cup of peanut butter or reduce the marshmallows slightly.
- Use natural peanut butter without stabilizers for a clean, rich flavor. Avoid overly sweet varieties that can overpower the treat.
- Lightly toast the chopped peanuts before adding to amplify their aroma and crunch.
- If sticky, chill your hands or spatula to press the mixture down more easily without sticking.
- Make ahead: Store airtight at room temperature for up to 3 days or freeze individually wrapped squares for up to a month.
Serving suggestions
Present these nutty delights on a rustic wooden board for an inviting, casual look. Garnish with a sprinkle of flaky sea salt or a drizzle of melted dark chocolate for refined contrast. Pair with a cold glass of milk or your favorite coffee for a perfect snack time indulgence. You can also cut them into bite-sized balls and roll in crushed peanuts or cocoa powder for party-kind finger treats.
nutritional Information per Serving
| Calories | Protein | Carbs | Fat |
|---|---|---|---|
| 210 kcal | 6 g | 25 g | 11 g |
To deepen your snack arsenal, explore our Classic Rice krispies Treats variations for even more inspiration. For peanut allergy alternatives and detailed peanut butter benefits, visit Peanut Institute.
Q&A
Q&A: Peanut Butter Rice Krispies – A Crunchy, Nutty Delight Recipe
Q1: What makes Peanut Butter Rice Krispies a unique treat?
A1: Peanut Butter Rice Krispies combine the classic crispiness of toasted rice cereal with the rich, creamy flavor of peanut butter. This fusion creates a snack that’s both crunchy and nutty, satisfying texture lovers and peanut butter fans alike.Q2: How do you achieve the perfect crunch in this recipe?
A2: The key is in gently toasting the Rice Krispies before mixing, and carefully melting the peanut butter with marshmallows to create a sticky yet airy binder. This ensures each bite is delightfully crisp without being mushy or overly chewy.
Q3: Can I use natural peanut butter for this recipe?
A3: Absolutely! Natural peanut butter adds a pure and slightly more earthy flavor. just be aware that its oil content may affect the texture slightly, so stirring thoroughly and chilling the mixture well helps maintain that signature crunch.
Q4: What’s a creative twist to elevate this classic treat?
A4: Add a sprinkle of sea salt on top before the mix sets-this enhances the nutty sweetness perfectly. Or swirl in some mini chocolate chips after mixing for pockets of gooey chocolate goodness.
Q5: Are Peanut Butter Rice Krispies gluten-free?
A5: yes, as long as you use certified gluten-free Rice Krispies and check that your peanut butter and marshmallows contain no gluten ingredients, this snack is a safe and crunchy gluten-free indulgence.
Q6: How long will Peanut Butter Rice Krispies stay fresh?
A6: Stored in an airtight container at room temperature, they stay fresh and crunchy for up to 3-4 days. For longer storage, keep them in the fridge to maintain their delightful texture.
Q7: Can kids help make this recipe?
A7: Definitely! It’s a fun, hands-on treat perfect for little chefs. Just handle the melted marshmallow mixture carefully or supervise that step,and let kids do the stirring and pressing into pans for a creative kitchen bond.
Enjoy the perfect harmony of crisp rice cereal and luscious peanut butter in every bite-Peanut Butter Rice Krispies are a nostalgic snack reinvented for today’s crunchy cravings!
In Retrospect
Whether you’re craving a nostalgic treat or searching for a quick, satisfying snack, Peanut Butter Rice Krispies deliver a perfect harmony of crunch and nutty richness that’s hard to beat.This simple recipe transforms everyday ingredients into a delightful bite that’s as fun to make as it is indeed to eat. So next time you want to add a little extra crunch and flavor to your snack lineup, give this crunchy, nutty delight a try-you might just discover your new favorite comfort food!
]]>