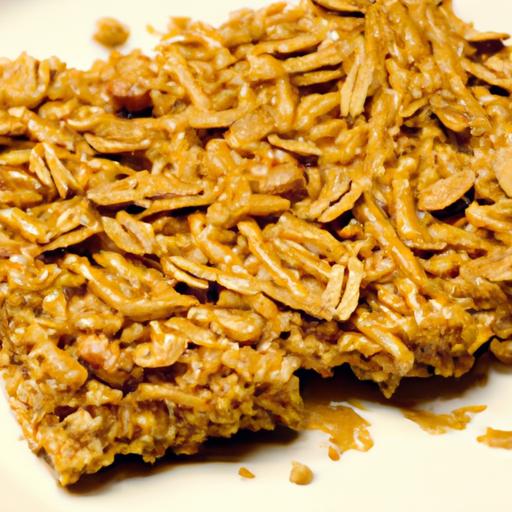
Peanut Butter Rice Krispies capture the ideal harmony between crunchy cereal and luscious creaminess, creating a treat that’s both nostalgic and irresistibly new. This beloved snack has roots in classic marshmallow bars but gets elevated by the rich, nutty depth of real peanut butter, making each bite a journey of textures and flavors that delight the senses. Whether you’re crafting these for a fast afternoon pick-me-up or a crowd-pleasing dessert, the secret to this recipe lies in selecting premium ingredients and mastering the delicate balance of heat and mixing.
Prep and Cook Time
- Preparation: 10 minutes
- Cooking: 10 minutes
- Total time: 20 minutes
Yield
Makes approximately 12 generous squares or 24 smaller bites
Difficulty Level
Easy – perfect for bakers of all skill levels, including beginners
Ingredients
- 6 cups Rice Krispies cereal
- 1 cup creamy peanut butter, preferably natural
- 3 tablespoons unsalted butter
- 1 (10 oz) bag mini marshmallows (or 4 cups regular marshmallows)
- 1 teaspoon pure vanilla extract
- 1/4 teaspoon fine sea salt (to enhance flavor)
- Optional mix-ins: ½ cup chopped roasted peanuts, ½ cup mini chocolate chips, or a sprinkle of flaky sea salt for topping
Instructions
- Prepare your pan: lightly grease a 9×13-inch baking dish or line it with parchment paper, leaving overhang on two sides for easy removal.
- Melt the butter and peanut butter: In a large saucepan over low heat, combine unsalted butter and creamy peanut butter. Stir gently and continuously untill melted and smooth, about 3-4 minutes.
- Add marshmallows: Gradually add the mini marshmallows to the peanut butter mixture. Stir constantly until fully melted and glossy,about 5 minutes.Remove from heat.
- Flavor with vanilla and salt: Stir in vanilla extract and sea salt. These add depth and balance the sweetness, giving the bars a sophisticated nutty backdrop.
- Fold in Rice Krispies: Immediately add the cereal and gently fold with a spatula until every grain is coated evenly. Work quickly for optimal texture.
- Customize now: If you want to add chopped peanuts or chocolate chips, fold them in gently at this stage to preserve the crunch.
- Press into pan: Using a buttered spatula or wax paper, press the mixture firmly and evenly into the prepared pan. Don’t press too hard or you’ll lose all the crunch.
- cool completely: Allow the bars to cool at room temperature, about 30 minutes, until firm enough to cut cleanly.
- Slice and serve: Use the parchment overhang to lift the slab out, than cut into desired squares or bars. Enjoy immediately or store in an airtight container for up to 3 days.
Tips for Success: Elevate Your Peanut Butter Rice Krispies
- ingredient quality matters: Using fresh peanut butter with natural oils intensifies richness and prevents graininess.
- Marshmallow melting: Keep heat low and stir often to avoid scorching the marshmallows, which would alter both texture and flavor.
- For extra crunch: Toast a handful of peanuts and sprinkle on top just before cooling for a delightful toasted finish.
- Make-ahead amiable: Store leftovers tightly wrapped or in a sealed container to maintain freshness and crunch.
- Gluten-free option: Ensure the Rice Krispies cereal is gluten-free (some versions contain malt flavoring). Substitute accordingly.
- Flavor twists: Swap vanilla for almond extract or swirl in dark chocolate for an upscale spin.
Serving Suggestions
These bars shine on their own but become an instant party favorite when embellished thoughtfully. For an elevated presentation, consider placing the squares on a rustic wooden board, then lightly dusting them with powdered sugar or drizzling tempered dark chocolate over the top. Pair them with cold milk or a cup of robust coffee to contrast the creamy peanut butter notes with a bitter edge.
For a fun twist,serve peanut butter Rice Krispies alongside fresh fruit slices such as apples or bananas,allowing guests to add a refreshing bite between each crunchy,decadent mouthful.
| nutrient | Per Serving (1 Bar) |
|---|---|
| Calories | 190 |
| Protein | 5g |
| Carbohydrates | 24g |
| Fat | 8g |

For more tried-and-true snack recipes featuring peanut butter, check out our Creamy Peanut Butter Energy Bites. To dive deeper into the nutritional benefits and uses of peanut butter, the Healthline Peanut Butter Nutrition Guide offers an excellent resource.
Q&A
Q&A: Peanut Butter Rice Krispies – A Crispy, Nutty Delight Recipe
Q1: What makes Peanut Butter Rice Krispies different from traditional Rice Krispies treats?
A: While classic Rice Krispies treats rely on marshmallows and butter for their signature chewy texture, Peanut Butter Rice Krispies add a rich, nutty depth to the mix. The peanut butter not only infuses the treats with a creamy,savory sweetness but also adds a lovely,slightly denser chew. This twist elevates the humble snack into a more decadent and satisfying delight.
Q2: Can I use crunchy or creamy peanut butter for this recipe?
A: Great question! Both crunchy and creamy peanut butter work wonderfully here, but they offer different experiences. Creamy peanut butter creates a smoother, more uniform texture, while crunchy peanut butter adds an extra layer of bite and nuttiness thanks to those delightful peanut bits. Feel free to choose based on whether you prefer silky or slightly textured treats.
Q3: What are the essential ingredients in this recipe?
A: The magic trio includes Rice Krispies cereal, peanut butter, and marshmallows. Butter often joins the party to help melt the marshmallows evenly and ensure everything binds together perfectly. Some variations sprinkle in a pinch of vanilla extract or a dash of salt to heighten the flavors, but at its core, these three main ingredients deliver that irresistible crispy and nutty combo.
Q4: Is it possible to make Peanut Butter Rice Krispies without marshmallows?
A: Absolutely! If marshmallows aren’t your thing or if you’re aiming for a healthier twist, you can substitute them with honey or maple syrup combined with additional peanut butter and a bit of coconut oil. However, keep in mind that marshmallows give the treats their classic chewy texture and sweetness, so alternatives might yield a slightly different consistency but still tasty results.
Q5: How can I prevent my Peanut Butter Rice Krispies from becoming too sticky or crumbly?
A: Balance is key! Melt your peanut butter and marshmallows gently, mixing thoroughly to ensure even distribution. Avoid overcooking, which can make the mixture stiff and dry. Also, press the mixture firmly into your pan to help it set properly but don’t compact it too tightly as that could reduce the crispy texture. Using buttered hands or a lightly greased spatula to press the mixture helps prevent sticking without sacrificing texture.
Q6: Can I add extra ingredients to customize my Peanut Butter Rice Krispies?
A: Definitely! Chopped peanuts, mini chocolate chips, dried fruit, or a sprinkle of sea salt make fantastic additions. For a fun twist, try drizzling melted chocolate over the top or folding in some toasted coconut flakes. These extras bring new dimensions of flavor and texture, turning your nutty crispy treats into customized delights.
Q7: What’s the best way to store Peanut Butter Rice krispies?
A: To keep them fresh and crispy, store the treats in an airtight container at room temperature for up to 3-5 days. Avoid refrigeration, as it can make them hard and less enjoyable. If you want to prep them ahead, wrap individual bars in parchment or wax paper to prevent sticking and help with easy grab-and-go snacking.
Whether you’re a peanut butter fanatic or just love a crispy, sweet treat, Peanut Butter Rice Krispies offer a perfect blend of textures and flavors. Ready to whip up this nutty delight? Grab your bowl and get stirring-crispy happiness awaits!
Key Takeaways
Whether you’re craving a quick snack or a fun treat to share, these Peanut Butter Rice Krispies bring together the perfect harmony of crispy crunch and rich nuttiness.Easy to make and utterly satisfying, this recipe transforms simple pantry staples into a delightful bite that’s hard to resist. So next time you want to turn ordinary Rice krispies into something unusual, give this nutty twist a try – your taste buds will thank you!
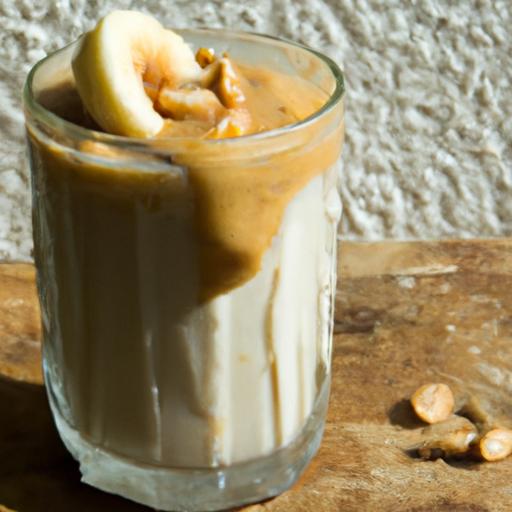
The Decadent Chocolate Peanut Butter Banana smoothie Recipe is an irresistible blend that flawlessly marries creamy textures with rich, indulgent flavors. Inspired by childhood comfort foods and the need for a speedy yet nourishing treat, this smoothie brings together wholesome ingredients that transform everyday bananas and peanut butter into a powerhouse of taste and nutrition.
Prep and Cook Time
- Prep Time: 5 minutes
- Cook Time: 0 minutes
- Total Time: 5 minutes
Yield
- Serves 2 generous portions
difficulty Level
- Easy – perfect for beginners and busy mornings
ingredients to Elevate Your Smoothie
- 2 ripe medium bananas, peeled and sliced (frozen for extra creaminess)
- 1 cup unsweetened almond milk (or your favorite milk alternative)
- 2 tablespoons natural creamy peanut butter (for the perfect nutty richness)
- 2 tablespoons unsweetened cocoa powder (deep, velvety chocolate flavour)
- 1 tablespoon honey or pure maple syrup (optional, for natural sweetness)
- 1/2 teaspoon pure vanilla extract (to enhance the flavor layers)
- 1/4 teaspoon ground cinnamon (optional, adds warmth and depth)
- Ice cubes or 1/2 cup crushed ice (for that perfectly chilled finish)
- Optional nutritional boosters: 1 tablespoon chia seeds, 1 scoop chocolate protein powder, or 1 tablespoon flaxseed meal
Step-by-Step Guide to Blending the Perfect Creamy Texture
- Prepare the bananas: For an ultra-creamy smoothie, peel and slice ripe bananas, then freeze them for at least 2 hours. This step mimics the richness of ice cream without any added sugar.
- Combine ingredients: In a high-powered blender, add the frozen banana slices, almond milk, peanut butter, cocoa powder, honey, vanilla extract, and cinnamon.
- Add ice: Toss in ice cubes or crushed ice. This controls the final smoothie thickness-add more if you prefer a thicker texture, or less for a liquider blend.
- Blend until smooth: Pulse the blender on medium-high for 30-45 seconds or until you achieve a creamy, velvety consistency without any lumps. Stop and scrape down the sides if needed to incorporate all ingredients evenly.
- Taste and adjust: Sample the smoothie and add more sweetener or cocoa powder if desired. Blend briefly again to mix any adjustments.
- Serve immediately: Pour into chilled glasses for the ultimate refreshing experiance.
Tips for Customizing Sweetness and Nutritional Boosts
- Adjust sweetness naturally: Swap honey with maple syrup or agave nectar, or skip sweetener entirely if your bananas are extra ripe.
- Boost nutrition: Add a scoop of plant-based or whey chocolate protein powder for extra protein.
- Fiber and omega-3s: Stir in chia seeds or flaxseed meal to enhance heart-healthy fats and promote digestion.
- Milk alternatives: Coconut milk adds creaminess and a tropical note; oat milk introduces subtle sweetness and silkiness.
- Dairy option: Greek yogurt or silken tofu can replace some liquid for tang and added protein while thickening the smoothie.
Serving Suggestions to Make Your Smoothie Truly Indulgent
- Garnish with chopped roasted peanuts or a light dusting of cocoa powder for visual appeal and textural contrast.
- Top with a dollop of whipped coconut cream or nut butter drizzle for an extra luscious touch.
- Serve with a reusable straw and a sprig of fresh mint or a sprinkle of cacao nibs for aroma and aesthetic appeal.
- pair your smoothie with crunchy granola or homemade oatmeal cookies for a delightful textural balance.
| Nutrient | Per Serving |
|---|---|
| Calories | 320 kcal |
| Protein | 9 g |
| Carbohydrates | 38 g |
| Fat | 14 g |

For further inspiration on wholesome smoothies, check out our Healthy Green Smoothie Recipes. To learn more about the health benefits of peanut butter, visit the Healthline guide to peanut butter.
Q&A
Q&A: Decadent Chocolate Peanut Butter Banana Smoothie Recipe
Q1: What makes this chocolate Peanut Butter Banana Smoothie decadent?
A1: the decadence comes from the rich, velvety blend of creamy peanut butter, ripe bananas, and luscious chocolate. When combined,these ingredients create a smoothie that feels indulgent and satisfying-like dessert in a glass,but packed with wholesome nutrition.
Q2: Can I make this smoothie vegan or dairy-free?
A2: absolutely! Simply swap out regular milk for your favorite plant-based milk such as almond, oat, or coconut milk. Use vegan chocolate or cocoa powder to keep the chocolatey goodness flowing without dairy.
Q3: What kind of chocolate is best for this smoothie?
A3: For the richest flavor, opt for unsweetened cocoa powder or dark chocolate with at least 70% cacao. This ensures deep chocolate notes without overpowering sweetness, which balances perfectly with the natural sugars in the banana and the saltiness of peanut butter.
Q4: How ripe should my bananas be?
A4: The riper, the sweeter! Look for bananas with plenty of brown speckles on their skin-that means they’re packed with natural sugars and will give your smoothie a creamy, naturally sweet base.
Q5: Can I add protein powder to boost this smoothie?
A5: Definitely! Adding a scoop of your favorite protein powder not only ramps up the nutritional value but also makes this smoothie an excellent post-workout treat or a filling breakfast option.
Q6: Is this smoothie suitable for weight loss?
A6: It can be! While indulgent in flavor, the smoothie combines protein, healthy fats, and fiber which help keep you full and satisfied. Portion control and mindful ingredient choices (like unsweetened cocoa and natural peanut butter) are key.
Q7: Can I prepare this smoothie in advance?
A7: Yes, you can! Freeze sliced bananas ahead of time for a chilled texture, and pre-measure your peanut butter and cocoa powder. Blending fresh just before drinking ensures the best taste and texture.
Q8: What’s a creative twist to make this smoothie even more exciting?
A8: Try adding a pinch of cinnamon or a splash of espresso for an extra flavor kick. For crunch, sprinkle some crushed peanuts or cacao nibs on top. Or swap peanut butter for almond or cashew butter for a subtle nutty variation.
Q9: How many servings does this recipe yield?
A9: Typically, this recipe makes one large or two smaller servings, perfect for sharing or saving half for an afternoon pick-me-up.
Q10: Why should I choose a smoothie over a traditional dessert?
A10: This smoothie packs all the rich flavors of a chocolate peanut butter treat but with added nutritional benefits like potassium from bananas, protein from peanut butter, and antioxidants from cocoa. It’s an indulgence that fuels your body without the guilt!
In Conclusion
As the velvety richness of chocolate melds effortlessly with the creamy sweetness of peanut butter and the natural goodness of ripe bananas, this decadent smoothie proves that indulgence can also be nourishing. Whether you’re seeking a quick breakfast boost,a post-workout treat,or a comforting snack,this recipe offers the perfect harmony of flavor and nutrition in every sip. So next time you crave something both appetizing and wholesome, blend up this luscious concoction and savor the magic where decadence meets health-one creamy swirl at a time.

The Power-Packed Peanut Butter Banana Smoothie Recipe Revealed unlocks a delicious blend of creamy, nutty, and naturally sweet flavors, transforming simple ingredients into a nutrient-rich powerhouse. This smoothie marries the wholesome protein and healthy fats of peanut butter with the potassium and natural sweetness of ripe bananas, creating a satisfying and energizing boost perfect for any time of day.
prep and Cook Time
planning: 5 minutes
Cooking: 0 minutes (no cooking required)
Total Time: 5 minutes
Yield
Serves 2 energizing smoothies (12 oz each)
Difficulty Level
Easy
Ingredients
- 2 ripe bananas, peeled and sliced
- 3 tablespoons natural creamy peanut butter (preferably unsweetened)
- 1 cup unsweetened almond milk (or your favorite plant-based milk)
- 1/2 cup Greek yogurt (plain or vanilla for extra creaminess)
- 1 tablespoon honey or pure maple syrup (adjust sweetness to taste)
- 1/2 teaspoon ground cinnamon (optional, adds warm spice)
- 1/2 teaspoon pure vanilla extract
- Ice cubes (about 4-6, depending on desired thickness)
Step-by-Step Guide to Blending Your Power-Packed Smoothie
- Prepare all ingredients. Start by slicing the bananas and gathering all ingredients within easy reach. Using ripe bananas ensures a creamy texture and natural sweetness.
- add liquids to the blender first. Pour the almond milk and Greek yogurt into your blender. This base helps the blending process flow smoothly and prevents sticking.
- Incorporate peanut butter and banana slices. Add the peanut butter and banana next. Peanut butter is rich in protein and healthy fats, which help keep you full longer.
- Add sweeteners and spices. Drizzle honey, sprinkle cinnamon, and pour in vanilla extract. These subtle flavors elevate the smoothie’s complexity without overpowering the natural nutty and fruity notes.
- Add ice cubes. Toss in ice for a refreshing chill and thicker texture. For an extra creamy texture, freeze banana slices beforehand.
- Blend until smooth and creamy. Blend on high speed for about 45-60 seconds, or until no lumps remain. Scrape down the sides once to ensure even blending.
- Check consistency and sweetness. Taste your smoothie. Add more sweetener, milk, or ice as needed to fit your preferred texture and flavor.
- Pour and serve immediatly. Use a tall glass and garnish with extra peanut butter drizzle or banana slices for eye appeal.
Tips for Customizing Flavors and Boosting Energy Levels
- Protein Boost: Add one scoop of vanilla or chocolate protein powder for post-workout recovery and extra protein punch.
- Nut-Free Option: Replace peanut butter with sunflower seed butter or almond butter for different nutty nuances.
- Superfood Enhancers: Toss in a tablespoon of chia seeds, flaxseeds, or hemp hearts to increase omega-3s and fiber.
- Dairy-Free Variation: Swap Greek yogurt for coconut yogurt or omit entirely for a lighter smoothie.
- Flavor Twists: Add a handful of baby spinach for a green smoothie upgrade without changing taste or nutrition dramatically.
- Energy Kick: Include a shot of cold brew coffee or a teaspoon of matcha powder for a natural caffeine boost.
Chef’s Notes
choosing peanut butter: Opt for natural peanut butter with minimal ingredients (just peanuts and salt) to avoid added sugars and oils that could alter flavor and nutrition.
Banana ripeness: The sweeter your banana, the less honey or syrup you’ll need. Overripe bananas are perfect as they blend smoother and add more natural sweetness.
Make-ahead: Prepare smoothie packs by freezing banana slices and measuring peanut butter portions into freezer-safe bags. When ready, toss contents into the blender, add fresh liquids, and blend.
Serving Suggestions
Pour the smoothie into clear glass tumblers to showcase its creamy golden hue. Garnish with:
- A sprinkle of crushed peanuts for crunch and visual contrast
- A dusting of cinnamon or cocoa powder
- A thin banana slice slipped onto the rim
- A small drizzle of peanut butter swirled on top
This smoothie pairs wonderfully with a handful of whole-grain granola or a slice of toasted multigrain bread for a complete breakfast or snack.
| Nutrient | Per Serving (1 Smoothie) |
|---|---|
| Calories | 320 kcal |
| Protein | 12 g |
| Carbohydrates | 32 g |
| fat | 14 g |

For more wholesome smoothie inspirations, check out our healthy green smoothie recipes. Learn more about the amazing health benefits of bananas from a trusted source at Healthline.
Q&A
Q&A: Power-Packed Peanut Butter Banana Smoothie Recipe Revealed
Q1: What makes the Peanut Butter Banana Smoothie “power-packed”?
A1: This smoothie is a powerhouse as it combines nutrient-dense ingredients like creamy peanut butter, ripe bananas, and protein-rich additions to fuel your body. The healthy fats from peanut butter, natural sugars and potassium from bananas, plus added protein and fiber, make it a balanced and energizing drink perfect for any time of day.
Q2: Can I customize the smoothie to fit different dietary needs?
A2: Absolutely! Whether you’re vegan, lactose-intolerant, or just love experimenting, this smoothie is incredibly versatile. Swap dairy milk for almond, oat, or soy milk. Use protein powders like plant-based or whey to boost protein content. Add seeds or greens for extra nutrients. The recipe welcomes your creativity!
Q3: What are the key ingredients for this smoothie?
A3: The magic starts with:
- Ripe banana for natural sweetness and creaminess
- Peanut butter for protein, healthy fats, and that irresistible nutty flavor
- milk (dairy or plant-based) to blend it all smoothly
- Optional add-ins like honey for extra sweetness, Greek yogurt for creaminess and protein, or chia seeds for fiber and omega-3s
Q4: How long does it take to prepare this smoothie?
A4: Whipping up this power-packed delight takes just 5 minutes tops! Simply toss your ingredients into a blender, blend until smooth, and you’re ready to sip an energizing treat that fuels your day.
Q5: Is this smoothie suitable for post-workout recovery?
A5: Definitely. Packed with protein and carbohydrates, this smoothie helps replenish energy stores and supports muscle recovery. The potassium in bananas also aids in preventing muscle cramps, making it a stellar post-sweat snack.
Q6: can kids enjoy this smoothie too?
A6: Yes! It’s a kid-approved combo that tastes like a healthy dessert.plus, it sneaks in some much-needed nutrients in a fun, delicious way. Adjust sweetness to suit little taste buds and watch it disappear in moments.
Q7: Any pro tips to upgrade this smoothie?
A7: For an extra kick, add a dash of cinnamon or a pinch of sea salt to enhance flavors. Toss in a handful of spinach for added greens-it won’t overpower the taste but will amp up the nutrition. You can also freeze the banana beforehand to create a thicker, frostier texture.
Q8: What’s the best way to store leftovers?
A8: Smoothies are best enjoyed fresh, but if you need to store leftovers, keep them in an airtight container in the fridge for up to 24 hours.Give it a quick stir or shake before drinking, as ingredients may settle or separate.
Ready to blend your way to tasty energy? This Peanut Butter Banana Smoothie is your new go-to for a quick, nutritious boost with a luscious twist!
The Conclusion
And there you have it-a power-packed peanut butter banana smoothie that’s as delicious as it is indeed nutritious.Whether you’re kickstarting your day, refueling after a workout, or simply craving a wholesome treat, this blend of creamy peanut butter, ripe bananas, and a splash of your favorite milk offers the perfect balance of energy and flavor. Easy to make and endlessly adaptable, this smoothie recipe isn’t just a drink-it’s your new go-to fuel for vitality. So grab your blender, dive into this creamy concoction, and sip your way to a stronger, smoother day ahead!
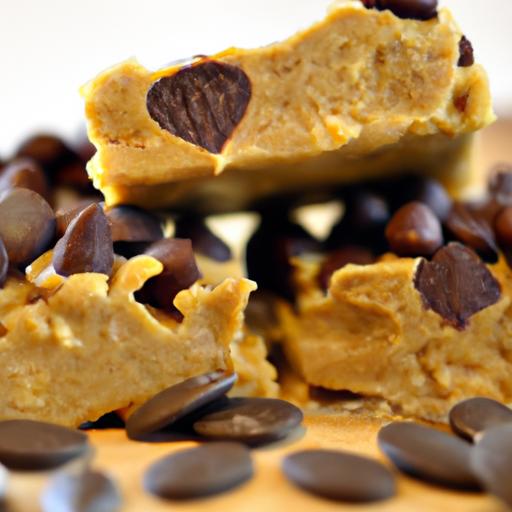
Power-Packed Peanut Butter Protein Balls with Oats Delight
Power-packed Peanut Butter Protein Balls with Oats Delight bring together the creamy richness of peanut butter and the hearty texture of oats to fuel your day with lasting energy. This no-bake snack has become a personal favorite after discovering its perfect balance between sweetness, crunch, and nutritional value-ideal for quick bites before workouts or busy afternoons. Its simplicity and versatility make it approachable for anyone looking to boost their protein intake deliciously.
prep and Cook Time
Readiness: 15 minutes
No cooking required
Yield
Approximately 20 delicious protein balls
Difficulty Level
Easy
Ingredients
- 1 cup creamy peanut butter (natural, unsweetened)
- 1 1/2 cups rolled oats (old-fashioned)
- 1/2 cup honey or maple syrup
- 1/3 cup ground flaxseed or chia seeds
- 1 scoop vanilla whey protein powder (about 30g)
- 1/4 cup mini dark chocolate chips (optional)
- 1 tsp vanilla extract
- Pinch of sea salt
Instructions
- Combine wet ingredients: In a large mixing bowl, blend the creamy peanut butter, honey, and vanilla extract using a spatula until smooth and emulsified.
- Mix dry ingredients: In a separate bowl, whisk together the rolled oats, ground flaxseed, protein powder, and sea salt. This ensures even distribution of flavors and nutrition.
- Incorporate dry into wet: Gradually fold the dry mixture into the peanut butter blend. Stir thoroughly until a sticky, dough-like consistency forms. If the mixture feels too dry, add a teaspoon of water or more honey; if too wet, add a few extra oats.
- Fold in extras: Gently add the mini dark chocolate chips for bursts of indulgence and texture.
- Shape the balls: Using a tablespoon or cookie scoop, portion out the mixture and roll between your palms to form compact, bite-sized balls (about 1 inch in diameter). For a smooth finish, coat hands lightly with coconut oil.
- Chill and set: Place the formed balls on a parchment-lined tray and refrigerate for at least 30 minutes. Chilling solidifies their texture, making them easier to handle and enhancing flavor melding.
- Store smartly: Transfer protein balls to an airtight container.Keep refrigerated for up to 1 week or freeze for up to 3 months.
Tips for Success
- For a nut-free choice, swap peanut butter with sunflower seed butter or tahini.
- If you prefer a chewier texture, experiment by replacing half the oats with puffed quinoa or millet flakes.
- Adjust sweetness by varying honey or using stevia drops for a lower sugar profile.
- Ensure protein powder blends well with oats by sifting it before mixing to avoid clumps.
- Make-ahead convenience: Freeze individual balls in a ziplock bag for grab-and-go energy anytime.
Serving Suggestions
Serve these vibrant,power-packed peanut butter protein balls with oats delight as a midday snack or pre/post-workout fuel. For an inviting presentation, arrange on a wooden board with a sprinkling of crushed peanuts and a drizzle of honey. Garnish with edible flower petals or a dusting of cinnamon to add an elegant touch to your energy boost.

Nutritional Information (per ball)
| Calories | Protein | Carbs | Fat |
|---|---|---|---|
| 120 kcal | 5 g | 12 g | 6 g |
discover more wholesome snack recipes in our Healthy Snack Ideas collection.For further reading on the nutritional benefits of oats and peanut butter, visit the Healthline Peanut Butter Nutrition Guide.
Q&A
Q&A: Power-Packed Peanut Butter Protein Balls with oats Delight
Q1: What exactly are Power-Packed Peanut Butter Protein Balls with Oats Delight?
A1: These tasty treats are bite-sized energy boosters made from creamy peanut butter, wholesome oats, and a punch of protein. Thay combine natural ingredients into a convenient snack that fuels your body and satisfies your hunger-perfect for busy days or post-workout refueling.
Q2: Why should I choose peanut butter and oats as main ingredients?
A2: Peanut butter is a mighty source of healthy fats and protein, helping keep you full and energized. oats bring fiber and complex carbohydrates to the table, promoting steady energy release and digestive health. Together, they create a balanced blend of taste and nutrition.
Q3: How do these protein balls support an active lifestyle?
A3: Packed with protein and slow-burning carbs, these balls serve as a quick, portable source of muscle-repairing nutrients and sustained energy. Whether you’re hitting the gym, running errands, or need a midday pick-me-up, they keep fatigue at bay and stamina high.
Q4: Can I customize the recipe to fit my dietary needs?
A4: Absolutely! Swap ingredients like honey with maple syrup for a vegan twist, add chia or flaxseeds for extra omega-3 power, or toss in dark chocolate chips for a decadent touch. The recipe is flexible and welcoming to your creativity.
Q5: How easy is it to prepare these protein balls at home?
A5: Super easy! With just a handful of ingredients and no baking required, you mix, roll, and refrigerate. In under 20 minutes,you’ll have a batch of nutritious goodies ready to energize your day.
Q6: Are these snack balls suitable for kids and picky eaters?
A6: Yes! their naturally sweet, nutty flavor appeals to all ages. Plus, they’re a sneaky way to pack in fiber and protein without intimidating little taste buds.
Q7: How should I store Power-packed Peanut Butter Protein Balls?
A7: Keep them chilled in an airtight container, and they’ll stay fresh for up to a week. For longer storage, pop them in the freezer and thaw a handful whenever you need a quick snack.
Q8: Can these protein balls aid in weight management?
A8: When eaten in moderation, they make a satisfying and nourishing snack that can curb hunger and reduce cravings for less healthy options. They support balanced eating habits by providing sustained energy without added sugars or empty calories.
Q9: What’s the best time to eat these protein balls?
A9: Anytime you need a nutrient boost! Pre- or post-workout, mid-morning pick-me-up, or an afternoon snack-they’re versatile companions for your daily energy needs.
Q10: Where can I find the recipe for Power-Packed Peanut Butter Protein Balls with Oats Delight?
A10: Right here! Dive into our full recipe and step-by-step guide in the article, and get ready to create your own convenient, tasty power snacks that fuel your busy life with wholesome goodness.
In Summary
In the world of quick,delicious,and nourishing snacks,these Power-Packed Peanut Butter Protein Balls with Oats Delight stand out as a true champion. Bursting with wholesome ingredients and balanced flavors, they are the perfect companion for your busy days, post-workout boosts, or even a guilt-free treat anytime you crave a pick-me-up. Simple to make and easy to customize, these little bites prove that nutritious snacking doesn’t have to be boring. So go ahead-roll up your sleeves, blend those ingredients, and fuel your body with a snack that’s as delightful as it is powerful. Your taste buds-and your energy levels-will thank you!
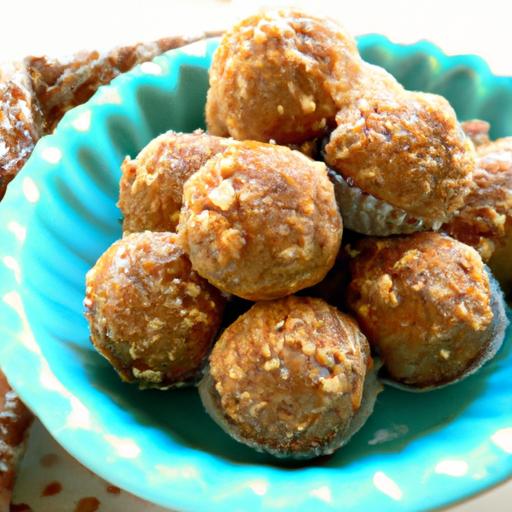
Power-Packed Peanut Butter Protein Balls serve as an irresistible and energy-boosting snack that marries creamy peanut butter with nutrient-dense ingredients to fuel your day. Rooted in the tradition of wholesome, no-bake treats, these protein balls have become my go-to remedy for that mid-afternoon slump or pre-workout fuel. Their rich texture and balanced flavors are not only delicious but deliver a powerful punch of sustained energy, thanks to the perfect blend of healthy fats, proteins, and natural sugars.
Prep and Cook Time
- Planning: 15 minutes
- Chilling: 30 minutes
- Total: 45 minutes
Yield
- About 18 peanut butter protein balls
Difficulty Level
- Easy
Ingredients
- 1 cup natural creamy peanut butter (unsweetened)
- 1/2 cup rolled oats,finely ground
- 1/3 cup honey or pure maple syrup
- 1/4 cup ground flaxseed
- 1/4 cup vanilla whey or plant-based protein powder
- 2 tbsp chia seeds
- 1/2 tsp cinnamon
- Pinch of sea salt
- Optional: 2 tbsp mini dark chocolate chips or chopped nuts for extra crunch
Instructions
- Combine dry ingredients: In a medium bowl,whisk together the rolled oats,ground flaxseed,protein powder,chia seeds,cinnamon, and sea salt until evenly mixed.
- Add wet ingredients: Stir in the peanut butter and honey, mixing thoroughly until a sticky, uniform dough forms. If the mixture feels too dry, add a teaspoon of warm water at a time to loosen.
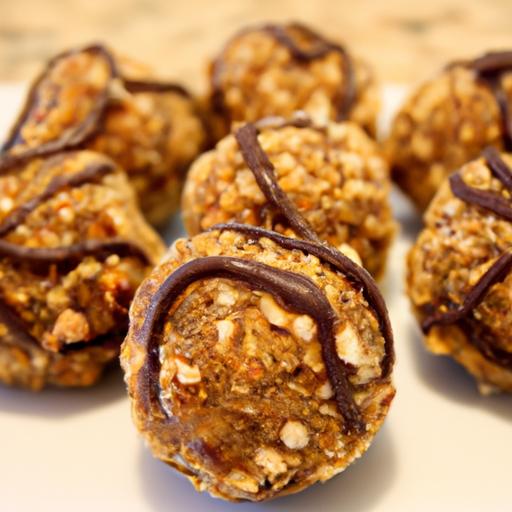
- Incorporate add-ins: Gently fold in mini chocolate chips or nuts if using, for delightful texture contrasts.
- Shape the balls: Using your hands or a small cookie scoop, portion out the mixture into 1-inch balls. roll firmly to create smooth, compact spheres.
- Chill: Transfer the balls to a parchment-lined tray and refrigerate for at least 30 minutes.This solidifies their structure and enhances chewiness.
- Serve or store: Enjoy immediately as a quick energy bite or store using the smart storage solutions below.
tips for Success When Making Peanut Butter Protein Balls
- Texture tweaks: For a chewier bite, soak the chia seeds in a tablespoon of water for 5 minutes before mixing.
- Customize your protein: Swap whey with plant-based powders like pea or brown rice protein for vegan-friendly options.
- Sweetness level: Adjust honey or maple syrup quantities to your taste; for a lower-sugar version, try mashed ripe banana.
- Flavor twists: Add 1 tsp vanilla extract, a dash of nutmeg, or zest of orange for seasonal flair.
- Make-ahead: Protein balls freeze beautifully. Store in an airtight container in the freezer for up to 3 months and thaw in the fridge overnight.
Serving Suggestions
Present these peanut butter protein balls atop a rustic wooden board alongside fresh fruit slices like apples or bananas for a vibrant, wholesome snack display. For a festive touch,sprinkle desiccated coconut or crushed roasted peanuts over the rolls before serving. Pairing with a cold glass of almond milk or a steaming cup of green tea elevates the experience, turning a simple snack into a nourishing mini-meal.
| Nutrient | Per Ball (approx.) |
|---|---|
| Calories | 110 kcal |
| Protein | 5 g |
| Carbohydrates | 10 g |
| Fat | 6 g |
Smart Storage Solutions to Keep Your Nutty Snacks Fresh and Ready
To maintain the freshness and texture of your peanut butter protein balls, store them in an airtight container lined with parchment paper. Keeping them refrigerated will preserve their firmness for up to one week. for longer shelf life,freezing is ideal-simply place the protein balls in a single layer on a baking sheet to freeze individually,then transfer to a freezer-safe container or ziplock bag. This prevents clumping and ensures you have a power-packed snack ready whenever hunger strikes.
Want to explore other energizing snacks? Check out our Healthy No-Bake Oat Energy bars recipe for delicious alternatives. For more on the benefits of incorporating peanut butter into your diet, visit Healthline’s Peanut Butter Nutrition guide.

Q&A
Q&A: Power-Packed Peanut Butter Protein Balls – A Nutty Energy Boost
Q1: What exactly are power-Packed Peanut Butter Protein Balls?
A1: These little gems are bite-sized snacks made from a blend of creamy peanut butter, protein-rich ingredients, and natural sweeteners. They’re designed to deliver an instant energizing boost, combining nutty flavors with muscle-fueling protein-all wrapped up in a convenient, no-bake treat.
Q2: Why peanut butter? What makes it so special in these protein balls?
A2: Peanut butter isn’t just deliciously creamy and nutty-it’s a powerhouse of healthy fats, plant-based protein, and essential nutrients like vitamin E and magnesium. This combo fuels your body with sustained energy and supports muscle repair, making peanut butter an ideal base for these energy balls.Q3: How do these protein balls compare to conventional energy bars?
A3: Unlike many energy bars that come packed with added sugars and preservatives, Power-Packed Peanut Butter Protein Balls are frequently enough homemade or crafted with simple, wholesome ingredients.They’re fresher, more customizable, and typically free from artificial additives-plus, their no-bake nature keeps them quick and easy to whip up.
Q4: Can these protein balls fit into different dietary plans?
A4: Absolutely! With a few smart swaps, these protein balls can be tailored to fit vegan, gluten-free, or paleo diets. As a notable example, use maple syrup or agave for sweetening, gluten-free oats, and plant-based protein powders-making them accessible energy boosters for everyone.
Q5: When’s the best time to enjoy these peanut butter protein balls?
A5: Anytime you need a quick pick-me-up! Whether pre-workout to fuel your session, post-workout to aid muscle recovery, or during a mid-afternoon slump, these protein balls provide a balanced combo of carbs, protein, and healthy fats to keep your energy steady and your cravings satisfied.
Q6: How long do these power balls last, and how should they be stored?
A6: Stored in an airtight container, these protein balls can last up to a week in the refrigerator, or even longer if frozen. Their dense, no-bake ingredients mean they maintain freshness and flavor-which makes them perfect for meal prepping or packing along on your next adventure.Q7: Any tips for making the perfect peanut butter protein ball?
A7: Absolutely! Use natural peanut butter without added sugars or oils for the cleanest taste. Adjust sweetness to your liking with honey or maple syrup, and don’t be shy with the mix-ins-chia seeds, flaxseeds, dark chocolate chips, or shredded coconut all add a delightful twist and extra nutrients. And remember, if the dough feels too sticky, just chill it for a bit before rolling into balls.
Q8: Can kids enjoy these too?
A8: Definitely! These little protein bombs make a wholesome snack for kids and adults alike. Just be sure to watch for nut allergies and adjust sweetness levels to keep them kid-friendly. They’re a sneaky way to pack in nutrients and energy in a fun, tasty form.
Harness the power of peanut butter and protein in these delectable bites-your new snack-time sidekick for energy, nutrition, and a touch of nutty joy!
In Summary
In the quest for a convenient, delicious, and nutritious snack, power-packed peanut butter protein balls stand out as a true game-changer. These little bites of nutty energy not only satisfy your taste buds but also fuel your body with essential proteins and healthy fats, making them perfect for any time of day. Whether you’re powering thru a busy workday, gearing up for a workout, or simply craving a wholesome treat, these protein balls offer a smart, satisfying solution. So next time you need a quick burst of energy, remember that sometimes the simplest ingredients-peanut butter, protein, and a touch of creativity-can come together to deliver big results.Here’s to snacking smarter and letting every bite power your day!
Decadent Chocolate Peanut Butter Banana Smoothie Recipe bursts with rich flavor and creamy indulgence, creating the perfect harmony between luscious chocolate, nutty peanut butter, and naturally sweet bananas. This smoothie isn’t just a treat; it’s a nourishing experience that revitalizes your mornings or powers your workouts with wholesome deliciousness. Inspired by classic flavor combinations and my personal quest for the ultimate creamy texture, this recipe delivers a velvety sip that feels like dessert in a glass but fuels your day with natural goodness.
Prep and Cook Time
- Readiness: 5 minutes
- Blending: 2 minutes
- Total Time: 7 minutes
yield
Serves 2 generous smoothies
Difficulty Level
Easy – Perfect for beginners and seasoned smoothie lovers alike
Ingredients That Elevate the Decadent Chocolate Peanut Butter Banana Smoothie
- 2 medium ripe bananas, peeled and sliced (preferably frozen for extra creaminess)
- 2 tablespoons creamy natural peanut butter (choose unsweetened for less sugar)
- 1 cup unsweetened almond milk (or your preferred milk choice)
- 2 tablespoons unsweetened cocoa powder, sifted too avoid lumps
- 1 tablespoon honey or maple syrup (optional; adjust sweetness to taste)
- 1/2 teaspoon pure vanilla extract for warm aromatic depth
- 1/4 cup Greek yogurt for added protein and silky texture
- A pinch of sea salt to balance flavors and enhance chocolate notes
- Ice cubes, as needed for thickness
- Optional: 1 tablespoon chia seeds or flaxseeds for a nutritional boost
Step by Step Guide to Achieving the Perfect Creamy Texture
- Prepare your bananas: Use ripe bananas, ideally frozen to create an ice-cream-like texture without watering down the smoothie.
- Add the wet ingredients: Pour almond milk and Greek yogurt into your blender for a creamy base that blends smoothly.
- Incorporate peanut butter and cocoa: Add peanut butter and sifted cocoa powder to avoid clumps and ensure an even chocolatey richness.
- Sweeten carefully: drizzle honey or maple syrup according to your taste preferences to balance the natural banana sweetness.
- Add vanilla and salt: Vanilla adds complexity while the pinch of salt elevates all flavors, creating a perfectly balanced profile.
- Blend and adjust: Start blending on low speed,gradually increasing to high for about 1-2 minutes until the smoothie is silky and lump-free.
- Check consistency: If too thick, add a splash of almond milk; if too thin, toss in a few ice cubes or extra frozen banana and blend again.
Tips for Customizing Sweetness and Nutritional Boosts
- Control sweetness naturally: Swap honey or maple syrup for medjool dates or mashed frozen berries for a fiber-rich twist.
- Make it vegan: Use plant-based yogurt like coconut or cashew for creaminess without dairy.
- Boost protein: Add a scoop of your favorite protein powder or substitute Greek yogurt with silken tofu to keep it smooth and protein-packed.
- Superfood enhancements: Stir in a teaspoon of maca powder or spirulina for subtle earthiness and a powerhouse of nutrients.
- Healthy fats: Sprinkle hemp seeds or add a drizzle of flaxseed oil to increase omega-3 fatty acids.
Expert Recommendations for Serving and Storage
For the ultimate presentation, pour your smoothie into chilled glasses and finish with a garnish of sliced banana, a swirl of peanut butter, and a light dusting of cocoa powder or finely chopped roasted peanuts. Serve immediately to enjoy the vibrant creamy texture and fresh flavors.
If you need to prepare ahead, pour the smoothie into an airtight container and refrigerate for up to 24 hours. Shake or stir well before drinking, as natural separation may occur. Avoid freezing the final blend, as texture can degrade with ice crystal formation.
Nutritional Information per serving
| Calories | Protein | Carbohydrates | Fat |
|---|---|---|---|
| 320 kcal | 10 g | 40 g | 12 g |
Chef’s Notes
- Ripe bananas are key – overripe ones bring natural sweetness and soften the smoothie without extra sugar.
- Use sifted cocoa powder to ensure a smooth blend and rich chocolate intensity.
- For an ultra-smooth smoothie, blend for at least 90 seconds.
- If the smoothie is too thick, add almond milk in 1/4 cup increments until desired consistency is reached.
- Batch prep by peeling and slicing bananas in advance, freezing them flat in a zip bag to minimize waste and save time.
- For inspiration on complementary smoothie recipes, visit our Healthy Smoothie Recipes page.
- Learn more about peanut butter’s health benefits through this healthline article.

Q&A
Q&A: Decadent Chocolate Peanut Butter Banana Smoothie Recipe
Q1: What makes this Chocolate Peanut Butter Banana Smoothie so decadent?
A1: It’s the luscious blend of creamy peanut butter,ripe bananas,and rich chocolate that transforms a simple smoothie into a velvety indulgence.The smooth texture, combined with natural sweetness and a hint of cocoa, creates a truly luxurious treat that feels more like dessert than a health drink.
Q2: Can I make this smoothie healthier without sacrificing the decadent flavor?
A2: Absolutely! swap regular peanut butter for natural, unsweetened peanut butter to cut down on added sugars. Use unsweetened cocoa powder instead of chocolate syrup for rich chocolate taste without extra sugar.Adding a splash of almond milk or Greek yogurt boosts creaminess and nutrients without dulling the indulgent vibe.
Q3: What’s the secret to achieving the perfect smoothie consistency?
A3: Balance is key! Use frozen bananas to naturally thicken your smoothie and add a creamy texture. Blend with just enough milk or plant-based alternative to create a silky pour without making it too thin.If you want it thicker, toss in a few ice cubes or a spoonful of oats.Q4: Can this smoothie replace a full meal?
A4: it can, if you pack it full of protein and fiber! Adding protein powder, Greek yogurt, or even chia seeds boosts its staying power, turning this decadent smoothie into a satisfying meal on the go. Otherwise, enjoy it as a rich snack or dessert to curb cravings.
Q5: Any creative twists to personalize this recipe?
A5: Definitely! Try adding a pinch of cinnamon or a dash of vanilla extract to deepen the flavor profile. For crunchy contrast,sprinkle some crushed peanuts or cacao nibs on top. you can even swap bananas with avocado for a silky texture and a subtle twist on flavor!
Q6: is this smoothie suitable for kids and picky eaters?
A6: Yes! The familiar flavors of chocolate, peanut butter, and banana make it a hit with kids. It’s a sneaky way to pack in fruit and protein, and blending everything smooth ensures no texture battles. Just adjust sweetness to suit little taste buds.Q7: How quickly should I drink this smoothie?
A7: Best enjoyed fresh! The flavors are brightest and the texture creamiest right after blending. If you must store it, keep it in an airtight container in the fridge for up to 24 hours, than give it a good shake or swift re-blend before sipping.
This Q&A unpacks the delicious decadence behind the chocolate peanut butter banana smoothie, offering tips to craft the perfect blend with a nutritious twist-making every sip feel like a guilty pleasure minus the guilt!
In Conclusion
As you savor the last sip of this decadent chocolate peanut butter banana smoothie, you’ll notice it’s more than just a treat-it’s a harmonious blend of flavors and nutrients that fuel both body and soul. Whether enjoyed as a morning pick-me-up, a post-workout reward, or a guilt-free indulgence, this smoothie proves that wholesome ingredients can feel wonderfully luxurious.So next time you crave something creamy, rich, and satisfying, remember this recipe-a simple, delicious way to turn everyday ingredients into an exceptional moment of bliss.

Peanut Butter Chocolate Chip Clif Bars are your ultimate companion for sustained energy and satisfying flavor, especially designed for those who crave a powerful yet wholesome snack. Crafted with natural ingredients and a smooth blend of peanut butter and rich chocolate chips, these bars transform a simple energy boost into a delicious ritual. Whether you’re powering through a workout, managing a busy day, or needing a swift pick-me-up, these bars balance nutrition with indulgence.
Prep and Cook Time
- Prep Time: 10 minutes
- Cook Time: 25 minutes
- Total Time: 35 minutes
Yield
- 8 bars (each approx. 2.5 oz)
Difficulty Level
- easy – perfect for all home bakers
Ingredients
- 1 cup natural creamy peanut butter
- 1/2 cup organic honey
- 1 1/2 cups rolled oats, lightly toasted
- 1/2 cup whole wheat flour, sifted
- 1/4 cup mini semi-sweet chocolate chips
- 1/4 cup chopped almonds, for added crunch
- 2 tablespoons chia seeds
- 1 teaspoon pure vanilla extract
- 1/2 teaspoon baking soda
- 1/4 teaspoon sea salt
- 1/3 cup unsweetened apple sauce, for moisture
Instructions
- Preheat your oven to 350°F (175°C).Line an 8×8-inch baking pan with parchment paper, leaving an overhang for easy removal.
- In a large bowl, whisk together peanut butter and honey until creamy and well blended. Stir in the applesauce and vanilla extract.
- In a separate bowl, combine the rolled oats, whole wheat flour, baking soda, sea salt, chia seeds, and chopped almonds.
- Gradually fold the dry ingredients into the wet mixture until a thick dough forms. Then gently fold in the mini chocolate chips, being careful not to overmix.
- Transfer the dough to the prepared pan and press it evenly with a spatula or your hands to create a uniform layer.
- Bake for 20-25 minutes until the edges turn golden and a toothpick inserted in the centre comes out clean.
- Remove from the oven and let cool entirely in the pan.Once cooled, lift the bars out using the parchment overhang and cut into 8 equal pieces.
Tips for Success
- For extra richness, use unsweetened peanut butter and add a sprinkle of sea salt on top before baking to enhance the flavor contrast.
- Substitute maple syrup for honey to make them vegan-kind.
- Ensure the oats are lightly toasted to bring out their nutty aroma and improve texture.
- Store bars in an airtight container at room temperature for up to 5 days, or freeze for longer freshness.
- To keep them chewy,avoid overbaking; start checking at 20 minutes.
Serving Suggestions
- Enjoy these bars warm with a cup of cold milk or a fresh brew of coffee to complement the nutty and chocolaty notes.
- Top with a light drizzle of melted dark chocolate and a sprinkle of crushed peanuts for a gourmet touch.
- Pair with fresh fruit like sliced bananas or strawberries for a balanced snack.
- Wrap individually in parchment paper for easy, energizing snacks during hikes, mid-workout breaks, or long workdays.
| Nutrient | Per Bar |
|---|---|
| Calories | 220 kcal |
| Protein | 7g |
| Carbohydrates | 23g |
| Fat | 12g |
| Fiber | 4g |
To explore more about how natural ingredients fuel your performance, visit The Nutrition Society. For quick and nutritious snack ideas, check out our healthy snack collection.

Q&A
Q&A: Peanut Butter Chocolate Chip Clif Bars – A Tasty Energy Boost
Q1: What makes Peanut Butter Chocolate Chip Clif Bars so special?
A: These bars combine the creamy, nutty richness of peanut butter with the sweet bursts of chocolate chips, creating a harmonious flavor that’s both indulgent and energizing. but beyond taste,they’re packed with nutrients designed to fuel your body for hours – perfect for athletes,busy professionals,or anyone needing a quick,delicious energy boost.
Q2: Are Peanut Butter Chocolate Chip Clif Bars a good source of energy?
A: Absolutely! Clif Bars are crafted to provide sustained energy through a balanced mix of carbohydrates, protein, and fiber. The natural carbs give you immediate fuel,while protein and fiber help maintain stamina,so you stay energized without the dreaded crash.
Q3: What ingredients contribute to the nutrition in these bars?
A: The key players include organic rolled oats, peanut butter, and real chocolate chips, all delivering a blend of complex carbs and healthy fats. Clif Bars also feature plant-based protein from soy or other sources, plus essential vitamins and minerals to support overall wellness.
Q4: How do these bars fit into a healthy lifestyle?
A: Whether you’re hitting the trails,powering through a busy workday,or recovering post-workout,these bars provide a convenient,wholesome snack option. They’re made with non-GMO ingredients and no artificial preservatives, aligning with clean-eating principles while satisfying your sweet tooth.
Q5: Can Peanut Butter Chocolate Chip Clif Bars replace a meal?
A: While they are packed with nutrients, Clif Bars are best enjoyed as a snack or energy supplement rather than a full meal replacement. Their purpose is to keep your energy levels steady between meals or during physical activity, making them a perfect partner for an active lifestyle.
Q6: Are these bars suitable for all diets?
A: They are vegetarian-friendly and made without artificial flavors, but those with specific allergies – like peanuts or soy – should be cautious. Always check the packaging for allergen facts to ensure they meet your dietary needs.
Q7: What’s the best way to enjoy a Peanut Butter Chocolate Chip Clif Bar?
A: Straight out of the wrapper is perfectly fine, but some adventurous snackers enjoy warming them slightly to melt the chocolate chips or pairing them with a hot cup of coffee for a comforting energy combo. Whatever your style, they’re designed to be portable, tasty, and satisfying anytime.
With their delicious blend of peanut butter and chocolate, plus a nutrition profile built for endurance, Peanut Butter Chocolate Chip Clif Bars are more than just a snack-they’re your tasty, anytime energy ally.
Concluding Remarks
Whether you’re hitting the trails, powering through a busy workday, or simply craving a delicious pick-me-up, Peanut Butter Chocolate Chip Clif Bars offer the perfect blend of flavor and fuel. packed with wholesome ingredients and a satisfying crunch, these bars deliver a tasty energy boost that keeps you moving forward without missing a bite.So next time you need a quick snack that’s as nutritious as it is indeed indulgent, reach for a Clif Bar-your taste buds and your stamina will thank you.
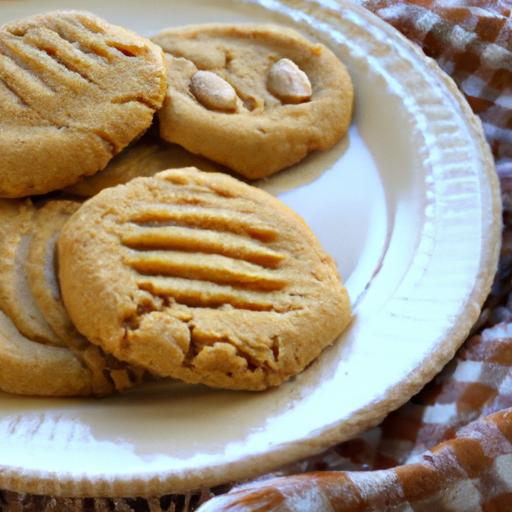
Simple joys: perfect 4-ingredient peanut butter cookies capture the essence of effortless baking, transforming pantry staples into a soft, chewy treat that never goes out of style. This recipe, a celebration of minimalism, delivers maximum flavor and texture with just four humble ingredients, making it both approachable for beginners and beloved by seasoned bakers alike.
Prep and Cook Time
- Preparation Time: 10 minutes
- Cook Time: 12 minutes
- Total Time: 22 minutes
Yield
- Approximately 18 cookies (1.5-inch diameter each)
Difficulty Level
- Easy – perfect for all skill levels
Ingredients
- 1 cup creamy peanut butter (natural or classic, no added sugar preferred)
- 1 cup granulated sugar (ensures just the right caramelized crunch)
- 1 large egg (room temperature for better mixing)
- 1 teaspoon baking soda (for gentle rise and tenderness)
Step by Step Guide to Perfectly Soft and Chewy peanut Butter Cookies
- Preheat your oven to 350°F (175°C). Line a baking sheet with parchment paper or a silicone mat for easy release and cleanup.
- In a large mixing bowl, combine the peanut butter and sugar. Using a wooden spoon or electric mixer on low,blend until creamy and uniform-this usually takes about 2 minutes.
- Add the egg and baking soda to the bowl, stirring until fully incorporated. The dough should be thick but pliable.
- Roll the dough into walnut-sized balls, placing them about 2 inches apart on the prepared baking sheet.
- Use the tines of a fork to gently press down each ball, creating a crisscross pattern and flattening to about ½ inch thick. This also helps cookies bake evenly.
- Bake for 10-12 minutes, or until the edges are just beginning to turn golden. The centers may look slightly underbaked-that’s the secret to soft, chewy cookies!
- Remove from oven and allow cookies to cool on the baking sheet for 5 minutes before transferring to a wire rack. This rest period helps cookies set without hardening.
Tips for Customizing Your Cookies with Minimal Ingredients
- Swap peanut butter varieties: Try crunchy peanut butter for added texture or natural peanut butter for a more rustic flavor.
- Reduce sugar: Use ¾ cup sugar for a less sweet, more intense peanut flavor.
- Add mix-ins: Stir in ¼ cup mini chocolate chips or chopped nuts for subtle dimension without bombing your ingredient count.
- For vegan adaptation: Substitute the egg with a flax egg (1 tbsp ground flaxseed + 3 tbsp water, chilled).
Expert Recommendations for Baking and Storing Peanut Butter Cookies
- Baking tips: Avoid overbaking; cookies firm up as they cool.Rotate your baking sheet halfway through to ensure even coloring.
- Ingredient quality: Use fresh baking soda and good-quality peanut butter for best results-these influence rise and flavor dramatically.
- Storage: Keep cooled cookies in an airtight container at room temperature for up to 5 days, or freeze for up to 2 months. To retain softness, place a slice of bread inside the container.
- Reheating: Warm cookies in a microwave for 10 seconds or in a preheated oven at 300°F for 3-4 minutes before serving for that fresh-baked sensation.
Serving Suggestions
Present these cookies alongside a glass of cold milk, a cup of rich coffee, or a creamy chai latte for an indulgent break. for a visual upgrade, dust with powdered sugar or drizzle melted dark chocolate over the top. Garnish with a sprinkle of flaky sea salt to amplify the peanut aroma and add subtle crunch.
| Nutritional Information (per cookie) | Amount |
|---|---|
| Calories | 120 kcal |
| Protein | 4 g |
| Carbohydrates | 10 g |
| Fat | 8 g |

For more inventive yet simple dessert ideas, explore our Easy Dessert Recipes collection. To dive deeper into the science behind baking soda’s role in quick cookies, visit King Arthur Baking’s official guide.
Q&A
Q&A: Simple Joys – Perfect 4-Ingredient peanut Butter Cookies
Q1: What makes these peanut butter cookies “perfect” with just four ingredients?
A1: It’s the magic of simplicity. Using just peanut butter, sugar, an egg, and a pinch of salt, these cookies achieve a tender, chewy texture and rich, nutty flavor without any fuss. The fewer ingredients let the peanut butter truly shine, creating a perfect balance of sweet and savory with every bite.
Q2: Are these cookies suitable for beginners or baking pros?
A2: Absolutely perfect for both! Beginners will love how easy and forgiving the recipe is-no intricate steps or exotic ingredients. Pros might appreciate the minimalist approach that still delivers maximum flavor and texture, proving that sometimes less really is more.
Q3: Can I customize these cookies without ruining the simplicity?
A3: Definitely! While the classic recipe is brilliant on its own, you can sprinkle in a handful of chocolate chips, a pinch of cinnamon, or a dash of vanilla extract to elevate the flavor. Just keep additions minimal so you don’t stray too far from the recipe’s effortless charm.
Q4: What’s the secret to achieving that perfect chewy texture?
A4: the ratio of peanut butter to sugar, plus the gentle mixing with the egg, creates a moist and chewy crumb. Baking just until the edges set but the centers stay soft ensures that delightful melt-in-your-mouth experience. Resist the urge to overbake!
Q5: Are these cookies allergy-kind or adaptable for dietary needs?
A5: While peanut butter is the star, you can swap it for almond or sunflower seed butter if needed. using natural or low-sugar sweeteners can also tweak the recipe for different dietary preferences. Just keep in mind that the simple ingredient list is key to the cookie’s signature texture and flavor.
Q6: How should I store these cookies to keep their freshness?
A6: Store them in an airtight container at room temperature, were they’ll stay soft and chewy for up to a week. For longer storage, pop them in the freezer-and thaw at room temp for a quick, nostalgic treat anytime.
Q7: What’s the best occasion to bake these cookies?
A7: Whenever the craving hits! They’re great for a spontaneous indulgence, an easy classroom treat, or a cozy snack to share with friends. Their simplicity makes them a joyful baking project for busy days or when you just need a little sweet comfort.
Embrace the simple joys of baking with these perfect 4-ingredient peanut butter cookies-because happiness is often found in the easiest recipes!
Final Thoughts
Baking needn’t be complicated to be delightful, and these 4-ingredient peanut butter cookies prove just that. with minimal effort and pantry staples, you can create a batch of tender, nutty treats that bring warmth and comfort to any moment. Whether you’re craving a quick snack, a homemade gift, or a cozy companion to your afternoon tea, these simple joys remind us that sometimes, the best things in life truly are the easiest to make. So, next time you reach for a sweet indulgence, trust in the magic of simplicity-and savor every bite.
Peanut butter Rice Krispies combine the nostalgic crunch of classic cereal treats with the rich,nutty depth of peanut butter,creating a harmony of textures and flavors that satisfy every craving. Originating as a fun twist on childhood favorites, this recipe elevates a simple snack into an irresistible delight suitable for all ages. Whether you’re making these for a family gathering or a quick indulgence, mastering the balance of sweetness and crunch will take your treat to the next level.
Prep and Cook time
- Planning: 10 minutes
- Cooking: 5 minutes
- Cooling: 15 minutes
- Total Time: 30 minutes
Yield
Approximately 12 generous squares (serves 6-8)
Difficulty Level
Easy – Perfect for beginners and seasoned snack-makers alike
Ingredients
- 4 cups Rice Krispies cereal
- 1 cup creamy natural peanut butter (no added sugar or salt for balanced flavor)
- 1/2 cup unsalted butter
- 1 1/2 cups mini marshmallows
- 1/4 cup honey or maple syrup (optional, adjust to taste)
- 1 teaspoon pure vanilla extract
- 1/4 teaspoon fine sea salt
- 1/2 cup chopped roasted peanuts (for added crunch)
Instructions
- Prepare Your Pan: Line a 9×9-inch square baking pan with parchment paper, allowing some overhang for easy removal later. Set aside.
- Melt Butter and Peanut butter: In a large saucepan over low heat, combine the unsalted butter and creamy natural peanut butter. Stir gently until fully melted and smooth, about 3-4 minutes. Avoid high heat to prevent separation.
- Add Sweetness and Flavor: Stir in the mini marshmallows, honey (or maple syrup), and vanilla extract. Continue stirring until the marshmallows are wholly melted, creating a luscious, glossy mixture. This step ensures a sticky yet pliable binding agent.
- incorporate the Cereal: Remove the pan from heat. Promptly add the Rice krispies cereal and sea salt. Gently fold the mixture with a spatula, ensuring every flake is coated but not crushed-preserving that essential crunch.
- Layer in Crunch: Fold in the chopped roasted peanuts carefully, distributing them evenly for bursts of nutty texture throughout.
- Press and Set: Transfer the mixture to your prepared pan. Using a clean, slightly damp spatula or your hands, press the mixture firmly and evenly into the pan, compacting without crushing the cereal.
- Cool and Cut: Allow the mixture to cool at room temperature for 15 minutes or pop it in the fridge for 10 minutes to firm up. once set, lift from the pan using parchment overhang and slice into squares or bars.
Tips for Success
- For a thicker, chewier texture, add an extra 1/4 cup of peanut butter or reduce the marshmallows slightly.
- Use natural peanut butter without stabilizers for a clean, rich flavor. Avoid overly sweet varieties that can overpower the treat.
- Lightly toast the chopped peanuts before adding to amplify their aroma and crunch.
- If sticky, chill your hands or spatula to press the mixture down more easily without sticking.
- Make ahead: Store airtight at room temperature for up to 3 days or freeze individually wrapped squares for up to a month.
Serving suggestions
Present these nutty delights on a rustic wooden board for an inviting, casual look. Garnish with a sprinkle of flaky sea salt or a drizzle of melted dark chocolate for refined contrast. Pair with a cold glass of milk or your favorite coffee for a perfect snack time indulgence. You can also cut them into bite-sized balls and roll in crushed peanuts or cocoa powder for party-kind finger treats.
nutritional Information per Serving
| Calories | Protein | Carbs | Fat |
|---|---|---|---|
| 210 kcal | 6 g | 25 g | 11 g |
To deepen your snack arsenal, explore our Classic Rice krispies Treats variations for even more inspiration. For peanut allergy alternatives and detailed peanut butter benefits, visit Peanut Institute.
Q&A
Q&A: Peanut Butter Rice Krispies – A Crunchy, Nutty Delight Recipe
Q1: What makes Peanut Butter Rice Krispies a unique treat?
A1: Peanut Butter Rice Krispies combine the classic crispiness of toasted rice cereal with the rich, creamy flavor of peanut butter. This fusion creates a snack that’s both crunchy and nutty, satisfying texture lovers and peanut butter fans alike.Q2: How do you achieve the perfect crunch in this recipe?
A2: The key is in gently toasting the Rice Krispies before mixing, and carefully melting the peanut butter with marshmallows to create a sticky yet airy binder. This ensures each bite is delightfully crisp without being mushy or overly chewy.
Q3: Can I use natural peanut butter for this recipe?
A3: Absolutely! Natural peanut butter adds a pure and slightly more earthy flavor. just be aware that its oil content may affect the texture slightly, so stirring thoroughly and chilling the mixture well helps maintain that signature crunch.
Q4: What’s a creative twist to elevate this classic treat?
A4: Add a sprinkle of sea salt on top before the mix sets-this enhances the nutty sweetness perfectly. Or swirl in some mini chocolate chips after mixing for pockets of gooey chocolate goodness.
Q5: Are Peanut Butter Rice Krispies gluten-free?
A5: yes, as long as you use certified gluten-free Rice Krispies and check that your peanut butter and marshmallows contain no gluten ingredients, this snack is a safe and crunchy gluten-free indulgence.
Q6: How long will Peanut Butter Rice Krispies stay fresh?
A6: Stored in an airtight container at room temperature, they stay fresh and crunchy for up to 3-4 days. For longer storage, keep them in the fridge to maintain their delightful texture.
Q7: Can kids help make this recipe?
A7: Definitely! It’s a fun, hands-on treat perfect for little chefs. Just handle the melted marshmallow mixture carefully or supervise that step,and let kids do the stirring and pressing into pans for a creative kitchen bond.
Enjoy the perfect harmony of crisp rice cereal and luscious peanut butter in every bite-Peanut Butter Rice Krispies are a nostalgic snack reinvented for today’s crunchy cravings!
In Retrospect
Whether you’re craving a nostalgic treat or searching for a quick, satisfying snack, Peanut Butter Rice Krispies deliver a perfect harmony of crunch and nutty richness that’s hard to beat.This simple recipe transforms everyday ingredients into a delightful bite that’s as fun to make as it is indeed to eat. So next time you want to add a little extra crunch and flavor to your snack lineup, give this crunchy, nutty delight a try-you might just discover your new favorite comfort food!
]]>