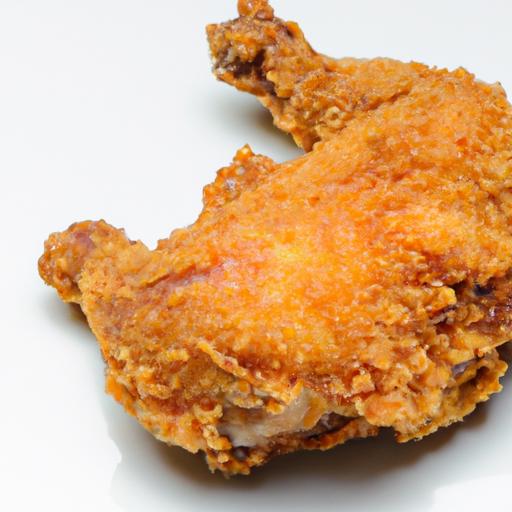
Crispy & Healthy: How to Make Stuffed Bell Peppers Air Fryer
Crispy & healthy stuffed bell peppers made in the air fryer transform an everyday vegetable into a vibrant, mouthwatering feast. this delightful recipe blends bold flavors with a satisfying crunch, all while keeping the prep straightforward and the cooking quick. Originating from customary mediterranean stuffed vegetable dishes, this modern twist harnesses the air fryer to deliver perfectly cooked, tender bell peppers with a filling that bursts with wholesome ingredients and vivid textures.
Prep and Cook Time
- Preparation: 15 minutes
- Air fryer Cooking: 18 minutes
- total Time: 33 minutes
Yield
Serves 4 hearty portions
Difficulty Level
Easy to Medium – ideal for cooks of all skill levels seeking a nutritious yet indulgent meal.
Ingredients
- 4 large bell peppers (choose a mix of red, yellow, and orange for sweetness and color)
- 1 cup cooked quinoa (rinsed and fluffy)
- 1/2 lb lean ground turkey or plant-based ground meat
- 1 small onion, finely chopped
- 2 cloves garlic, minced
- 1 cup diced tomatoes (canned or fresh)
- 1/2 cup shredded mozzarella cheese (optional for topping)
- 1/4 cup fresh parsley, chopped
- 2 tbsp olive oil
- 1 tsp smoked paprika
- 1/2 tsp cumin
- Salt and pepper to taste
Crispy & Healthy Stuffed Bell Peppers Air Fryer: Step-by-Step Instructions
- Prepare the peppers: Slice the tops off the bell peppers and carefully remove the seeds and membranes.Set aside the tops for later use or chop to mix into the stuffing.
- Make the stuffing base: In a skillet,heat 1 tbsp olive oil over medium heat. Sauté the onions until translucent, about 3 minutes.
- add the garlic and cook for another minute until fragrant.
- brown the ground turkey (or plant-based meat) thoroughly, breaking it up as it cooks, about 6-7 minutes. Season with smoked paprika,cumin,salt,and pepper.
- Stir in the cooked quinoa, diced tomatoes, and chopped parsley.Simmer for 3 minutes to meld flavors and reduce excess moisture. Remove from heat.
- Stuff each bell pepper generously with the filling, pressing gently to pack the mixture evenly.
- Preheat your air fryer to 360°F (180°C). Lightly brush the outside of the peppers with the remaining olive oil to promote a crisp, golden skin.
- Arrange the peppers upright in the air fryer basket, ensuring they don’t touch for even air circulation.
- Cook for 15 minutes. Open the air fryer carefully, sprinkle mozzarella cheese evenly on top (if using), then continue cooking for an additional 3 minutes or until the cheese melts and the peppers are tender but retain some bite.
- Remove and let rest briefly before serving to allow flavors to settle.
Tips for Success
- For the best flavor and texture,choose firm bell peppers with bright,glossy skin. Avoid those with wrinkles or soft spots.
- If you prefer a vegetarian stuffing, swap ground turkey for cooked lentils or finely chopped mushrooms to keep that hearty feeling.
- Don’t overcrowd the air fryer basket; cooking peppers spaced apart helps achieve a uniformly crispy exterior.
- Prep your stuffing ahead and refrigerate-this recipe can be made a day in advance to save time on busy evenings.
- To add a subtle smoky depth,a pinch of crushed red pepper flakes can be sifted into the filling.
serving suggestions
To make your crispy & healthy stuffed bell peppers a showstopper, serve them on a bed of lightly dressed mixed greens or alongside a creamy avocado dip. Garnish with extra chopped parsley and a lemon wedge for a fresh citrus note.A drizzle of balsamic glaze adds a lovely contrast and enhances the vibrant flavors

Nutritional Details
| Nutrient | Per Serving |
|---|---|
| Calories | 320 kcal |
| Protein | 28 g |
| Carbohydrates | 20 g |
| Fat | 10 g |
For more inspiration on wholesome, easy meals, check out our Healthy Air Fryer Recipes collection. To learn about the health benefits of bell peppers, visit the Healthline nutrition guide.
Q&A
Q&A: crispy & Healthy – How to Make Stuffed Bell Peppers in the Air Fryer
Q1: Why choose an air fryer for making stuffed bell peppers?
A1: The air fryer is a game-changer for stuffed bell peppers because it crisps the pepper’s exterior beautifully while keeping the filling moist and flavorful. Unlike conventional baking, air frying reduces cooking time and uses less oil, making your peppers healthier without sacrificing that irresistible crunch.
Q2: Can I make any type of stuffed bell pepper in the air fryer?
A2: Absolutely! Whether you prefer a classic ground beef and rice filling, a quinoa and veggie medley, or even a cheesy Mexican-inspired mix, the air fryer handles them all with ease. Just pack your peppers loosely, so heat circulates evenly for perfect cooking every time.
Q3: How do I prep the bell peppers for air frying?
A3: Start by slicing off the tops and removing seeds and membranes.Blanching the peppers briefly in boiling water helps soften the skin slightly, but if you’re short on time, air frying the empty peppers for 3-5 minutes before stuffing can achieve a similar effect. This step ensures they cook evenly without becoming mushy.
Q4: What’s the secret to getting the peppers crispy outside and tender inside?
A4: It’s all about balance! Use a light spray of oil on the pepper’s outside before air frying, and make sure your filling isn’t too wet. Overly saucy fillings can steam the pepper instead of crisping it. Also, avoid overcrowding the basket to maintain proper airflow.
Q5: How long do stuffed peppers usually take in the air fryer?
A5: Generally, stuffed peppers take about 15-20 minutes at 360°F (180°C). cooking time can vary based on the size of your peppers and the moisture in your filling. Check halfway through and rotate if needed for even browning.
Q6: Can I prepare stuffed peppers ahead of time and then air fry them later?
A6: Yes! Prepare and stuff your peppers in advance, keep them in the fridge, and air fry just before serving. This not only saves time but also ensures you get that satisfying crispy finish right before mealtime.
Q7: Any tips for making stuffed bell peppers extra healthy?
A7: Skip heavy cheeses or opt for part-skim varieties,add plenty of colorful veggies and lean protein,and use whole grains like brown rice or quinoa. The air fryer’s minimal oil requirement already cuts down on extra fat, making this dish a nutritious and tasty winner.Q8: What sides complement air-fried stuffed bell peppers?
A8: Light and fresh sides work best-think mixed green salads, roasted carrots, or a zesty cucumber yogurt sauce. These keep the meal balanced and highlight the comforting warmth of your crispy peppers.
With these tips, your air fryer stuffed bell peppers will be crispy on the outside, healthy, and absolutely bursting with flavor.Happy cooking!
Closing Remarks
Whether you’re craving a comforting dinner or aiming to eat a little lighter without sacrificing flavor, these crispy, stuffed bell peppers made in the air fryer offer the perfect solution. The magic lies in achieving that satisfying crunch while keeping every bite fresh and nutritious. So next time you want a meal that’s as vibrant as it is wholesome, give this recipe a whirl-your air fryer (and your taste buds) will thank you. Happy cooking, and here’s to delicious dishes that make healthy feel indulgent!

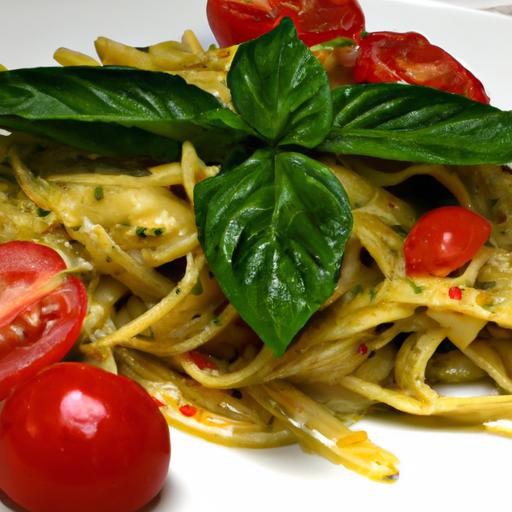
Fresh Flavors in pesto pasta with cherry tomatoes begin with the thoughtful selection of each ingredient, setting the stage for a vibrant and lively dish that excites the senses. This recipe combines the aromatic essence of basil with the bright burst of sun-ripened cherry tomatoes, all harmonized by a zesty twist that elevates traditional pesto to new heights.
Prep and Cook time
Preparation: 15 minutes | Cooking: 10 minutes | Total: 25 minutes
yield
Serves 4 generous portions
Difficulty Level
Easy – Perfect for weeknight dinners or weekend gatherings
Ingredients
- 2 cups fresh basil leaves, packed and gently rinsed
- 1/2 cup extra-virgin olive oil, cold-pressed
- 1/3 cup pine nuts, toasted lightly for depth of flavor
- 2 garlic cloves, peeled and minced
- 1/2 cup freshly grated Parmesan cheese
- 1 teaspoon lemon zest, finely grated for a bright twist
- Salt and freshly ground black pepper, to taste
- 12 oz (340g) pasta of your choice (fusilli, linguine, or penne work beautifully)
- 1 1/2 cups cherry tomatoes, assorted colors for visual appeal, halved
- 1 tablespoon balsamic vinegar (optional, for tomato marination)
- Fresh basil sprigs for garnish
Instructions
- Prepare the pesto sauce: In a food processor, combine basil leaves, toasted pine nuts, garlic, and lemon zest. Pulse until coarsely chopped. With the motor running, slowly drizzle in the olive oil until smooth and emulsified. Transfer to a bowl and stir in the Parmesan cheese. Season lightly with salt and pepper. Taste and adjust seasoning.
- Marinate the cherry tomatoes: Toss cherry tomatoes with balsamic vinegar, a pinch of salt, and pepper. Let them rest for 10 minutes, allowing the flavors to mingle and intensify.
- Cook the pasta: Bring a large pot of salted water to a rolling boil. Add pasta and cook according to package instructions until al dente.Reserve 1/2 cup of pasta water before draining.
- Combine pasta and pesto: Return drained pasta to the pot or a large mixing bowl. Add the fresh basil pesto and a splash of reserved pasta water, tossing gently to coat evenly. The reserved water helps loosen the pesto, achieving a silky texture without overpowering flavor.
- Add the cherry tomatoes: Gently fold in the marinated cherry tomatoes, preserving their juicy bursts and vibrant hues.
- Final seasoning and serve: taste the pasta, adjusting salt, pepper, or a drizzle of olive oil if needed. Serve instantly, garnished with fresh basil sprigs and an extra sprinkle of Parmesan for an irresistible finish.
Tips for Balancing Texture and Taste in Your Pesto Pasta Dish
- Use firm, ripe cherry tomatoes: Selecting vibrant, plump cherry tomatoes ensures a sweet acidity that complements the rich, herbaceous pesto without overpowering it.
- Toast pine nuts carefully: Light toasting amplifies their nuttiness but avoid browning too much, which can impart bitterness.
- Balance acid and richness: The lemon zest in the pesto and balsamic vinegar on the tomatoes offer a subtle sharpness that counters the olive oil’s richness beautifully.
- Fresh basil is key: Wilted or aged basil can introduce bitterness and dull the fragrance – always use fresh, aromatic leaves picked close to the time of cooking.
- Texture contrast: The juicy tomatoes add a pleasant pop against the creamy pesto-coated pasta, creating an engaging mouthfeel in every bite.
- Use pasta water wisely: The starchy water is a secret ally to loosen and blend your pesto sauce naturally, preventing a heavy oily finish.
Chef’s Notes
- Variations: Swap pine nuts for walnuts or almonds if preferred - each nut offers a unique flavor profile.
- Make-ahead: Pesto can be prepared up to 2 days in advance and refrigerated, but add fresh lemon zest before serving to reinvigorate the flavors.
- Vegan option: Replace Parmesan with nutritional yeast or vegan cheese for a dairy-free take.
- Storage: Store leftover pasta separately from extra pesto; recombine and reheat gently with a splash of pasta water.
- Common issue: If pesto tastes too bitter, a pinch of sugar or extra lemon juice can balance it perfectly.
Serving Suggestions
Present your pesto pasta with cherry tomatoes on a warm, rustic ceramic plate to showcase its colorful vibrancy. Garnish each serving with fresh basil leaves and a light dusting of cracked black pepper. For added texture and aroma,scatter toasted pine nuts or a drizzle of aged balsamic reduction around the edges. Pair this dish with a crisp white wine, like Pinot Grigio, and a simple side of garlic bread or mixed greens lightly dressed in lemon vinaigrette.

| Nutrient | Per serving |
|---|---|
| Calories | 460 kcal |
| protein | 14 g |
| Carbohydrates | 52 g |
| Fat | 20 g |
For more delightful Italian-inspired recipes, check out our Classic Italian Pasta Sauces collection. To deepen your knowledge on pesto’s rich history, visit Britannica’s pesto overview.
Q&A
Q&A: Fresh Flavors – How to Make Pesto Pasta with cherry Tomatoes
Q1: What makes pesto pasta with cherry tomatoes a perfect dish for fresh, vibrant meals?
A1: Pesto pasta with cherry tomatoes bursts with freshness thanks to the herbaceous basil pesto, sweet and tangy cherry tomatoes, and al dente pasta that soaks up all the flavors. It’s a harmonious balance of green, red, and golden hues on your plate-inviting both your eyes and taste buds for a quick, nutrient-packed delight.
Q2: Can you explain what traditional pesto consists of and how it complements pasta?
A2: Traditional pesto is a fragrant blend of fresh basil leaves, pine nuts, garlic, Parmesan cheese, olive oil, and a pinch of salt. This creamy,aromatic sauce coats each strand or piece of pasta,infusing every bite with its rich,nutty,and herby character.The luscious texture of pesto clings perfectly to pasta, making each mouthful a celebration of fresh garden flavors.
Q3: Why cherry tomatoes,and how do they enhance the dish?
A3: Cherry tomatoes bring a burst of juicy sweetness with a slight tang that beautifully contrasts the earthiness of pesto. Their small size allows them to maintain a pleasant pop and texture when cooked lightly, adding color and a refreshing vibrancy that elevates the overall dish experience.
Q4: What type of pasta works best with pesto and cherry tomatoes?
A4: While many pasta shapes work, short, twisted types like fusilli, trofie, or rotini are especially good at catching the pesto and mixing with the cherry tomatoes. Long pastas like spaghetti or linguine also work well if you prefer a classic presentation-the key is choosing pasta that holds the pesto sauce without letting it slip off.
Q5: How do you prepare the cherry tomatoes for this dish? Should they be cooked or fresh?
A5: For pesto pasta, cherry tomatoes are best lightly sautéed or roasted just until they soften and release their juices without losing their shape. This warms them up, enhances their sweetness, and melds their flavor with the pesto. Alternatively, tossing fresh raw cherry tomatoes with the pasta adds a refreshing burst, suitable for warmer days.
Q6: What’s the secret to making the best homemade pesto for this recipe?
A6: The secret lies in fresh, vibrant ingredients and balance. Use basil that’s bright green and unblemished, generously toast your pine nuts to deepen their flavor, and don’t skimp on quality Parmesan cheese. Use good olive oil for smoothness, and pulse the ingredients gently in a food processor or mortar and pestle to preserve a slightly coarse texture that makes pesto so inviting.
Q7: Can this recipe be vegan or allergy-pleasant?
A7: Absolutely! To make vegan pesto, simply substitute parmesan with nutritional yeast or a vegan cheese alternative. For nut allergies,swap pine nuts with seeds like pumpkin or sunflower seeds. The cherry tomatoes and pasta remain the same, making it an easily adaptable yet endlessly flavorful dish.Q8: Any serving tips or garnishes that enhance the pesto pasta experience?
A8: Garnish with freshly grated Parmesan or a sprinkle of vegan feta for an extra hit of umami. A drizzle of extra virgin olive oil,a few fresh basil leaves,or a pinch of crushed red pepper flakes add layers of flavor and visual appeal. Serve with a crisp side salad or crusty bread for a complete, satisfying meal.
Q9: How long does it take to prepare pesto pasta with cherry tomatoes?
A9: From start to finish, expect about 20 to 30 minutes. Pesto can be made ahead and stored, and cherry tomatoes take just minutes to sauté.It’s a fast, fresh meal perfect for busy weeknights or casual entertaining with a gourmet touch.
Q10: What occasions is this dish best suited for?
A10: This dish feels at home on sunny summer evenings, casual dinners with friends, or as a light lunch that energizes your day. Its fresh, vibrant flavors also make it a winning choice for picnic baskets, potlucks, or anytime you want to evoke the taste of a Mediterranean garden on your plate.
Insights and Conclusions
As the vibrant colors of cherry tomatoes mingle with the bright, herby punch of fresh pesto, this pasta dish becomes more than just a meal-it’s a celebration of summer’s simplest, most flavorful gifts. With every twirl of the fork, you’re savoring the harmony of garden-fresh ingredients and timeless culinary tradition. Whether served al fresco or as a quick weeknight dinner,pesto pasta with cherry tomatoes invites you to embrace freshness in every bite. So next time you’re craving a dish that’s both effortless and extraordinary, remember: a handful of basil, a splash of olive oil, and those sweet, juicy tomatoes are all you need to create magic on your plate.
Sweet Bliss: How to Make Delicious Frozen Chocolate Strawberries
Sweet Bliss begins with the perfect strawberry, paired with expertly tempered chocolate, creating a luscious treat that dances on your palate. This classic indulgence combines the juicy freshness of strawberries with the rich silkiness of chocolate-a harmony that’s as delightful to make as it is to enjoy. Whether for a romantic evening or a fun family dessert,mastering each step ensures irresistibly elegant results every time.
Prep and Cook Time
- Preparation: 20 minutes
- freezing time: 2 hours
- Total time: Approximately 2 hours 20 minutes
Yield
Makes approximately 20 frozen chocolate strawberries, depending on size.
Difficulty Level
Medium – Perfect for beginners willing to explore chocolate tempering with a rewarding payoff.
Ingredients
- 20 large fresh strawberries, stems intact and thoroughly dried
- 8 oz (225g) high-quality dark chocolate (70% cacao recommended)
- 4 oz (115g) white chocolate (for decorating, optional)
- 1 tbsp coconut oil or neutral vegetable oil (for smooth melting)
- Optional garnishes: crushed nuts, sprinkles, edible gold dust, or shredded coconut
choosing the perfect Strawberries for Ultimate Freshness
Start this delicious adventure by selecting strawberries that are vibrant red, glossy, and fragrant-avoid any with bruises or mushy spots. The freshest berries provide a firm bite and optimal sweetness, a crucial contrast to the silky chocolate coating. For sweet Bliss, smaller to medium-sized berries work wonderfully, as their balance of sweetness and texture holds well after freezing. After washing, dry each strawberry entirely with a paper towel; residual moisture can cause chocolate to seize or the berries to become icy rather than frozen perfectly.
Selecting and Tempering Chocolate for a Silky Smooth Coating
Tempering chocolate is the secret to that gorgeous sheen and satisfying snap. Choose couverture or high-quality baking chocolate. Chop chocolate evenly and melt gently in a heatproof bowl over simmering water, stirring constantly. Adding coconut oil helps achieve a glossy finish and easier dipping. temper by melting two-thirds of the chocolate, then stirring in the remaining third off heat until it cools slightly to about 31°C (88°F) for dark chocolate. this process ensures Sweet Bliss in every bite with a smooth, firm shell that won’t melt immediately.
Step by step Guide to Dipping and Decorating Frozen Chocolate Strawberries
- Prepare a lined baking sheet: cover it with parchment paper for easy removal and clean presentation.
- Dip each strawberry by the stem: Hold firmly and submerge two-thirds into the tempered chocolate, swirling gently for even coverage.
- Let excess chocolate drip off: Rotate the berry above the bowl for a smooth, thin coat.
- Place berries on the parchment: Immediately sprinkle your chosen garnishes before the chocolate sets to ensure they adhere beautifully.
- Drizzle white chocolate (optional): Warm the white chocolate slightly and use a fork or piping bag to create delicate stripes or zigzags over the dark chocolate for an elegant finish.
- Freeze for at least 2 hours: Transfer the tray to the freezer, allowing the chocolate to harden completely and the strawberries to become perfectly frozen.
Tips for Storing and Serving Your Frozen Chocolate Strawberry Delights
Once frozen, Sweet Bliss creations are best stored in a single-layer container lined with wax or parchment paper to prevent sticking. Cover with a loose lid or plastic wrap, avoiding airtight seals that cause moisture buildup and sogginess. Serve chilled from the freezer for that blissful crunch and fresh burst of berry juice juxtaposed with silky chocolate. Garnish plates with mint leaves, edible flowers, or a dusting of powdered sugar to elevate presentation. These treats also pair beautifully with a glass of chilled prosecco or a decadent chocolate mousse for an indulgent dessert spread.
chef’s notes
- Substitute strawberries with other berries like raspberries or blackberries for creative variations.
- If tempering chocolate feels daunting, try the “seeding method” for a beginner-amiable approach.
- Ensure strawberries are fully dry before dipping; any moisture compromises chocolate adherence and texture.
- Make ahead and freeze up to 48 hours, but consume within 24 hours of thawing for the best texture.
Serving Suggestions
Display frozen chocolate strawberries on a crystal or ceramic platter set atop fresh mint or edible blossoms. Serve immediately from the freezer or allow a 2-minute thaw for a softer bite. For extra flair,accompany with homemade whipped cream or a drizzle of rich caramel sauce.These bite-sized jewels also create an unforgettable addition to birthday celebrations, bridal showers, or holiday parties.
| Nutrient | Per Serving (1 strawberry) |
|---|---|
| Calories | 60 kcal |
| Protein | 1 g |
| Carbohydrates | 8 g |
| Fat | 3.5 g |
For more dessert inspiration, check out our Decadent Chocolate Desserts collection. To deepen your understanding of chocolate tempering techniques, visit Cocoa Barista Magazine’s guide.

Q&A
Q&A: Sweet Bliss – How to Make Delicious Frozen chocolate Strawberries
Q1: What makes frozen chocolate strawberries so irresistible?
A1: It’s the perfect harmony of juicy, sweet strawberries and smooth, rich chocolate that creates a delightful contrast. The chill of the frozen berry enhances the refreshing burst of flavor, while the chocolate adds a velvety sweetness that melts in your mouth, making every bite a decadent experience.
Q2: What kind of chocolate works best for dipping strawberries?
A2: Semi-sweet or dark chocolate tends to be the star choice as it beautifully balances the natural sweetness of the strawberries.However,milk chocolate or even white chocolate can add a creamy twist if you prefer a sweeter,creamier bite. Using couverture chocolate with a higher cocoa butter content will give you a shinier and smoother coating.
Q3: How do you prepare strawberries before freezing and dipping?
A3: Start by choosing plump, ripe strawberries free from bruises.Wash them gently and dry thoroughly-any moisture can cause the chocolate to seize. Leave the green stems intact for an easy hold. For the best results, dip the strawberries in chocolate first, then place them on parchment paper to freeze. That way, the chocolate shell hardens beautifully around the berry.
Q4: Can I add toppings to my frozen chocolate strawberries?
A4: Absolutely! Before the chocolate sets, sprinkle your strawberries with crushed nuts, shredded coconut, colorful sprinkles, or even a pinch of sea salt. These toppings add texture and flavor,turning a simple frozen treat into a show-stopping dessert.
Q5: What’s the secret to perfect chocolate dipping?
A5: Gently melt the chocolate using a double boiler or microwave in short bursts to avoid burning. Stir frequently to achieve a smooth consistency. Dip the strawberry about two-thirds of the way, then let the excess chocolate drip off before placing it on parchment paper. Keep your hands steady and work quickly to prevent premature hardening.
Q6: How long should frozen chocolate strawberries be stored?
A6: Store them in an airtight container lined with parchment paper to avoid sticking,and keep them in the freezer for up to two weeks. For the freshest taste, enjoy them within a few days-when the strawberries are still juicy, and the chocolate remains perfectly crisp.
Q7: Any creative twists to try with frozen chocolate strawberries?
A7: For a surprising pop of flavor, drizzle melted white chocolate over dark chocolate-dipped berries or vice versa. You can also spice things up with a touch of chili powder or cinnamon in the melted chocolate. Another fun idea is to freeze the strawberries in layers-dip once, freeze, then dip again for an ultra-thick chocolate shell.
Q8: Can frozen chocolate strawberries be a healthy dessert option?
A8: Definitely! Strawberries are rich in antioxidants, fiber, and vitamins, while dark chocolate provides heart-healthy flavonoids. When enjoyed in moderation, frozen chocolate strawberries offer a satisfying treat that feels indulgent but also brings nutritional goodness to your dessert plate.
Embrace the sweet bliss of crafting your own frozen chocolate strawberries-each bite is a mini celebration of flavor, texture, and pure happiness!
Wrapping Up
As the last bite of your frozen chocolate strawberry melts into a blissful harmony of rich cocoa and juicy fruit, you’ll realize that this simple treat is more than just a dessert-it’s a celebration of flavor and texture that dances on your taste buds. Whether you’re crafting these delightful morsels for a special occasion or a quiet moment of self-indulgence, the magic lies in the perfect balance between sweetness, chill, and freshness. So next time you crave something cool and decadent, remember that with just a few easy steps, you can create your own sweet bliss right in your kitchen-ready to be savored one luscious bite at a time.

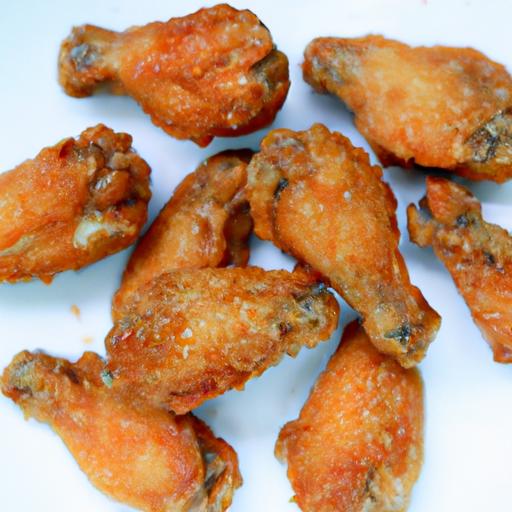
Crispy and easy frozen chicken wings are a game changer when it comes to quick cravings and irresistibly crunchy snacks. the secret to perfect wings lies not just in the air fryer itself, but in selecting the right wings and mastering a few clever seasoning and cooking tricks. Whether you’re hosting a casual gathering or simply want a flavorful, juicy bite at home, these tips will have your wings crisped to golden perfection every time.
Prep and Cook Time
- Readiness: 10 minutes
- Cook Time: 25-30 minutes
- Total Time: 35-40 minutes
Yield
Serves 4 as an appetizer or snack
Difficulty Level
Easy – beginner friendly with straightforward steps
Ingredients
- 2 pounds frozen chicken wings, separated into flats and drumettes
- 1 tablespoon baking powder (aluminum-free)
- 1 teaspoon kosher salt
- 1 teaspoon garlic powder
- 1/2 teaspoon smoked paprika
- 1/2 teaspoon freshly ground black pepper
- 1 tablespoon olive oil or avocado oil
- Optional: chili flakes or cayenne pepper for heat
instructions
- Preheat your air fryer to 400°F (200°C). This ensures immediate crisping once wings hit the basket.
- Pat dry the frozen wings with paper towels. Removing excess moisture is key to crispiness even when starting from frozen.
- In a large bowl, combine baking powder, kosher salt, garlic powder, smoked paprika, black pepper, and optional spices. baking powder helps draw out moisture and create that coveted golden crust.
- Toss wings with the seasoning mix and olive oil until each piece is lightly coated, ensuring even seasoning.
- Arrange the wings in a single layer in the air fryer basket,making sure they don’t overlap – overcrowding will steam them,ruining crispiness.
- cook for 25-30 minutes, flipping wings halfway through. Watch for a uniform golden-brown finish and check internal temperature hits 165°F (74°C).
- Once cooked, transfer to a wire rack for a few minutes to maintain crisp texture and allow excess steam to escape.
- Serve instantly with your favorite dipping sauces or toss in buffalo sauce for that classic wing experience.
Tips for Success
- Choose wings labeled “individually frozen” when possible to prevent clumping and easy portioning.
- Aluminum-free baking powder is crucial-it prevents metallic flavors and helps crisp without bitterness.
- For extra crunch,increase air fryer temperature to 425°F in the last 3 minutes-but watch closely to avoid burning.
- Don’t skip the pat dry step! Removing moisture from frozen wings before seasoning is essential to achieving truly crispy skin.
- Air fryer models vary: Always check your wings for doneness and crispiness a few minutes before the timer ends.
- Make-ahead option: Season your wings and freeze them on a baking sheet in a single layer. Store in a bag, then air fry straight from frozen for convenience.
Serving Suggestions
Serve these crispy and easy frozen chicken wings with a cool ranch or blue cheese dip to balance the heat,and garnish with freshly chopped parsley or green onions for a pop of color. Pair with crunchy celery and carrot sticks for a classic combo. For a party-ready platter, add lemon wedges and sprinkle flaky sea salt over the wings just before serving for an extra burst of flavor.
| Nutrient | Amount (per serving) |
|---|---|
| Calories | 280 kcal |
| Protein | 22 g |
| Carbohydrates | 1 g |
| Fat | 20 g |
mastering the art of crispy and easy frozen chicken wings in the air fryer elevates your game night, family dinner, or snacking routine to irresistible new heights. For an inspired twist, check out our ultimate homemade buffalo sauce recipe to toss your wings in after cooking. Ready for more culinary wisdom? Delve into Food Network’s expert guide on air frying here to expand your kitchen skills.

Q&A
Q&A: crispy & Easy – how to Cook Frozen Chicken Wings in an Air Fryer
Q1: Can I cook frozen chicken wings directly in the air fryer without thawing?
Absolutely! One of the biggest perks of air fryers is their ability to transform frozen wings into crispy delights without any defrosting.Just pop them in, set the temperature, and let the hot circulating air do the magic.
Q2: what temperature and cooking time work best for frozen chicken wings?
for golden, crispy wings straight from the freezer, preheat your air fryer to 400°F (about 200°C). Cook the wings for 25-30 minutes, flipping or shaking the basket halfway through to ensure even crispiness on all sides.
Q3: How do I make sure my wings come out crispy and not soggy?
Patience and airflow are key! don’t overcrowd the basket-give each wing enough breathing room. Also, spraying a light mist of oil on the wings before cooking helps achieve that coveted crispy skin.
Q4: Should I season the wings before or after air frying?
For frozen wings, it’s best to season after cooking. The exterior is frequently enough a bit icy or wet, which can prevent spices from sticking. Once crispy, toss your wings in your favorite sauce or seasoning blend for maximum flavor impact.
Q5: Can I cook breaded wings from frozen in the air fryer, and will they stay crispy?
Yes! Breaded frozen wings work wonderfully in the air fryer. Just be mindful to shake the basket a few times during cooking so the breading doesn’t clump and stays nice and crunchy.
Q6: Is there a way to prevent smoke or splatter when cooking wings?
If your wings have skin-on fat or are notably greasy, add a small amount of water (about 1 tablespoon) to the bottom of the air fryer drawer to prevent fat from smoking. Also, cleaning your air fryer regularly helps reduce any lingering smoke from old grease spots.
Q7: Can I air fry frozen wings with sauce already on them?
If the wings are sauced and frozen, cooking times might need to be adjusted slightly longer to ensure proper heating.Be aware that sugary sauces can sometimes burn at high temps, so it might help to add sticky sauces after crisping the wings.
Q8: What’s a foolproof dipping sauce pairing for crispy air-fried wings?
Classic Buffalo, tangy honey garlic, or creamy ranch are always winners. The crisp texture of air-fried wings contrasts beautifully with bold, flavorful dips-ready to elevate your snacking game!
Ready to revolutionize your wing nights? With just a few simple tweaks, your air fryer can turn frozen chicken wings into a crispy, mouthwatering masterpiece-no mess, no fuss, just pure deliciousness.
Final Thoughts
Whether you’re whipping up a last-minute snack or planning a game day feast,cooking frozen chicken wings in an air fryer is your shortcut to crispy,juicy perfection without the hassle. With just a few simple steps and minimal cleanup, you can transform a frozen pack of wings into golden bites bursting with flavor. so next time hunger strikes, skip the wait-your air fryer is ready to deliver wings that are effortlessly flavorful, every single time. Happy cooking!
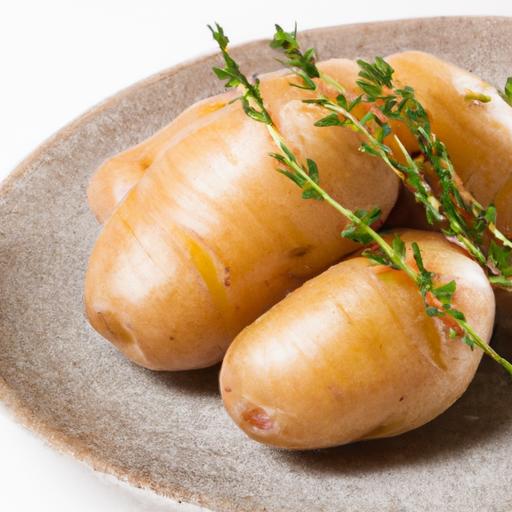
Unlock flavor begins with selecting the perfect potatoes, the foundation for creamy roasted garlic smashed potatoes that are bursting with rich, golden garlic essence. For this beloved comfort dish, the ideal potato choice transforms simple ingredients into a luscious, textured masterpiece-one bite reveals crispy edges and melting centers infused with deep roasted garlic aroma.
Prep and cook Time
- Preparation: 15 minutes
- Roasting: 40 minutes
- Total Time: 55 minutes
Yield
Serves 4-6 as a side
Difficulty Level
Easy to Medium – perfect for home cooks eager to master simple roasting and smashing techniques
Ingredients
- 2 pounds Yukon Gold potatoes, washed and scrubbed (perfect for creamy texture and delicate skin)
- 1 whole bulb of garlic, cloves separated and peeled
- 3 tablespoons olive oil, divided
- 3 tablespoons unsalted butter, melted
- Salt, to taste (approximately 1½ teaspoons)
- Freshly ground black pepper, to taste
- 2 tablespoons fresh rosemary, finely chopped (optional, for aromatic herb notes)
- 1/3 cup grated Parmesan cheese (optional, for a savory finish)
- 2 tablespoons chopped fresh parsley (for garnish)
instructions
- Preheat your oven to 400°F (200°C). Place the whole garlic bulb on a piece of foil, drizzle with 1 tablespoon olive oil, wrap tightly, and roast for 30-40 minutes untill cloves are golden and soft. this step unlocks the garlic’s deep, mellow sweetness.
- While the garlic roasts, prepare the potatoes: Boil the Yukon Golds whole in salted water for 20 minutes or until fork-tender. Drain well and allow to steam-dry for 5 minutes to remove excess moisture.
- Place the drained potatoes on a baking sheet lined with parchment paper. Drizzle with the remaining 2 tablespoons olive oil and generously season with salt and black pepper.
- Using a potato masher or sturdy flat bottom of a glass, gently press down on each potato until it’s about ½-inch thick. Take care not to completely mash; you want a balance of smooth interior and crisp edges.
- Squeeze the roasted garlic cloves out of the bulb and gently mash them with a fork. Toss the smashed garlic and melted butter together, then brush or drizzle this fragrant mixture over the smashed potatoes, coating evenly.
- Scatter fresh rosemary evenly over the potatoes, adding an earthy herbal depth that complements the roasted garlic beautifully.
- Bake in the preheated oven for 20-25 minutes, until potatoes develop golden brown, crispy edges with a tender, creamy core.
- If desired, sprinkle grated Parmesan in the last 5 minutes of baking for melty, savory richness.
- Remove from oven and garnish with chopped parsley, adding a fresh, vibrant touch and eye-catching color.
- Serve immediately, appreciating the crispy-smash texture paired with that unforgettable roasted garlic flavor.
Tips for Success
- Choosing Yukon Gold potatoes ensures creaminess inside without mealy dryness; feel free to experiment with red potatoes for a slightly firmer bite.
- Don’t skimp on roasting the garlic whole-this slow caramelization is key to unlocking mellow and complex garlic notes that raw garlic can’t match.
- When boiling potatoes, resist overcooking; perfectly tender potatoes hold shape when smashed and crisp beautifully.
- For extra depth,brush potatoes with a mix of melted butter and garlic oil before baking; substitute butter with ghee for a nuttier nuance.
- Make-ahead tip: You can partially roast and smash potatoes ahead,then finish baking just before serving for convenience.
Serving Suggestions
These creamy roasted garlic smashed potatoes are a showstopper beside roasted meats or grilled vegetables. For an elegant touch, plate with a dollop of sour cream or crème fraîche and a sprinkle of smoked paprika. Pair alongside pan-seared salmon or herb-roasted chicken for a balanced and hearty meal. Fresh green beans tossed with lemon zest and toasted almonds complement the rich garlic notes perfectly.

| Nutrient | Per Serving |
|---|---|
| Calories | 210 |
| Protein | 4g |
| Carbohydrates | 28g |
| Fat | 8g |
For those wanting to explore more creative sides featuring roasted garlic, check out our Roasted Garlic Mashed sweet Potatoes recipe. Learn to enhance natural flavors with proper techniques.
For detailed scientific insights on the chemical transformations during garlic roasting, visit ScienceDaily’s garlic roasting article.
Q&A
Q&A: Unlock Flavor – How to Make Roasted Garlic Smashed Potatoes
Q1: What makes roasted garlic smashed potatoes different from regular mashed potatoes?
A1: Unlike traditional mashed potatoes that tend to be creamy and smooth, roasted garlic smashed potatoes strike the perfect balance between crispy and tender. The potatoes are boiled until soft, gently smashed to create delightful nooks and crannies, then roasted to a golden crisp with mellow, caramelized roasted garlic infusing every bite. It’s texture and flavor playing a savory symphony on your palate.
Q2: Why roast the garlic instead of just adding raw garlic?
A2: Roasting garlic transforms its sharp, pungent bite into a sweet, nutty, and buttery flavor that blends beautifully with potatoes. This mellow depth elevates the dish beyond what raw garlic could achieve, lending a warm, aromatic richness without overwhelming your taste buds.
Q3: Which type of potatoes work best for smashed potatoes?
A3: Small to medium-sized potatoes with thin skins, like baby Yukon Gold or red potatoes, are ideal. They hold their shape well, have creamy interiors, and crisp up nicely when roasted. Their tender skin also adds a lovely texture contrast after smashing.
Q4: What are key tips to getting the perfect crispiness on smashed potatoes?
A4: First, boil the potatoes just until fork-tender but not falling apart.After smashing, don’t overcrowd the baking sheet-give each piece room to roast evenly. Drizzle enough oil (olive or avocado) to coat them thoroughly, and roast at a high temperature (around 425°F/220°C) to achieve that irresistible golden crust.
Q5: Can I customize the flavor beyond roasted garlic?
A5: Absolutely! While roasted garlic is the star, smashed potatoes are a versatile canvas. Try tossing in fresh herbs like rosemary, thyme, or chives post-roasting, sprinkle with parmesan or smoked paprika, or finish with a drizzle of lemon-infused olive oil for an extra zing.
Q6: How do I serve these roasted garlic smashed potatoes?
A6: Serve hot and fresh, right out of the oven as a mouthwatering side dish to grilled meats, roasted vegetables, or a fresh green salad. Their crispy edges and soft centers make every bite a delightful contrast,perfect for family dinners or cozy gatherings.
Q7: Any tricks for making this dish ahead of time?
A7: You can boil the potatoes and roast the garlic a day ahead, storing them separately in the fridge. When ready to serve, reheat the potatoes on a baking sheet and smash before a final quick roast to crisp up – this keeps them fresh and flavorful without losing their signature texture.
Unlock powerful flavor with this simple technique, and transform humble potatoes into a show-stopping side that everyone will crave!
The Conclusion
As the aroma of roasted garlic mingles with buttery, fluffy potatoes, you’ve unlocked a flavor combination that transforms a simple side into an unforgettable dish. whether served alongside a hearty roast or enjoyed on its own, these roasted garlic smashed potatoes invite you to savor every bite, celebrating the magic that happens when humble ingredients meet a touch of culinary creativity. So next time you’re craving comfort with a flavorful twist, remember: a little roasting, smashing, and seasoning is all it takes to turn your potatoes into a star-worthy experience. Happy cooking-and even happier eating!
savor the Kick: How to Make shrimp Tacos with Spicy mayo is a vibrant celebration of bold flavors and fresh textures that brings coastal Mexican street food right to your kitchen. The succulent shrimp, kissed with smoky spices, combined with a luscious, zesty mayo, creates a harmony that dances on the palate. Originating from the sunny shores of Baja california, these tacos have won hearts worldwide for their bright taste and effortless appeal. Whether it’s your first time or you’re refining your technique, this recipe guides you through every step to craft unforgettable shrimp tacos bursting with a flavorful punch.
Prep and Cook Time
- Preparation: 15 minutes
- Cooking: 10 minutes
- Total Time: 25 minutes
Yield
serves 4 generous shrimp tacos
Difficulty Level
Easy to Medium – Perfect for weeknight dinners or casual gatherings
Ingredients
- For the Shrimp:
- 1 lb large shrimp (16-20 count), peeled and deveined
- 1 tbsp olive oil
- 1 tsp smoked paprika
- 1/2 tsp chili powder
- 1/4 tsp cumin
- 1/4 tsp garlic powder
- Salt and freshly ground black pepper, to taste
- For the Spicy Mayo:
- 1/2 cup mayonnaise (preferably homemade or high-quality)
- 1-2 tbsp sriracha sauce (adjust for heat preference)
- 1 tsp fresh lime juice
- 1/2 tsp smoked paprika
- 1/4 tsp garlic powder
- Pinch of salt
- for the Tacos:
- 8 small corn tortillas
- 1 cup shredded green cabbage
- 1/4 cup fresh cilantro leaves
- 1 avocado, thinly sliced
- Fresh lime wedges, for serving
- Optional: pickled red onions or jalapeño slices
Instructions
- Prepare the shrimp. In a medium bowl, toss the shrimp with olive oil, smoked paprika, chili powder, cumin, garlic powder, salt, and pepper. Ensure each piece is evenly coated for maximum flavor.
- Make the spicy mayo sauce. In a small bowl, whisk together mayonnaise, sriracha, lime juice, smoked paprika, garlic powder, and a pinch of salt. Taste and adjust the heat level or acidity to your liking. Chill until ready to serve.
- Cook the shrimp. Heat a large non-stick skillet over medium-high heat. Add the shrimp in a single layer and sauté for about 2-3 minutes per side, until pink and opaque. Avoid overcrowding for perfect sear and texture.
- Warm the tortillas. Using a dry skillet or griddle over medium heat, warm tortillas one at a time until pliable and slightly charred – about 30 seconds per side.Keep them wrapped in a clean kitchen towel to stay soft.
- Assemble your tacos. Spread a generous smear of spicy mayo on each tortilla. Layer shredded cabbage,followed by 4-5 juicy shrimp.Top with avocado slices and fresh cilantro. Add pickled red onions or jalapeños for extra pop if desired.
- Finish and serve. Garnish with a spritz of fresh lime juice and serve immediately while warm for the ultimate contrast of creamy, spicy, and crisp textures.
Tips for Success
- Choosing shrimp: Opt for wild-caught or sustainably farmed large shrimp for the best texture and flavor. Fresh or properly thawed frozen shrimp work equally well.
- Make ahead spicy mayo: This sauce can be made up to 2 days in advance and refrigerated, allowing the flavors to deepen for an even zestier punch.
- extra crunch: Add thinly sliced radishes or toasted pepitas as toppings to introduce satisfying texture contrasts.
- Heat level control: Customize the spicy mayo by swapping sriracha with chipotle mayo or adding a few dashes of hot sauce.
- Storage Tips: Keep cooked shrimp and tacos components separate if prepping early; assemble just before serving to maintain freshness and prevent sogginess.
Serving Suggestions
Present your shrimp tacos on a rustic wooden board lined with parchment for a warm, inviting feel. A colorful side of charred street corn (elote) or a simple quinoa salad complements the tacos beautifully. Fresh lime wedges and an icy margarita or sparkling water with cucumber slices elevate the experience even more.
For garnish, sprinkle chopped cilantro and a few crumbles of queso fresco or cotija cheese for that authentic Baja flair. When plating, use small bowls for sauces and toppings, inviting guests to build their own taco masterpiece.

| Nutrient | Per Serving (2 tacos) |
|---|---|
| Calories | 420 |
| Protein | 28g |
| Carbohydrates | 30g |
| Fat | 18g |
For more seafood taco inspiration, check out our Grilled Fish Taco Recipe. Curious about the health benefits of shrimp? The Bon Appétit guide to shrimp nutrition is an excellent read.
Q&A
Q&A: Savor the Kick – How to Make Shrimp tacos with Spicy Mayo
Q1: What makes shrimp tacos with spicy mayo such a crowd-pleaser?
A1: Shrimp tacos are a delightful marriage of sweet, tender seafood and bold, vibrant flavors.When paired with a creamy, spicy mayo, thay hit the perfect balance of heat and smoothness, awakening your taste buds with every bite. The combination is fresh, flavorful, and irresistibly fun to eat!
Q2: How do I prepare the shrimp for these tacos to ensure maximum flavor and juiciness?
A2: Start with fresh or thawed shrimp, peeled and deveined. Marinate them briefly in a zesty blend of lime juice, garlic, chili powder, and a pinch of salt. Then, sear them quickly in a hot skillet until they’re just opaque and slightly caramelized. This method locks in moisture while layering on a smokey,spiced kick.
Q3: What’s the secret to crafting the perfect spicy mayo for shrimp tacos?
A3: The magic lies in balance. Combine creamy mayonnaise with a splash of lime juice, a dash of smoked paprika, and a generous squeeze of sriracha or your favourite hot sauce.Adjust the heat to your liking, then blend until silky smooth. The lime brightens the flavor while the heat gives your tacos a lively punch.
Q4: Which toppings truly elevate shrimp tacos beyond the ordinary?
A4: Keep it fresh and vibrant: think crunchy shredded cabbage or radishes, zesty pickled red onions, and a sprinkle of fresh cilantro. A wedge of lime for squeezing adds a burst of citrusy brightness, tying the spicy mayo and shrimp together into a harmonious bite.
Q5: Can I make shrimp tacos with spicy mayo ahead of time?
A5: Absolutely-but timing is everything. You can prepare the spicy mayo and toppings in advance, storing them separately in airtight containers. cook the shrimp just before serving to maintain their juicy texture. Assemble the tacos right before eating to keep the tortillas warm and prevent sogginess.Q6: are shrimp tacos with spicy mayo adaptable for dietary preferences or restrictions?
A6: Certainly! Use gluten-free corn tortillas for a gluten-free option. Swap mayonnaise with vegan mayo for plant-based diets, and choose your preferred hot sauce to control the spice level. The recipe is flexible enough to accommodate many tastes while keeping that signature kick intact.Q7: What kind of tortillas work best for these shrimp tacos?
A7: Soft, warm corn tortillas are customary and add authentic flavor, but flour tortillas work beautifully if you prefer a pillowy texture. Lightly warming the tortillas on a skillet before assembling ensures they’re pliable and a perfect vessel for the spicy shrimp and creamy mayo.
Craving that fiery fusion of flavors now? Roll up your sleeves, gather your ingredients, and savor the kick of shrimp tacos with spicy mayo-your taste buds will thank you!
Wrapping Up
As you wrap up your culinary adventure, remember that the magic of shrimp tacos lies not just in the heat, but in the harmonious dance of flavors-the tender shrimp, the creamy, spicy mayo, and the fresh, crisp toppings all coming together to create a bite that sings. Whether you’re sharing them at a casual gathering or savoring a solo feast, these shrimp tacos promise a burst of zest that awakens the palate and leaves you craving more. So go ahead, embrace the kick, and let every taco tell a story of spice, texture, and irresistible flavor. Your taste buds will thank you.
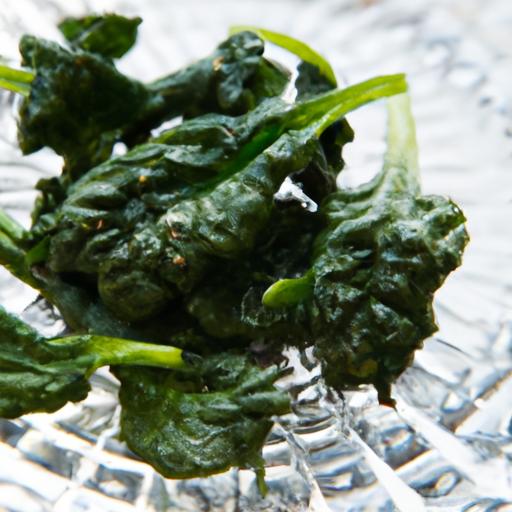
]]>Crispy & Healthy: How to Make air fryer Spinach Chips
Crispy & Healthy: How to Make Air Fryer Spinach Chips is a game-changer for anyone craving a light, nourishing snack bursting with vibrant, green flavor. Stemming from a desire to reinvent traditional chips, these spinach chips capture the essence of fresh greens with an irresistibly crunchy texture.Using an air fryer not only locks in the crispiness but also keeps the calorie count low, making this recipe perfect for health-conscious food lovers.
Prep and Cook Time
- Preparation: 10 minutes
- Cooking: 12 minutes
- Total Time: 22 minutes
Yield
About 2 servings (approx. 40 chips)
Difficulty level
Easy
Ingredients
- 4 cups fresh spinach leaves, thoroughly washed and dried
- 1 tablespoon olive oil or avocado oil
- 1/2 teaspoon smoked paprika
- 1/4 teaspoon garlic powder
- 1/4 teaspoon sea salt, or to taste
- optional: A pinch of black pepper or cayenne for a subtle kick
Choosing the Perfect Spinach Leaves for Maximum Crispiness
When aiming for flawlessly crispy spinach chips, selecting the right spinach leaves is essential. Opt for young, baby spinach leaves-they have a tender, thinner structure which allows them to crisp quickly without burning.Avoid the big, mature leaves as they are thicker and contain more moisture, leading to soggy chips. Always pat the leaves dry with paper towels or use a salad spinner; any residual water will steam during cooking and diminish crispiness. The fresher and greener the leaves, the more vibrant and appetizing your chips will look once air fried.
Mastering the Seasoning Blend to Elevate Flavor Without Extra Calories
Creating a seasoning mix that complements spinach’s mild earthiness is key to elevating these chips. Use smoked paprika to add warmth and subtle smokiness, balanced by a hint of garlic powder for savory depth. Sea salt enhances natural flavors without adding unnecessary sodium when used sparingly. For extra flare, add a pinch of cayenne or black pepper to bring out a subtle heat that wakes up the palate-all without adding calories. The olive oil helps the seasonings adhere perfectly, guaranteeing each chip is packed with flavor.
Step by Step Guide to Air Frying Spinach Chips for Perfect Texture
- Preheat your air fryer to 350°F (175°C) for 3 minutes. this ensures even crisping from the start.
- in a large bowl, gently toss the spinach leaves with the olive oil, making sure every leaf gets a light, even coating.
- Sprinkle the paprika, garlic powder, and sea salt over the leaves.Use your hands or a spatula to toss and distribute the seasoning evenly.
- Arrange the leaves in a single layer inside the air fryer basket. avoid overcrowding so air can circulate freely for maximum crispiness.
- Cook for 8 minutes, then carefully shake the basket or use tongs to turn the chips. Continue cooking for an additional 4 minutes or until the edges are crisp and slightly golden. Keep a close eye to prevent burning.
- Remove immediately to a cooling rack or plate lined with paper towels to maintain crunchy texture and prevent condensation.
Expert Tips for Storing and Serving Your Homemade Spinach Chips
To keep your spinach chips crispy long after cooking, cool them entirely before storing in an airtight container. Place a desiccant packet or a few sheets of paper towel inside the container to absorb moisture. Store at room temperature and enjoy within 1-2 days for peak freshness.
Serve your chips as a guilt-free snack or a vibrant garnish atop salads, soups, or grilled dishes. For extra appeal, sprinkle with a dash of freshly grated Parmesan or a squeeze of lemon to brighten the flavor. Pair with a tangy yogurt dip or homemade hummus to create a balanced snack experience that’s both crunchy and refreshing.
Chef’s Notes
- variations: Try adding nutritional yeast for a cheesy flavor or a sprinkle of cumin for an earthy twist.
- Substitutions: Kale or Swiss chard leaves can be used but might require a slightly longer air frying time.
- Common issues: If chips turn out soggy, ensure leaves are thoroughly dried and avoid layered overcrowding in the basket.
- Make-ahead: Chips are best fresh but can be lightly reheated in the air fryer for 2 minutes to regain crispness.
Serving Suggestions
Arrange these spinach chips in a gorgeous bowl garnished with a sprinkle of flaky sea salt and freshly cracked black pepper. Complement with a side of tzatziki or roasted red pepper dip to amplify their irresistible crisp bite.

| Nutrient | Per Serving |
|---|---|
| Calories | 90 kcal |
| Protein | 3 g |
| Carbohydrates | 5 g |
| Fat | 7 g |
For more healthy snacking recipes, check out our article on Crispy Kale Chips. additionally, learn about the nutritional benefits of spinach on the Healthline Nutrition page.
Q&A
Q&A: Crispy & Healthy – How to Make Air Fryer Spinach Chips
Q1: Why choose spinach chips over regular potato chips?
A: Spinach chips pack a nutritional punch with vitamins A, C, iron, and fiber, all while being low in calories and carbs. Unlike potato chips, which frequently enough come drenched in oil and salt, spinach chips deliver crispy satisfaction with a guilt-free crunch.
Q2: Can spinach really get crispy in an air fryer?
A: Absolutely! The hot circulating air in an air fryer removes moisture quickly,helping those delicate spinach leaves turn irresistibly crisp without turning limp or soggy. It’s like magic, but healthier.
Q3: What’s the secret to perfect air fryer spinach chips?
A: Key factors include: using fresh, dry spinach leaves (no moisture means better crispiness); tossing them lightly in a small amount of oil to enhance texture and flavor; spacing them out evenly in the air fryer basket for optimal airflow; and keeping a watchful eye during cooking to avoid burning.
Q4: How long does it typically take to make spinach chips in an air fryer?
A: Around 5-7 minutes at 350°F (175°C). Time varies slightly depending on your air fryer model and the thickness of the leaves.Start checking at 4 minutes to prevent scorching and remove once golden and crisp.
Q5: can I add seasonings to jazz up my spinach chips?
A: Definitely! spinach chips are a versatile blank canvas. sprinkle with garlic powder, smoked paprika, nutritional yeast, chili flakes, or even a pinch of parmesan for a savory twist. The air fryer will amplify those flavors beautifully.
Q6: Are there any tips to store leftover spinach chips?
A: These chips are best enjoyed fresh,but if you must stash leftovers,cool them completely and store in an airtight container at room temperature.They might lose some crunch, so reheating in the air fryer for a minute or two can revive their crisp glory.
Q7: Can this method work for othre leafy greens?
A: Yes! Kale,Swiss chard,or even beet greens can transform into appetizing air-fried chips using the same technique. Just adjust cooking times slightly depending on leaf thickness.Q8: Any advice for beginners trying air fryer spinach chips for the frist time?
A: Keep it simple and be patient. Don’t overcrowd the basket,allow enough airflow,and experiment with seasoning to find your personal perfect crunch.Once you nail it, air fryer spinach chips become your go-to snack for a crispy, healthy delight!
Key Takeaways
Whether you’re craving a crunchy snack or looking for a nutritious side, air fryer spinach chips offer the perfect balance of crispy delight and wholesome goodness. With just a handful of ingredients and a little air fryer magic, you can transform humble spinach leaves into a guilt-free treat that’s bursting with flavor and texture. So next time you want to snack smart without sacrificing satisfaction, give these vibrant green chips a try-you might just find your new favorite way to enjoy one of nature’s most nutrient-packed greens. Happy air frying!
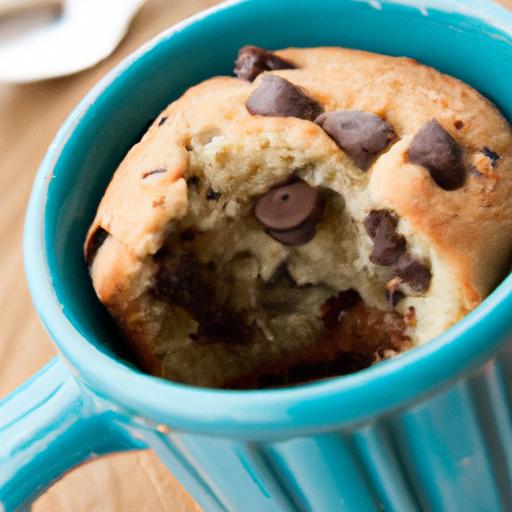
Quick Delight: How to Make a Perfect Chocolate Chip Mug Cake begins with selecting the very best ingredients to bring out remarkable moisture and flavor in every bite. Whether you’re craving a late-night snack or a spontaneous dessert, choosing quality components is the secret to creating a luscious, bakery-worthy mug cake at the push of a button.
Choosing the Ideal Ingredients for a Moist and Flavorful Mug Cake
The foundation of any unforgettable chocolate chip mug cake lies in the ingredients you use. All-purpose flour is essential for structure,but opting for a light,finely sifted variety helps maintain a delicate crumb. To guarantee moisture, incorporate a blend of whole milk and a small amount of vegetable oil or melted butter, which enrich the texture far beyond what water or milk alone can achieve.
When it comes to sweetness and depth, brown sugar is your ally. Its molasses content adds tenderness and a slight caramel undertone, perfectly complementing the rich semi-sweet chocolate chips. For a touch of balance and complexity,a small pinch of fine sea salt will amplify flavors,making every bite enchantingly satisfying.
Fresh eggs or a well-beaten egg yolk bind all the elements effortlessly, while a pinch of baking powder ensures ideal lift without over-expansion, preventing the mug cake from drying out.
Mastering the Microwave Technique for Even Baking and Perfect Texture
Mastering the microwave technique is key to achieving a perfect mug cake. Start by using a microwave-safe mug with a wide mouth and smooth sides-it allows heat to penetrate evenly.Mix ingredients thoroughly to create a homogenous batter, ensuring your chocolate chips are evenly distributed.
Microwaves cook unevenly by nature, so consider these simple yet effective techniques: microwave in short bursts of 30 seconds, checking in between. This practice avoids overcooking edges while the center remains underdone. Rotate the mug if your microwave lacks a turntable. Once you see the mug cake rise and a toothpick inserted comes out slightly moist with crumbs, it’s ready.
remember, residual heat continues to cook the cake for a few moments off the microwave-it’s best to let it rest before indulging.
Creative Twists to Elevate Your Chocolate Chip Mug Cake Experience
Innovate by mixing in a teaspoon of finely chopped toasted nuts for added crunch or swirl in a spoonful of creamy peanut butter just before microwaving, enhancing indulgence. For a flavor uplift, sprinkle a pinch of cinnamon or espresso powder to intensify the chocolate notes.
fancy a fruity surprise? Add a few fresh raspberries or chopped dried cherries on top of the batter before cooking-they burst with brightness against the chocolate’s richness. Alternatively, replace classic chocolate chips with a mix of white chocolate and butterscotch for a luxurious twist.
Troubleshooting Common Mug Cake Mishaps for Consistent Success
If your mug cake turns out dry, it likely cooked too long or lacked sufficient fat. Next time, reduce microwave time in 10-second increments and verify ingredient proportions-too much flour or sugar can cause dryness. A slightly undercooked center signals perfection; it will set as it cools.
Dense or rubbery textures often stem from overmixing batter, triggering gluten progress. Mix gently until ingredients just combine to keep the crumb tender. In contrast, a flat cake points to expired baking powder or insufficient leavening; always work with fresh baking agents to ensure rise and fluffiness.
for uneven baking, check your microwave’s wattage and wattage settings. Adjust cooking times accordingly and use a microwave-safe plate underneath to encourage even heat distribution.
Prep and Cook Time
- Preparation: 5 minutes
- Cooking: 60-90 seconds (microwave)
- Total Time: Approximately 7 minutes
Yield
Serves: 1 single-serving mug cake
Difficulty Level
Easy – Perfect for beginners and quick cravings alike.
Ingredients
- 4 tbsp all-purpose flour, sifted
- 2 tbsp brown sugar, packed
- 1/4 tsp baking powder
- Pinch of fine sea salt
- 3 tbsp whole milk
- 1 tbsp vegetable oil or melted unsalted butter
- 1/4 tsp pure vanilla extract
- 1 large egg yolk
- 2 tbsp semi-sweet chocolate chips
Instructions
- In a microwave-safe mug, combine flour, brown sugar, baking powder, and sea salt. Mix thoroughly with a fork or small whisk.
- Add milk, vegetable oil, vanilla extract, and egg yolk. Whisk until smooth and fully incorporated, ensuring no lumps remain.
- Fold in chocolate chips, reserving a few to sprinkle on top for an attractive finish.
- Sprinkle remaining chocolate chips evenly over the batter’s surface.
- Microwave on high for 60 seconds. Check for doneness by inserting a toothpick in the center. If it comes out wet, continue microwaving in 10-second intervals.
- Allow the mug cake to rest for 2 minutes. This lets heat finish the cooking process and the cake to set,while keeping it moist.
- Serve immediately with your favourite topping or enjoy directly from the mug.
Chef’s Notes
- Substitute almond milk or oat milk for dairy to make this dish dairy-free.
- for a richer texture, use full-fat coconut milk instead of whole milk.
- Try adding 1 tbsp of instant espresso powder for a mocha twist-or a pinch of cayenne for subtle heat.
- For a vegan version,replace egg yolk with 1 tbsp unsweetened applesauce or mashed banana.
- If the mug cake rises too much and spills, choose a larger mug next time and reduce baking powder slightly.
- Make ahead: Mix dry ingredients in a sachet; add wet ingredients fresh when ready to cook.
Serving Suggestions
Enhance your mug cake experience by topping it with a dollop of whipped cream or a scoop of vanilla ice cream. A drizzle of warm caramel sauce or a sprinkle of crushed nuts adds irresistible texture and indulgence. garnish with fresh mint leaves or a dusting of powdered sugar for a café-style presentation.
Pair your creation with a hot cup of espresso or a frothy cappuccino for a perfect cozy moment.

| Nutrient | Per Serving |
|---|---|
| Calories | 320 kcal |
| protein | 6 g |
| Carbohydrates | 42 g |
| Fat | 14 g |
For a deeper dive into quick and scrumptious microwave desserts, check out our collection of easy microwave dessert recipes. For scientific insights about microwave cooking technology and its impact on food texture, visit ScienceDirect’s food science articles.
Q&A
Q&A: Quick Delight – How to Make a Perfect Chocolate Chip mug Cake
Q1: What exactly is a chocolate chip mug cake?
A1: Imagine a warm, gooey chocolate chip cookie and a fluffy cake rolled into one, all baked in a mug in just a minute or two. That’s a chocolate chip mug cake-a single-serving dessert that’s quick, easy, and perfect when you crave something sweet but don’t want to wait or make a mess.
Q2: Why should I make a mug cake instead of a regular cake?
A2: Mug cakes are the superheroes of speedy sweets! They require minimal ingredients, little prep time, and no need for an oven. Plus,they satisfy your sweet tooth instantly,perfect for last-minute cravings or a quick treat without leftovers.
Q3: What are the basic ingredients for a chocolate chip mug cake?
A3: The magic lies in simplicity! Typically, you’ll need flour, sugar, baking powder, milk, oil (or melted butter), vanilla extract, and, of course, chocolate chips. All ingredients are whisked together directly in your favorite microwave-safe mug.
Q4: How do I ensure my mug cake turns out moist and fluffy?
A4: The secret is balance and mixing gently. Use the right amount of liquid to dry ingredients; don’t overmix-just enough to combine. And beware of overcooking! Microwave in short bursts and check for doneness to keep that tender crumb and melty chocolate goodness.Q5: Can I customize the flavor or add extras?
A5: Absolutely! Throw in a pinch of cinnamon for warmth,swap classic chocolate chips for white or dark chocolate,nuts for crunch,or even a dollop of peanut butter in the center for a gooey surprise. The mug cake world is your playground.
Q6: What microwave settings work best?
A6: Use full power but keep an eye on cooking times-usually between 60 to 90 seconds. As microwaves vary in strength, start with a shorter bake, then add more time if needed. The cake should spring back when touched lightly.
Q7: Any tips for serving and enjoying my mug cake?
A7: Serve it straight from the mug with a scoop of ice cream or a drizzle of caramel sauce. If you’re feeling fancy, dust some powdered sugar or add a few fresh berries. Enjoy it warm and fresh for that ultimate “quick delight” experience.
Q8: Is a chocolate chip mug cake suitable for dietary restrictions?
A8: The basic recipe can be adapted! Use gluten-free flour for gluten sensitivities, plant-based milk and oil for dairy-free needs, or sugar alternatives for lower-calorie versions. Mug cakes are flexible-just tailor the ingredients to your taste and needs.
With these tasty tips and tricks,your chocolate chip mug cake adventure will be nothing short of delightful. Ready, set, mug!
Closing Remarks
Whether you’re craving a speedy sweet treat or simply want to indulge without the fuss, mastering the chocolate chip mug cake is your golden ticket to instant delight.With just a handful of ingredients and a microwave, you can whip up a warm, melty masterpiece in minutes-no oven mitts or mixing bowls required. So next time the chocolate cravings hit, remember this quick recipe and treat yourself to a perfectly gooey, satisfying mug cake that proves good things really do come in small, speedy packages. Happy munching!
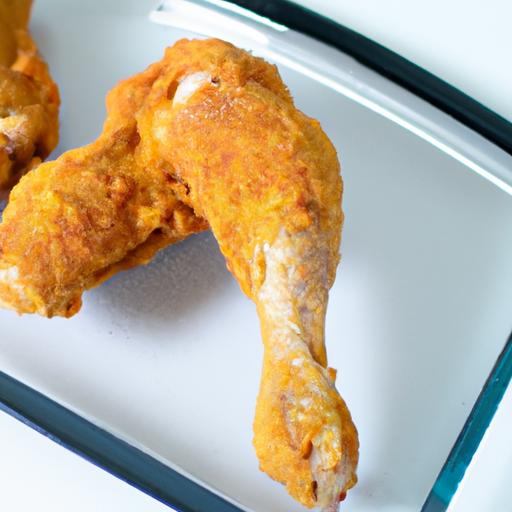
Crispy & Quick: How to Cook Frozen Chicken in Air Fryer
Crispy & Quick: How to Cook Frozen Chicken in Air Fryer is the ultimate game-changer for busy weeknights when time is short but you crave that perfectly golden, crunchy exterior paired with juicy, tender meat inside. Growing up,I often avoided preparing chicken from frozen because crispiness always seemed elusive,and uneven cooking too common. But mastering the right method transforms frozen chicken cuts into a mouthwatering meal with minimal effort and maximum satisfaction.This guide walks you through choosing the ideal cuts, fine-tuning your air fryer temperature and timing, seasoning like a pro, and troubleshooting common pitfalls so your chicken emerges irresistible every time.
Prep and Cook Time
- Readiness: 5 minutes
- Cooking: 20-30 minutes (depending on cut and thickness)
- Total Time: 25-35 minutes
Yield
Serves 4 people comfortably
Difficulty Level
Easy – perfect for beginners and seasoned cooks alike
Ingredients
- 1.5 lbs frozen chicken pieces (breasts, thighs, drumsticks, or wings)
- 1 cup all-purpose flour, sifted
- 1 teaspoon smoked paprika
- 1 teaspoon garlic powder
- 1 teaspoon onion powder
- ½ teaspoon cayenne pepper (optional for heat)
- 1 teaspoon kosher salt
- ½ teaspoon freshly cracked black pepper
- 2 large eggs, beaten
- 2 tablespoons olive oil or melted butter (for brushing)
- Cooking spray (optional, for extra crispiness)
Instructions
- Prepare the seasoning mixture: In a medium bowl, whisk together the flour, smoked paprika, garlic powder, onion powder, cayenne pepper, salt, and black pepper.
- Set up your dredging station: Pour beaten eggs into a shallow dish for easy dipping. This helps the seasoning cling to the chicken’s surface.
- Coat the frozen chicken: Dip each frozen chicken piece quickly into the beaten eggs, then roll them thoroughly in the flour mixture, gently pressing the coating to adhere well. You want an even, generous layer to maximize crispiness.
- Preheat your air fryer: Set to 400°F (205°C) and let it heat for about 3-5 minutes. Preheating ensures the chicken skin begins crisping right away.
- Arrange chicken carefully: lay coated chicken pieces in a single layer in the air fryer basket, leaving space between pieces for hot air circulation.
- Brush with oil: Lightly brush or spray olive oil onto the chicken to create that golden crunch.
- Cook in stages: Air fry for 10 minutes, flip the chicken, brush with oil again, then air fry for another 10-15 minutes. Smaller pieces like wings may require less time, while thick breasts need longer.
- Check doneness: Use an instant-read thermometer-internal temperature should reach 165°F (74°C) for safe consumption. For extra crispiness, add 2-3 minutes of cook time.
- rest and serve: Let the chicken rest for 5 minutes before serving to lock in juices and maximize tenderness.
Tips for Success: Elevate Your Air Fried Chicken
- choosing the right frozen chicken cuts is key.bone-in pieces retain moisture better and add flavor, but boneless cuts are quicker to cook and perfect for slicing into salads or wraps.
- Temperature matters: Consistently cooking at 400°F ensures that crispy crust while avoiding drying out the meat. Avoid overcrowding the basket; hot air needs room to circulate freely.
- Season boldly: Your flour mixture is your flavor base-don’t be shy with smoked paprika, garlic, and salt.For a twist, try adding dried herbs like thyme or rosemary.
- Troubleshooting tips: If your chicken isn’t crispy enough, increase the final cook time by a few minutes or sprinkle a touch more flour for added crunch. If the outside burns before the inside cooks through,reduce temperature by 10-15°F and extend the cooking time for even cooking.
- Make ahead: Prep the chicken by coating and store on a baking sheet wrapped in plastic wrap in the fridge for up to 4 hours before air frying.This helps the coating bind and enhances crispiness.
serving Suggestions
The versatility of this crispy air-fried chicken lets you pair it with a variety of sides. A fresh cabbage slaw or crunchy pickles add zesty contrast. serve with a drizzle of honey mustard or tangy buffalo sauce for dipping. Garnish with finely chopped parsley or a squeeze of lemon to brighten flavors. For a hearty approach, plate with creamy mashed potatoes or roasted vegetables seasoned with garlic and thyme.

| Nutrient | Per serving (4 servings) |
|---|---|
| Calories | 320 kcal |
| Protein | 35 g |
| Carbohydrates | 12 g |
| Fat | 10 g |
For more tips on perfecting your air fryer meals, check out The Ultimate Air Fryer Guide for Beginners. To learn more about the science behind air frying technique, visit Serious Eats.
Q&A
Q&A: crispy & Quick – How to Cook Frozen Chicken in an Air Fryer
Q1: Can I cook frozen chicken directly in the air fryer,or do I need to thaw it first?
A: Great news-no thawing required! One of the air fryer’s superpowers is its ability to cook frozen chicken straight from the freezer. The hot circulating air crisps up the outside while cooking the inside thoroughly, giving you juicy, tender chicken without the wait.Q2: What temperature and time should I set for cooking frozen chicken in the air fryer?
A: A sweet spot to aim for is usually 360°F (182°C) for about 20-25 minutes. thicker pieces like breasts may need a little extra time, while smaller items like nuggets cook faster. Always flip halfway to ensure even crispiness.Q3: how do I make sure the chicken is crispy and not soggy?
A: Pat your frozen chicken dry with a paper towel if it’s icy. Lightly coat with a bit of oil to encourage that golden crust.Also, don’t overcrowd the basket-air flow is key! Crisping comes from good air circulation and just the right heat.
Q4: Is it safe to cook chicken from frozen in the air fryer?
A: Absolutely! The air fryer’s rapid heat circulating surroundings cooks chicken safely all the way through. use a meat thermometer to check-internal temperature should reach 165°F (74°C) to ensure it’s perfectly cooked and safe to eat.
Q5: Can I season frozen chicken before air frying?
A: While seasoning frozen chicken can be tricky since the surface is icy, you can still toss it in spices or marinade after the first 5-10 minutes of cooking when the surface has thawed. Alternatively, toss the cooked chicken in your favourite sauce or seasoning right after cooking for a flavor boost.
Q6: What types of frozen chicken work best in the air fryer?
A: Whether it’s breaded nuggets, chicken tenders, thighs, or boneless breasts, the air fryer excels. Just adjust the cooking time depending on size and thickness. Breaded options come out especially crispy and satisfying.
Q7: Any tips for the crispiest air-fried frozen chicken?
A: Yes! For extra crunch, lightly spray with oil mid-cook.shake or flip to avoid soggy spots. Also, if you have time, sprinkle a bit of baking powder (not baking soda) on the skin or coating-it helps dry out the surface for amazing crispness.Q8: How do I reheat leftover air-fried frozen chicken?
A: To revive that crispy magic, pop leftovers back in the air fryer at 350°F (175°C) for 3-5 minutes. Say goodbye to soggy microwaved chicken and hello to freshly crisped bites.
With these tips, your journey to crispy, juicy, and quick frozen chicken perfection in the air fryer is just a few clicks away. Happy frying!
Final Thoughts
whether you’re racing against the clock or simply craving that perfect crispy bite, cooking frozen chicken in your air fryer is a game-changer. With minimal effort and maximum crunch, this method transforms a busy weeknight dinner into a crispy, flavorful triumph. So next time you reach for that frozen chicken, remember: your air fryer isn’t just a kitchen gadget-it’s a ticket to quick, flavorful meals that never compromise on taste. Happy cooking, and may your chicken always come out golden and irresistible!
Crispy Perfection begins with selecting the right chicken cuts that naturally lend themselves to a golden, crunchy crust and juicy interior. Whether your a fan of drumsticks, thighs, or classic wings, each piece offers a slightly different texture and cooking time, influencing the ultimate crispiness of your air-fried masterpiece. The secret lies in balancing moisture and surface area-cuts with skin on and a bit of fat underneath develop that irresistible crunch when properly air fried.
Choosing the Best Chicken Cuts for Ultimate Crispiness
Opt for bone-in, skin-on cuts such as chicken thighs, drumsticks, and wings. Their skin crisps beautifully, locking in flavorful juices beneath. While breasts can be crispy, they dry out easily; if you prefer breasts, consider butterflying or pounding them to even thickness and using a slightly shorter cooking time. For even crispier results, avoid overcrowding the air fryer basket to allow hot air to circulate freely around each piece.
mastering the Marinade and Seasoning for Flavorful Results
Marinating your chicken is essential to infuse tenderness and depth of flavor that peek through every crunchy bite. A simple but powerful blend combines buttermilk or yogurt with spices-think smoked paprika, garlic powder, onion powder, and cayenne for subtle heat. the acidity in buttermilk tenderizes while the spices develop complexity. Season liberally, but always balance salt and spices to your taste.
The Best marinade Tip:
Allow your chicken to marinate for at least 4 hours, or ideally overnight. This patience yields the moast flavorful, juicy interior that contrasts perfectly with the crispy exterior.
Optimal Temperature and Timing Strategies for Perfectly Fried Chicken
Setting your air fryer to 380°F (193°C) creates that critical high heat environment for crisping skin without overcooking the inside. Place your seasoned chicken in a single,spaced-out layer,and cook for 25-30 minutes,flipping halfway through for even browning. Use an instant-read thermometer to check for an internal temperature of 165°F (74°C) to ensure food safety.
Pro Tip: Spray a light mist of oil on the chicken skin or toss it in a coating of oil before air frying. This step promotes even browning and maximizes crunch.
Tips and Tricks to Maintain Crunchiness After Air Frying
The battle isn’t over once the air fryer beeps-keeping your crispy chicken crunchy is an art. Transfer cooked chicken to a wire rack set over a baking sheet. This lets air circulate and prevents sogginess from trapped steam. Avoid stacking pieces or covering them with foil, which traps moisture.
For best results,serve immediately. If you need to reheat leftovers, use the air fryer again at a lower temperature (320°F / 160°C) for a few minutes to refresh the crispiness without drying the meat out.
Prep and Cook Time
- Prep Time: 15 minutes plus 4 hours marination
- Cook Time: 25-30 minutes
Yield
Serves 4 hungry adults
Difficulty Level
Medium – requires marination and attention to timing
Ingredients
- 2 lbs chicken thighs, drumsticks, or wings, skin-on, bone-in
- 1 cup buttermilk (or plain yogurt for marinade)
- 1 tbsp smoked paprika
- 1 tsp garlic powder
- 1 tsp onion powder
- ½ tsp cayenne pepper (optional, for heat)
- 1 tsp salt
- ½ tsp black pepper
- 2 tbsp vegetable or avocado oil (for coating)
Instructions
- Marinate the chicken: In a large bowl, whisk together buttermilk, smoked paprika, garlic powder, onion powder, cayenne, salt, and pepper. Submerge chicken pieces in the marinade, cover, and refrigerate for at least 4 hours or overnight.
- Preheat the air fryer: Set to 380°F (193°C) and let it warm up for 3-5 minutes.
- Prepare the chicken: Remove chicken from marinade, shaking off excess buttermilk.Drizzle or brush oil evenly over each piece, ensuring the skin is lightly coated.
- Arrange chicken in the air fryer basket: Place pieces skin-side down initially, spacing them out so air circulates freely.
- Air fry for 12-15 minutes, then flip the pieces and continue cooking for another 12-15 minutes until skin is golden and internal temperature reads 165°F (74°C).
- Rest and drain: Transfer chicken to a wire rack over a baking sheet to rest for 5 minutes. This maintains crispness and allows juices to redistribute.
- Serve immediately with your favorite sides and garnishes, or follow reheating tips below for leftovers.
Chef’s Notes
- Experiment with dried herbs like thyme or oregano in the marinade for a fresh twist.
- If pressed for time,a speedy 1-hour marination still improves flavor & texture.
- Crispy skin depends on dry skin; pat chicken dry before oil coating if you skip marination.
- Use a digital thermometer for perfectly cooked chicken every time.
- Leftovers can be stored covered in the fridge and refreshed in the air fryer as described.
Serving Suggestions
Serve your crispy air-fried chicken on a rustic wooden board lined with parchment paper for a cozy, inviting presentation. Garnish with fresh chopped parsley, lemon wedges, or pickled jalapeños for a burst of brightness. Pair with creamy coleslaw, sweet potato fries, or a crisp garden salad to contrast the crunchy protein.

| Nutrient | Amount per serving |
|---|---|
| Calories | 320 kcal |
| Protein | 28 g |
| Carbohydrates | 2 g |
| Fat | 22 g |
For further seasoning inspiration, explore our guide on Top Air Fryer Spices to Try. For food safety standards,consult the USDA guidelines on safe minimum internal temperatures.
Q&A
Q&A: Crispy Perfection – How to Fry Chicken in an Air Fryer
Q1: What makes air-fried chicken different from traditional fried chicken?
A: Air-fried chicken achieves that crave-worthy crisp without drowning in oil. Instead of deep-frying, an air fryer circulates hot air around the chicken, creating a crunchy crust with a fraction of the fat. It’s a healthier twist that doesn’t skimp on flavor or texture.
Q2: How do I get my air-fried chicken super crispy?
A: The secret lies in prepping your chicken and using the right coating. Pat your chicken dry before dredging it in a seasoned mixture of flour, cornstarch, or breadcrumbs-cornstarch especially amps up the crunch. Lightly spray the coated chicken with oil to help it brown evenly and crisp up beautifully.
Q3: Can I use bone-in chicken pieces or just boneless?
A: Absolutely, both work! Bone-in chicken offers juicy, tender meat with a crispy shell, but it may require a slightly longer cook time.Boneless chicken cooks faster and is perfect for quicker meals. Just adjust timing accordingly and use a meat thermometer to nail perfect doneness.
Q4: What temperature and time should I set on my air fryer for frying chicken?
A: Generally, 375°F (190°C) is air fryer gold for chicken, cooking for about 20-25 minutes. flip halfway through to ensure even crisping. Of course, cook times vary by thickness and size, so keep an eye on that golden crust emerging!
Q5: Is it necessary to marinate the chicken beforehand?
A: While not mandatory, marinating amps up flavor and tenderness. A simple buttermilk soak overnight imparts moisture and tang, helping the coating stick better. If you’re short on time, even a quick brine or spice rub works wonders.
Q6: How do I prevent the coating from falling off in the air fryer?
A: Dry chicken skin is your friend-pat it thoroughly before dredging. Also, press the coating firmly onto the chicken and avoid overcrowding the basket, giving each piece room to crisp. A light mist of oil seals the coating and locks it onto the chicken.Q7: Can I reheat air-fried chicken and keep it crispy?
A: Yes! Reheat in the air fryer for a few minutes at 350°F (175°C) instead of the microwave to revive that crunch. Avoid covering it, so steam doesn’t soften the coating.
Q8: Are there any tips for seasoning the coating?
A: Mix it up! Classic salt,pepper,garlic powder,paprika,and cayenne create a balanced flavor with a kick. For an exotic twist,try adding curry powder or smoked paprika. Fresh herbs mixed into the coating or sprinkled after cooking also brighten the bite.
Q9: What side dishes pair well with air-fried chicken?
A: Crispy chicken loves company. Classic coleslaw, buttery mashed potatoes, roasted veggies, or even a light salad make perfect partners. For a Southern vibe, go with cornbread and collard greens!
Q10: Is air frying chicken suitable for beginners?
A: Definitely! Air fryers are user-amiable and forgiving. With simple steps like patting dry, seasoning, and setting the timer, even kitchen newbies can achieve that irresistible crispy perfection without the mess of oil splatters.
Got that crispy craving? With these tips and tricks, your air fryer will turn out golden, juicy chicken that’s guilt-free and gloriously crunchy-every single time!
future Outlook
Whether you’re a seasoned chef or a kitchen newbie, mastering the art of air-fried chicken opens the door to a world of crispy, golden goodness without the guilt of deep frying. With just a few simple steps, the right technique, and your trusty air fryer, you can achieve that perfect crunch every time-juicy on the inside, irresistibly crispy on the outside.So go ahead, experiment with your favorite spices and sauces, and enjoy a healthier spin on a timeless classic. as when it comes to frying chicken in an air fryer, crispy perfection is never out of reach.