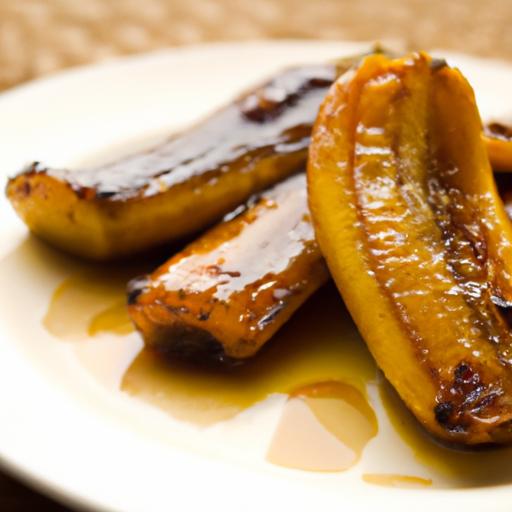
Golden Delight: The Art and Science of Caramelized Bananas
Golden Delight begins with the perfect ripeness of bananas,where sweet meets softness to create the ideal canvas for caramelization. Harnessing the delicate balance between sugar and heat transforms humble fruit into a luscious,amber-hued treat bursting with complex flavors and enticing aromas. this recipe will guide you through mastering heat control, infusing spices and spirits, and presenting your caramelized bananas with flair-turning a simple fruit into culinary art with every bite.
Prep and Cook Time
- Preparation: 10 minutes
- Cooking: 8-10 minutes
- Total Time: 20 minutes
Yield
Serves 4 as a decadent dessert or snack
Difficulty Level
Easy to Medium – Perfect for beginners eager to elevate their fruit game
Ingredients
- 4 ripe bananas (firm but deeply yellow with hints of brown spots)
- 3 tbsp unsalted butter
- 1/4 cup dark brown sugar, packed
- 1 tsp ground cinnamon
- 1/4 tsp freshly grated nutmeg
- 1 tbsp dark rum or aged brandy (optional but recommended)
- 1 tsp vanilla extract
- Pinch of fine sea salt
- Zest of 1/2 a lemon (for brightness)
- 2 tbsp chopped toasted pecans or walnuts (for garnish)
Instructions
- Prepare the bananas: Peel and slice the bananas diagonally into 1/2-inch thick pieces to maximize surface area for caramelization. Set aside.
- Heat the pan: Warm a large non-stick skillet over medium heat. Add 3 tbsp unsalted butter and allow it to melt gently without browning.
- Create the caramel base: Sprinkle 1/4 cup brown sugar evenly over the melted butter. Stir gently until the sugar dissolves and forms a rich amber syrup, roughly 2-3 minutes.Add the cinnamon, nutmeg, and a pinch of sea salt to awaken warm, fragrant notes.
- Add bananas and heat control: Carefully add the banana slices in a single layer, ensuring they do not overcrowd the pan. Sauté for 2-3 minutes on one side-avoid stirring too frequently to allow perfect golden crusts to form.
- Flip and infuse: Gently turn the bananas using a spatula. Add 1 tbsp dark rum and 1 tsp vanilla extract around the edges-tilt the pan slightly to let the spirits ignite briefly for an intoxicating flare (optional).
- finish the caramelization: Cook for another 2-3 minutes until the bananas are tender, caramelized to a rich dark gold, and infused with the warming spices and spirit flavors.
- Brighten and serve: Remove from heat, sprinkle with lemon zest for contrast, and top with chopped toasted nuts for texture.
Chef’s notes for Golden Delight Success
- Choosing bananas: aim for bananas that are ripe but firm. Overripe bananas will become mushy rather than caramelize, while underripe ones won’t develop enough sweetness.
- Heat management: Medium heat is key. Too high and sugar burns; too low and caramelization becomes soggy. Patience allows for the glossy golden finish.
- Spirit swaps: Bourbon or spiced rum offers alternatives that add depth.For non-alcoholic versions, use a splash of vanilla almond milk or orange juice rather.
- Make-ahead tips: Caramelized bananas are best served fresh but can be gently reheated in a warm pan for no more than a minute.
- For vegan versions: Replace butter with coconut oil and use maple syrup in place of brown sugar for a plant-based caramel.
Creative Serving Suggestions to Showcase Your Golden Delight
Present your caramelized bananas atop a scoop of creamy vanilla bean ice cream for an indulgent contrast of temperatures. For a brunch twist, pair with warm waffles or French toast, drizzling any extra caramel sauce over the top. A dusting of edible flowers or a sprig of fresh mint adds an elegant burst of color.or, plate alongside thick Greek yogurt mixed with a touch of honey for a fresh, tangy balance. Don’t forget a sprinkle of toasted nuts for satisfying crunch and eye appeal.
| Nutrient | Per Serving |
|---|---|
| Calories | 210 kcal |
| Protein | 1.5 g |
| Carbohydrates | 32 g |
| Fat | 8 g |
Discover more ways to elevate your fruit desserts in our fruit tart guide. For a deep dive into sugar chemistry and caramelization science,visit ScienceDaily’s caramelization article.

Q&A
Q&A: golden Delight – The Art and Science of Caramelized Bananas
Q1: What makes caramelized bananas so irresistibly delicious?
A1: Caramelized bananas are the perfect marriage of natural sweetness and complex caramel notes. When heat transforms the banana’s sugars into a luscious golden crust, it creates a delightful contrast between soft, creamy fruit and slightly crisp, buttery caramel. This interplay of textures and intensified flavors is what makes each bite so enchanting.
Q2: How does caramelization differ from simply cooking bananas?
A2: Cooking bananas softly often results in mushiness and mild sweetness. Caramelization,on the other hand,is a chemical process where the sugars break down under heat,browning and developing rich,nutty,and toasty flavors. This nuanced transformation elevates the humble banana from simple fruit to a decadent treat.
Q3: What is the ideal banana ripeness for caramelizing?
A3: The best bananas for caramelizing are ripe but still firm-think yellow with a few brown speckles.Overripe bananas become too mushy and may not hold their shape, while underripe ones lack sufficient sugar. This sweet spot ensures the fruit softens beautifully while caramelizing evenly.
Q4: Why is butter frequently enough used in caramelizing bananas?
A4: Butter introduces a luscious richness and helps achieve a smooth, golden caramel coat.Its milk solids slightly brown, contributing to that deep, nutty flavor. Plus, the fat prevents sticking and aids in even cooking, making the bananas tender yet texturally appealing.
Q5: Can caramelizing bananas be done without added sugar?
A5: Absolutely! Ripe bananas contain natural sugars that caramelize beautifully on their own. Though, a sprinkle of brown sugar or honey can amplify sweetness and deepen the caramel flavor for those seeking extra indulgence.
Q6: What scientific magic occurs during the caramelization process?
A6: As bananas are heated, their sugars undergo thermal degradation and polymerization, forming complex compounds that create rich flavors and brown pigments known as melanoidins. This reaction not only changes color and taste but also enhances aroma, engaging multiple senses.
Q7: How can one avoid common pitfalls like burning the bananas?
A7: Moderation in heat is key-medium-low heat gives sugars time to caramelize without scorching. Using a heavy skillet and being patient ensures gentle browning. Frequent gentle stirring or turning helps cook evenly and prevents bitterness from burnt spots.Q8: What are some creative ways to enjoy caramelized bananas?
A8: Beyond classic vanilla ice cream topping, try swirling caramelized bananas into oatmeal, folding them into pancakes or French toast batter, layering in parfaits, or pairing with savory elements like bacon or cheese for a sweet-savory dance.
Q9: Is caramelized banana a dessert or can it play a savory role?
A9: While predominantly a decadent dessert, caramelized bananas can surprise as a savory component in dishes. Combined with spices like chili or herbs like thyme, they provide contrast and complexity in sauces or protein accompaniments.
Q10: What cultural cuisines celebrate caramelized bananas?
A10: Caribbean,Southeast Asian,and Latin American culinary traditions often feature caramelized bananas or plantains. From Indonesian pisang goreng to Cuban dulce de plátano, it’s a global comfort food that transcends borders, each culture adding unique spices or preparation techniques.
Caramelized bananas embody both art and science-a golden transformation that captivates the palate and invites culinary creativity. Whether as a simple treat or gourmet flourish, they remind us how heat and time unlock the hidden magic within fruit.
To Conclude
as the amber hues of caramelized bananas glisten invitingly on your plate, you witness the perfect harmony of art and science at play. This timeless treat transcends mere sweetness, embodying a transformative process where heat and sugar dance to unlock new depths of flavor and texture.Whether drizzled over pancakes, nestled beside ice cream, or enjoyed simply on their own, caramelized bananas offer a golden delight that captivates both the curious cook and the seasoned connoisseur.Embracing this alchemy not only elevates a humble fruit but also invites us to savor the delicate balance of culinary mastery and natural chemistry-reminding us that sometimes, the sweetest moments emerge from the most unexpected reactions.
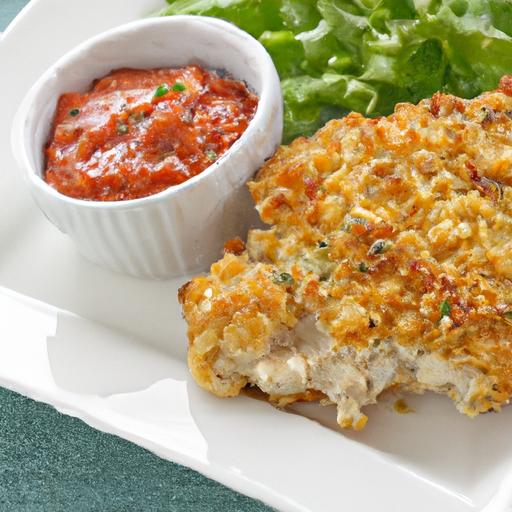
Golden italian Chicken Cutlets are a beloved staple in Italian-American cuisine, offering a delightful balance of crispiness and tender juiciness that captivates the palate with every bite. Originating from the rustic trattorias of Italy, this dish celebrates simplicity and quality ingredients, transforming humble chicken breasts into golden, crunchy masterpieces. My frist taste of these cutlets was at a family gathering where the tantalizing aroma of garlic and fresh herbs filled the air, leaving a lasting impression that inspired this detailed guide to perfecting the classic at home.
Prep and Cook Time
Readiness: 15 minutes
Cook Time: 12-15 minutes
Total Time: 30 minutes
Yield
Serves 4 generous portions
Difficulty Level
Easy to Medium – Perfect for home cooks seeking a crispy, flavorful result without fuss
Ingredients
- 4 boneless, skinless chicken breasts, pounded to ½-inch thickness
- 1 cup all-purpose flour, sifted
- 2 large eggs, beaten
- 1 cup fine dry breadcrumbs (Panko for extra crunch)
- ½ cup grated Parmesan cheese
- 1 tbsp fresh Italian parsley, finely chopped
- 1 tsp garlic powder
- 1 tsp dried oregano
- Salt and freshly ground black pepper, to taste
- ½ cup extra virgin olive oil, for frying
- Lemon wedges, for garnish
Step-by-Step Guide to Preparing and Cooking Golden Italian Chicken Cutlets
- Prepare your workspace: Arrange three shallow dishes – one with flour seasoned lightly with salt and pepper, one with beaten eggs, and one with a mixture of breadcrumbs, Parmesan, parsley, garlic powder, and oregano.
- Pound the chicken breasts: Using a meat mallet or rolling pin, gently flatten each chicken breast to an even thickness of about ½ inch. This ensures even cooking and tender texture.
- Dredge the chicken: Coat each piece first in the flour, shaking off excess to prevent clumping.
- Dip in egg: Fully immerse the floured chicken in the beaten eggs,allowing the excess to drip off for a thin coating.
- Coat with the breadcrumb mixture: Press the chicken firmly into the breadcrumb mixture, ensuring every inch is coated to achieve that golden crust.
- Heat the oil: Warm the olive oil in a large skillet over medium heat until shimmering but not smoking (about 350°F/175°C). This prevents sogginess and promotes crispiness.
- Cook the cutlets: Place cutlets in the hot oil without crowding. Fry for 4-5 minutes per side, turning once until deep golden brown and cooked through (internal temperature of 165°F/74°C).
- Drain: Transfer cutlets to a wire rack over a baking sheet or paper towels to drain excess oil, keeping the crust crisp.
- Serve immediately with fresh lemon wedges for a bright, zesty finish.
Chef’s Notes and Tips for Success
- Ingredient quality matters: Opt for fresh, organic chicken breasts and high-quality Parmesan for depth of flavor.
- Breadcrumb variety: Use Panko for extra crunch or traditional Italian-style breadcrumbs for authentic texture.
- Do not overcrowd the pan: fry in batches if needed to maintain consistent oil temperature and achieve perfect crispness.
- Make-ahead tip: Bread the cutlets up to 4 hours ahead, refrigerate on a wire rack, and fry just before serving for convenience.
- Option seasonings: Add a sprinkle of red pepper flakes or switch parsley for fresh basil to adjust the flavor profile.
- Oil temperature: use a thermometer to maintain consistent heat; if too cool, cutlets absorb oil, if too hot, they burn quickly.
Pairing Suggestions and serving Ideas to Elevate Your Crispy Culinary Classic
Golden Italian Chicken Cutlets shine brightest when accompanied by complementary sides and thoughtful garnishes. Consider a vibrant arugula and cherry tomato salad tossed with a lemon vinaigrette to cut through the richness. Creamy polenta or garlic mashed potatoes offer a comforting balance, while lightly sautéed seasonal vegetables add color and freshness.
For sauces, a simple marinara or a drizzle of basil pesto creates a layered Italian flavor experience.Don’t forget a fresh squeeze of lemon over the cutlets and a sprinkle of finely chopped parsley for that picture-perfect finish. Pair with a crisp Pinot Grigio or a glass of Chianti for an authentic delight.
| nutritional Details (per serving) | Calories | Protein (g) | Carbs (g) | Fat (g) |
|---|---|---|---|---|
| Golden Italian Chicken Cutlets | 420 | 45 | 18 | 18 |

Looking for more comforting Italian dishes? Try our Classic Italian Parmesan Eggplant recipe to continue your culinary journey. For an in-depth dive into breadcrumb varieties and their uses, this breadcrumb guide by Serious Eats is an excellent resource.
Q&A
Q&A: Golden Italian Chicken Cutlets – A Crispy culinary Classic
Q1: What makes Golden Italian Chicken Cutlets a classic in Italian cuisine?
A1: Golden Italian Chicken cutlets embody the perfect harmony of texture and flavor-a crispy, golden-brown crust encasing tender, juicy chicken. This dish has stood the test of time because it’s simple yet irresistibly flavorful, showcasing how basic ingredients can create a memorable culinary experience rooted in Italian tradition.
Q2: How do you achieve that signature golden, crispy crust?
A2: The secret lies in the breading technique. Chicken cutlets are first pounded thin, then dredged in seasoned flour, dipped in beaten eggs, and finally coated with a mixture of fine breadcrumbs and grated Parmesan cheese. Frying them in hot olive oil until they reach a rich golden color locks in moisture while creating that satisfying crunch.
Q3: can you use other types of meat for this recipe?
A3: Absolutely! While chicken is the classic choice, veal, pork, or even turkey can be used to create delicious variations. Each offers a unique texture and flavor but follows the same breading and frying process to achieve that signature crispiness.
Q4: Are Golden Italian Chicken Cutlets typically served with any sauces or sides?
A4: Traditionally, they shine on their own with a simple squeeze of fresh lemon to accentuate flavor. However, they also pair beautifully with marinara sauce, a fresh arugula salad, or a hearty side of pasta.The versatility of accompaniments makes this dish a favorite for any mealtime.Q5: what makes pounding the chicken cutlets crucial?
A5: Pounding chicken to an even thickness ensures speedy, even cooking and tenderizes the meat. This step prevents dryness and helps the cutlets fry up crisp and juicy-a key characteristic of this golden classic.Q6: Can this dish be made ahead or is it best served fresh?
A6: Golden Italian Chicken Cutlets are best enjoyed fresh, straight from the pan, to maintain their crispy texture. However, you can prepare them ahead and keep them warm in a low oven for short periods. For make-ahead meals, reheating in a skillet or oven rather than the microwave helps preserve the crunch.Q7: What’s the cultural significance of this dish in Italian-American kitchens?
A7: In many Italian-American households, Golden Italian Chicken Cutlets are a nostalgic staple, evoking family gatherings and Sunday dinners.They represent comfort, home-cooked love, and the ability to transform humble ingredients into a beloved feast-truly a culinary classic that bridges cultures.
Q8: Any tips for someone trying this recipe for the first time?
A8: Don’t rush the breading process-coat each piece thoroughly to get maximum crispiness. Also, maintain the oil at the right temperature; too hot and the coating burns, too cool and it becomes soggy. Lastly, embrace the art of patience-perfectly golden cutlets are worth the wait!
In Summary
as the last crispy bite of golden italian chicken cutlets melts away, you’re left with more than just a lingering crunch-it’s a celebration of tradition, flavor, and simple ingredients elevated to perfection. This culinary classic, with its perfectly breaded exterior and juicy, tender interior, is a timeless reminder that sometiems the most satisfying dishes come from humble roots and a little bit of love. Whether served family-style or plated for a special occasion, these cutlets invite you to savor the art of crispy indulgence, one golden bite at a time.
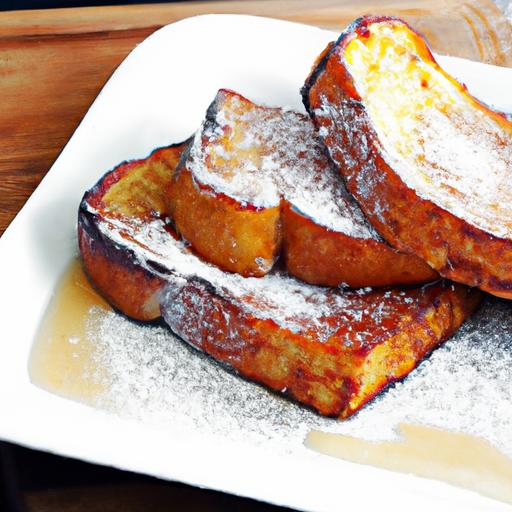
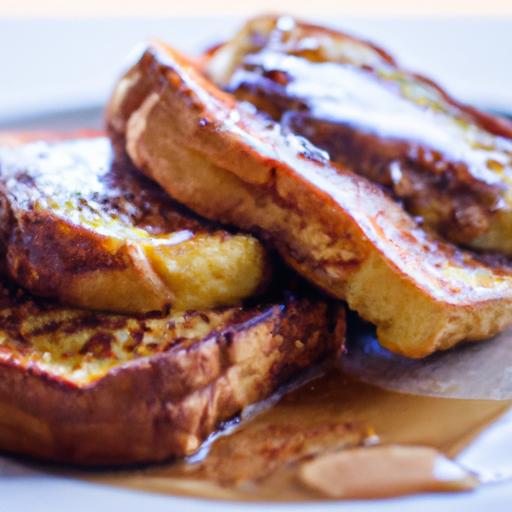
Golden Morning Delight: Perfect French Toast with Maple Syrup
golden Morning Delight: Perfect French Toast with Maple Syrup is a timeless breakfast classic that brings comfort and joy to any morning. Rooted deeply in french culinary tradition, this dish transforms simple ingredients into a delightful balance of fluffy interiors and crispy edges. I still remember waking up to the intoxicating aroma of warm maple syrup drizzling over buttery,golden slices-a moment that inspired me to master the art of perfect French toast. Today, I’m thrilled to share an approachable recipe and expert techniques that’ll help you achieve that idyllic harmony of texture and flavor right in your kitchen.
Prep and Cook time
- Prep Time: 15 minutes
- Cook Time: 20 minutes
- Total Time: 35 minutes
Yield
Serves 4 generous portions
Difficulty Level
Easy – Perfect for beginners and seasoned cooks alike
Ingredients
- 6 slices of thick-cut brioche or challah bread, slightly stale
- 3 large eggs, free-range preferred
- 1 cup whole milk or half-and-half for extra creaminess
- 2 tbsp pure maple syrup, plus extra for serving
- 1 tsp vanilla extract
- 1 tbsp granulated sugar
- 1/2 tsp ground cinnamon
- Pinch of salt
- 2 tbsp unsalted butter, for cooking
Instructions
- Choosing the Ideal Bread: Select thick slices of brioche or challah, as their soft crumb and subtle sweetness create the ideal canvas for both fluffy moisture and a crisp exterior. Day-old or slightly stale bread soaks up the batter without falling apart.
- Making the Ultimate batter: In a shallow dish,whisk together the eggs,milk,maple syrup,vanilla,sugar,cinnamon,and salt until fully combined. The addition of a touch of maple syrup subtly enhances the natural sweetness, while cinnamon adds depth.
- Soaking: dip each bread slice into the batter, allowing it to absorb for about 20 seconds per side. Avoid oversaturating to maintain crispiness.
- Preheating the Pan: heat a non-stick skillet or griddle over medium heat, then add 1 tablespoon of butter, swirling it to coat the surface evenly.
- Cooking to Golden Perfection: Place the soaked bread on the skillet, cooking for about 3-4 minutes per side, or until each side is deep golden brown and slightly crispy. Flip carefully with a spatula for even cooking.
- Repeat: Add butter as needed between batches to maintain a luscious, buttery crust on your French toast.
- Serving: Plate instantly, drizzle generously with pure maple syrup, and garnish as desired.
Tips for success
- Bread Variations: While brioche and challah are ideal, sourdough or rustic country bread also work beautifully for a slight tang and sturdier texture.
- Make-Ahead Batter: Prepare your batter up to 2 hours in advance and keep it refrigerated; whisk again before use to reincorporate ingredients.
- preventing Sogginess: Use thick bread and avoid soaking more than 20 seconds per side. Patting bread dry briefly before cooking can help maintain crisp edges.
- Cinnamon Substitute: Try a pinch of nutmeg or cardamom for a unique twist if cinnamon isn’t readily available.
- Maple Syrup Quality: Always opt for 100% pure maple syrup to elevate the natural sweetness and aroma.
Serving suggestions
For a truly decadent experience, serve your French toast with fresh berries like raspberries or blueberries, a dusting of powdered sugar, and a pat of whipped butter. Add a sprinkle of toasted pecans or sliced almonds for delightful crunch and an earthy contrast to the syrup’s sweetness. Pair your plate with a hot cup of coffee or freshly squeezed orange juice to complete this golden morning indulgence.
nutritional Facts
| Nutrient | Per Serving |
|---|---|
| Calories | 320 kcal |
| Protein | 9 g |
| Carbohydrates | 40 g |
| Fat | 12 g |

Discover more breakfast inspirations in our best pancake recipes and learn about the benefits of pure maple syrup from the Real Maple Syrup producers Association.
Q&A
Q&A: Golden Morning Delight – Perfect French Toast with Maple Syrup
Q1: What makes French toast truly “perfect”?
A1: The perfect French toast strikes a harmonious balance between a crisp,golden exterior and a tender,custardy interior.It should be soaked just enough to absorb the egg and milk mixture without becoming soggy, then cooked over medium heat to develop a lovely caramelized crust.The magic lies in choosing the right bread – thick slices of brioche or challah work wonders – and embracing a touch of patience on the stove.
Q2: Why is maple syrup the ideal topping for French toast?
A2: Maple syrup adds a natural sweetness with a hint of caramel and earthiness that complements the rich, eggy layers of french toast perfectly. Unlike processed syrups, pure maple syrup offers complexity and depth, enhancing each bite with its amber glow and sticky embrace – transforming breakfast into a cozy morning festivity.
Q3: Are there secrets to soaking the bread without losing texture?
A3: Absolutely! The key is to dip each slice briefly – just long enough for the surface to absorb the custard, but not so long that it becomes saturated through and mushy. Let the bread soak on one side for about 10 seconds, flip, and soak the other side. Using day-old bread is another trick; slightly stale bread holds the custard better without falling apart.
Q4: can I customize the custard mix for diffrent flavors?
A4: Yes! Classic custard is a blend of eggs, milk, vanilla extract, and a pinch of cinnamon or nutmeg. To elevate it, try adding a splash of orange zest for brightness, a dash of cardamom for exotic warmth, or even a teaspoon of instant espresso powder for a subtle mocha twist. These tweaks inject personality while maintaining the toast’s creamy foundation.
Q5: How can I ensure my french toast cooks evenly without burning?
A5: Use medium heat and a butter-and-oil combo in your pan – butter for flavor, oil to raise the smoke point. Preheat the skillet thoroughly before adding the slices, then cook each side for 3-4 minutes. Resist the urge to crowd the pan; giving each piece space helps sustain a consistent temperature and even browning.
Q6: what are some dreamy add-ons or sides to accompany my French toast?
A6: fresh berries, sliced bananas, or a dollop of whipped cream create delightful contrasts in texture and flavor.Nuts like toasted pecans or almonds add a satisfying crunch. For a tangy punch, a spoonful of Greek yogurt or a smear of mascarpone cheese can elevate the dish.And, of course, a generous drizzle of warm maple syrup ties it all together in golden harmony.
Q7: Can French toast be made ahead for a crowd or meal prep?
A7: Yes! You can prepare the custard-soaked bread slices, layer them on a baking sheet, and freeze until ready. to serve, bake them in a preheated oven at 375°F (190°C) for about 15-20 minutes until heated through and crisped. This method preserves texture and flavor, making brunch stress-free and delightful.
Enjoy your golden mornings with this perfect French toast, crowned by the rich sweetness of maple syrup – a breakfast classic reimagined for everyday delight!
The Conclusion
As the sweet aroma of golden, crisp French toast mingles with the rich, amber drizzle of maple syrup, you’re reminded that breakfast is more than just a meal-it’s a moment. A moment to savor simple joys, to start the day with warmth and delight, and to transform everyday ingredients into a comforting masterpiece. With this recipe in your kitchen arsenal, every morning holds the promise of that perfect bite: crispy edges, tender inside, and just the right touch of sweetness. So, whether it’s a weekend treat or a weekday indulgence, let your Golden Morning delight become a tradition-because some mornings truly deserve to be extraordinary.
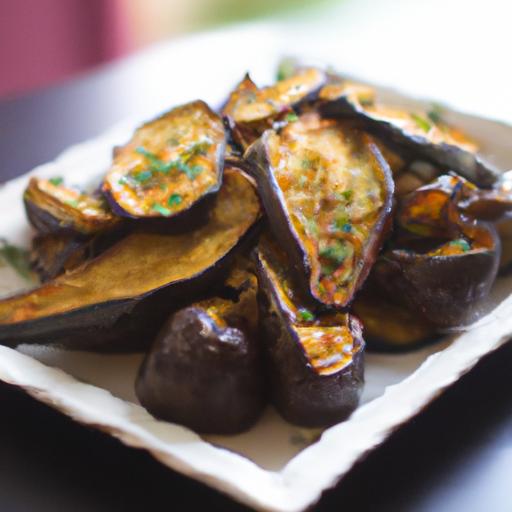
Golden Crispy Air fryer Eggplant is a splendid way to enjoy a nutritious vegetable while indulging in a delightful crispy texture that is both satisfying and guilt-free. This recipe celebrates the marriage of traditional flavors with modern cooking techniques, turning simple eggplant slices into a crunchy, golden masterpiece that’s perfect as a snack, appetizer, or side dish. With air frying, you capture the essence of fried eggplant without the excessive oil, making every bite light, crisp, and bursting with natural flavour.
Prep and Cook Time
- Preparation: 15 minutes
- Cooking: 18 minutes
- Total Time: 33 minutes
Yield
Serves 4 as a snack or side
Difficulty Level
Easy
Ingredients
- 1 medium eggplant (about 1 pound), sliced into ½ inch rounds
- ¾ cup all-purpose flour, sifted
- 2 large eggs, beaten
- 1 cup panko breadcrumbs
- ½ cup grated Parmesan cheese
- 1 tsp garlic powder
- 1 tsp smoked paprika
- ½ tsp salt
- ¼ tsp black pepper, freshly ground
- Cooking spray (preferably avocado oil or olive oil spray)
- Fresh parsley, chopped (for garnish)
Instructions
- Prepare the eggplant: Pat the eggplant slices dry with paper towels to remove excess moisture.This step is crucial for achieving that perfect crispiness.
- Set up dredging stations: Place the flour in one shallow dish, beaten eggs in a second, and the panko mixture in a third. For the panko mix,combine breadcrumbs,Parmesan,garlic powder,smoked paprika,salt,and pepper.
- Coat each slice: Dip each eggplant slice frist into the flour,shaking off any excess,then into the egg,and finally press into the panko mixture thoroughly,ensuring each piece is evenly coated.
- Preheat your air fryer: Set it to 375°F (190°C) and let it warm up for 3-5 minutes to ensure even cooking and crispiness.
- Arrange slices in the air fryer basket: Lay the eggplant pieces in a single layer without overlapping. Lightly spray each slice with cooking spray; this mimics frying without excess oil.
- Cook: Air fry for 9 minutes, then carefully flip the slices, spray the other side, and continue cooking for an additional 8-9 minutes until golden and crisp.depending on your air fryer model, adjust timing slightly but aim for deep golden hues.
- Remove and rest: Let the crispy eggplant rest for 2 minutes before serving to maintain its texture and allow flavors to settle.
Chef’s Notes: Tips for Success
- Salting your eggplant: For extra moisture removal and an intensified flavor, sprinkle slices with salt and let sit for 30 minutes, then rinse and pat dry before coating.
- Breadcrumb alternatives: Use gluten-free panko or crushed cornflakes for variations in texture.
- Flavor twists: Experiment by adding italian herbs or chili powder to the breadcrumb mix for a zesty kick.
- Make-ahead idea: Coat the eggplant slices up to the panko stage, lay them on parchment-lined trays, and refrigerate for up to 2 hours before air frying.
- Avoid overcrowding: Cook eggplant slices in batches if necessary to ensure each piece crisps properly.
Serving suggestions
Present these golden crispy delights garnished with freshly chopped parsley and serve alongside a cooling garlic yogurt dip or a tangy marinara sauce. Layer atop a crisp salad with arugula and cherry tomatoes, or pile onto a sandwich with roasted red peppers and fresh mozzarella for an irresistible vegetarian meal. Pair with a drizzle of balsamic glaze or a sprinkle of freshly cracked black pepper to elevate each bite.

Why This Method Elevates Eggplant’s Nutritional Value
Eggplant is a nutrient-rich vegetable packed with dietary fiber, antioxidants such as nasunin, vitamins B1 and B6, and essential minerals like manganese. Air frying enhances these benefits by using minimal oil, drastically reducing the fat content compared to traditional frying. The hot circulating air crisps the exterior beautifully, sealing in moisture and nutrients inside. This method preserves eggplant’s natural goodness while delivering a crunchy texture that’s both flavorful and health-conscious.
| Nutrient | Per Serving |
|---|---|
| Calories | 140 kcal |
| Protein | 6 g |
| Carbohydrates | 18 g |
| Fat | 5 g |
| Fiber | 5 g |
For further insights on air frying techniques and other healthy recipes, explore our detailed Ultimate air Fryer Guide which complements this Golden Crispy Air Fryer Eggplant recipe beautifully.
Incorporate this easy, crispy, and healthy vegetable dish into your weekly rotation and enjoy a guilt-free indulgence that’s bursting with vibrant flavors and textures!
for more on eggplant’s health benefits directly from a trusted source, visit Healthline’s complete guide on eggplant.
Q&A
Q&A: Golden Crispy Air Fryer eggplant – A Healthy Delight
Q1: What makes air fryer eggplant a healthier option compared to traditional frying?
A1: Air frying eggplant uses substantially less oil than deep frying, slashing calories and fat while still achieving that irresistible crispy texture. The hot air circulation cooks the eggplant evenly, locking in nutrients and flavor without the grease-making it a guilt-free indulgence!
Q2: How do you get that perfect golden crisp on air fryer eggplant?
A2: The secret lies in the preparation! Start by slicing the eggplant evenly, then lightly coat the pieces with a thin layer of oil and your favorite seasoning or breadcrumbs. The air fryer’s rapid air technology creates a dry, hot habitat that crisps the exterior beautifully while keeping the inside tender and creamy.
Q3: Can I customize the flavors of air fryer eggplant easily?
A3: Absolutely! Eggplant is like a culinary chameleon, soaking up flavors brilliantly. Try classic Italian herbs, smoky paprika, garlic powder, or even a sprinkle of Parmesan for an umami kick. Whether you wont it spicy, herby, or savory, the air fryer eggplant can adapt to your cravings.
Q4: Is air fryer eggplant suitable for special diets?
A4: Yes! This dish fits most dietary needs-gluten-free if you use gluten-free breadcrumbs, vegan without cheese, and naturally low-carb if you skip heavy coatings. It’s a versatile side or snack that suits clean eating, plant-based meals, and even meal prep for busy lifestyles.
Q5: What’s the best way to serve golden crispy air fryer eggplant?
A5: The options are endless. Serve it as a crispy appetizer with a zesty yogurt dip, layer it in a healthy veggie sandwich, or toss it into a vibrant salad for extra crunch.It also pairs wonderfully with grains, pasta, or grilled proteins-adding color, texture, and that crave-worthy crisp.
Q6: Any tips for storing and reheating air fryer eggplant?
A6: Store leftover pieces in an airtight container in the fridge for up to 3 days. To regain that crispiness, pop them back into the air fryer at 350°F (175°C) for 3-5 minutes rather than microwaving. This quick refresh restores the golden crunch, keeping your healthy delight just as tasty!
Final Thoughts
Incorporating golden crispy air fryer eggplant into your meals isn’t just a treat for the taste buds-it’s a smart, healthy choice that brings vibrant flavor and satisfying texture without the extra oil or guilt. This simple yet versatile dish proves that nourishing your body doesn’t mean sacrificing deliciousness. So next time you crave a crunchy,wholesome snack or side,let your air fryer do the magic,transforming humble eggplant into a golden delight that’s as good for you as it is indeed for your palate. Embrace this tasty tradition reimagined, and make every bite a celebration of health and flavor.
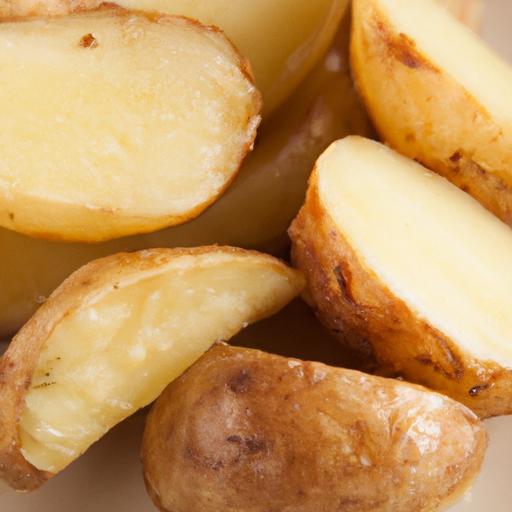
Golden Garlic Rosemary Roasted Potatoes: A Flavorful Delight
Golden Garlic Rosemary Roasted Potatoes are the epitome of comfort and elegance in one dish. Originating from rustic European kitchens, this timeless recipe infuses humble potatoes with the aromatic magic of fresh rosemary and garlic, creating an irresistible golden crust and tender interior. From the moment these potatoes hit the oven, your kitchen fills with an inviting fragrance that promises a feast worth savoring.
Prep and Cook Time
- Preparation: 15 minutes
- Cook Time: 40 minutes
- Total Time: 55 minutes
Yield
serves 4 as a delightful side dish
Difficulty Level
Easy – Perfect for both kitchen novices and seasoned home cooks
The Art of Selecting the perfect potatoes for Roasting
Choosing the right potato is crucial for the best results in your Golden Garlic Rosemary Roasted Potatoes. Opt for Yukon gold or red potatoes-both waxy varieties that hold their shape beautifully while offering a creamy texture inside. Their natural sweetness balances beautifully with garlic and rosemary’s earthy tones. Avoid starchy potatoes like Russets; though they crisp well, they tend to fall apart during roasting. For vibrant results, select potatoes of uniform size to ensure even cooking and consistent golden color.
Unlocking the Aromatic magic of Garlic and Rosemary
Fresh garlic cloves and fragrant rosemary sprigs are the soul of this dish. Lightly crushing the garlic before roasting releases its flavor, mingling with the rosemary’s piney, herbaceous notes to permeate every bite. For an added layer of flavor,consider roasting whole garlic cloves separately on foil,then tossing the softened garlic into your potatoes just before serving for bursts of sweetness. Be mindful not to burn the garlic during cooking, which can introduce bitterness-adjust oven temperature or roasting time as needed.
Step-by-Step Guide to Achieving Crispy Golden Perfection
- Preheat your oven to 425°F (220°C). A hot oven is essential to achieve that coveted crisp exterior.
- Wash and dry 2 pounds of Yukon gold potatoes. Cut them into evenly sized 1-inch chunks to ensure uniform roasting.
- Parboil the potatoes in salted boiling water for 5 minutes-this tenderizes without fully cooking, allowing the surface to roughen slightly.
- Drain and gently shake the potatoes in the pot to create a roughened surface that crisps beautifully.
- toss potatoes with 3 tablespoons olive oil,4 minced garlic cloves,2 tablespoons chopped fresh rosemary,and 1 teaspoon sea salt. Ensure every piece is thoroughly coated.
- Spread the potatoes on a baking sheet in a single layer, leaving enough room around each piece for air circulation.
- Roast for 40 minutes,turning halfway through.watch for a deep golden-brown crust to develop, with tender centers.
- Remove from oven and garnish immediately with freshly chopped parsley and an optional sprinkle of flaky sea salt for contrast.
Serving suggestions and Pairing Ideas for Maximum Flavor
Golden Garlic Rosemary Roasted Potatoes pair flawlessly with a variety of mains. Serve alongside succulent roasted chicken, grilled steak, or pan-seared fish. for a vegetarian twist, complement with a vibrant sautéed kale salad or a rich mushroom ragout. Garnish with lemon zest or a dollop of garlic aioli to elevate taste profiles. These potatoes also shine as a party appetizer tossed with parmesan and chili flakes for a punchy bite.
Ingredients
- 2 lbs Yukon Gold potatoes, washed and cut into 1-inch chunks
- 3 tbsp extra virgin olive oil
- 4 cloves garlic, minced or crushed
- 2 tbsp fresh rosemary, chopped
- 1 tsp sea salt, plus extra for finishing
- Freshly ground black pepper, to taste
- fresh parsley, chopped, for garnish
Instructions
- Preheat your oven to 425°F (220°C), ensuring the rack is positioned in the center for even heat distribution.
- Place the potato chunks in a large pot of salted boiling water and parboil for 5 minutes. The potatoes should be just tender but still firm.
- Drain the potatoes thoroughly and return them to the warm pot.Cover and shake gently to create textured edges-this helps with crispiness.
- Transfer potatoes to a large bowl. Add olive oil, minced garlic, rosemary, sea salt, and black pepper. Toss thoroughly until each piece is coated evenly.
- Arrange the potatoes on a baking sheet lined with parchment paper or a silicone mat, spacing them out to prevent steaming.
- Roast for 40 minutes, flipping the potatoes halfway through to ensure even browning on all sides.
- Once golden and crispy, remove from oven and transfer to a serving dish. Sprinkle with fresh parsley and additional flaky sea salt if desired.
chef’s Notes and Tips for Success
- Shortcut: Use pre-minced garlic paste if short on time, but fresh garlic will yield a superior flavor.
- Make-ahead: Parboil and toss your potatoes in oil and seasonings up to 8 hours ahead. Refrigerate covered; roast just before serving.
- Crispiness tip: Don’t overcrowd the pan-crowding traps steam and softens the potatoes.
- substitutions: Rosemary can be swapped with thyme, sage, or oregano for flavor variations.
- Vegetarian boost: Stir in a handful of grated Parmesan cheese during the last 10 minutes of roasting for a deliciously salty crust.
- External reference: For in-depth potato science and roasting secrets, visit the Serious Eats Guide to Roasted Potatoes.
Nutritional Details (Per Serving)
| Calories | Protein | Carbs | Fat |
|---|---|---|---|
| 210 kcal | 3 g | 30 g | 8 g |
Explore more flavorful roasted vegetable recipes here.

Q&A
Q&A: Golden Garlic Rosemary Roasted Potatoes – A Flavorful Delight
Q1: What makes Golden Garlic Rosemary Roasted potatoes so special?
A1: These potatoes combine the irresistible crunch of perfectly roasted edges with the aromatic symphony of garlic and fresh rosemary. The golden exterior gives way to a tender, fluffy interior, creating a texture contrast that’s downright dreamy. It’s comfort food elevated with herbaceous elegance.Q2: Why choose rosemary and garlic together?
A2: Rosemary’s piney, slightly peppery notes pair beautifully with garlic’s robust pungency, creating a dynamic flavor duo that infuses each potato cube with savory depth. Together, they transform humble spuds into an herb-scented party on your plate.
Q3: What type of potatoes work best for roasting?
A3: Starchy or all-purpose potatoes such as Yukon Gold or Russets are ideal. Yukon Golds roast to a fabulous golden crispness while maintaining a creamy interior. Their natural buttery flavor also complements garlic and rosemary perfectly.
Q4: how do you achieve the perfect golden crust?
A4: The secret lies in high heat roasting-usually around 425°F (220°C)-and tossing potatoes in a generous amount of olive oil. Don’t overcrowd the pan; giving each piece space allows the edges to caramelize beautifully. Flipping halfway ensures an even, irresistible crunch all around.
Q5: Can I customize this recipe?
A5: Absolutely! Add a sprinkle of smoked paprika for a subtle kick, or toss in some chopped thyme or parsley for extra herbaceous notes. A squeeze of fresh lemon juice right before serving can brighten the whole dish, adding a zesty twist.
Q6: What dishes pair well with golden garlic rosemary roasted potatoes?
A6: These potatoes are versatile: perfect alongside roasted chicken, grilled steak, or even a fresh summer salad. Their warm, savory flavor also makes them a comforting side for holiday meals or casual weeknight dinners alike.
Q7: Any tips for prepping ahead?
A7: you can peel and cube the potatoes in advance, then store them in cold water to prevent browning. When ready to cook, drain, dry thoroughly, and proceed with seasoning and roasting. This prep step saves time without sacrificing flavor or texture.
Q8: How should leftovers be stored and reheated?
A8: Store cooled potatoes in an airtight container in the fridge for up to 3 days. Reheat them in a hot skillet or oven rather than the microwave to revive their crispy charm. A swift sauté with a bit of olive oil will refresh their golden goodness.
Q9: Is this recipe suitable for special diets?
A9: Definitely! It’s naturally gluten-free and vegetarian, with simple, wholesome ingredients. Using quality olive oil keeps it heart-healthy, and you can easily adjust seasonings to reduce sodium or accommodate other dietary needs.
Q10: What’s the secret to making this dish unforgettable?
A10: It’s the love and attention to detail! From selecting fresh herbs to roasting at just the right temperature and seasoning generously, every step enhances the potatoes’ humble beauty. the result is a dish that’s both soul-satisfying and impressively flavorful-truly a golden delight.
The Way Forward
As the last crisp bite of these Golden Garlic Rosemary Roasted Potatoes melts away, you’re left with more than just a satisfying flavor-it’s an experience that celebrates the humble potato’s potential to shine. Infused with the aromatic warmth of garlic and the earthy allure of rosemary, this dish transforms any meal into a comforting feast.whether served alongside a Sunday roast or enjoyed as a standalone snack,these golden nuggets promise to elevate your kitchen repertoire with simplicity and flair. So next time you crave a soulful side or a crowd-pleasing treat, remember that the perfect combination of herbs, garlic, and golden roasting is just a recipe away from delicious delight.

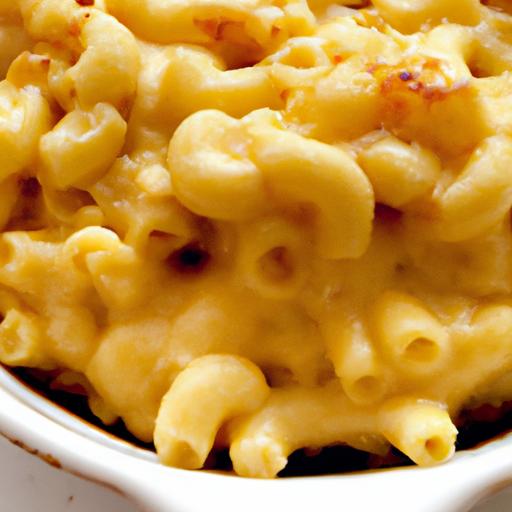
Golden Comfort starts with selecting the right cheeses to build a luscious and flavorful base that truly elevates baked mac and cheese from simple to sublime. Balancing sharpness, creaminess, and meltability is key to crafting that irresistibly creamy sauce, while mastering the roux ensures the perfect silky texture that clings beautifully to every noodle. Pairing this with thoughtfully chosen pasta shapes and skillful baking techniques brings the entire dish to golden, bubbling perfection.
Choosing the Ideal Cheeses for a Creamy and Flavorful Base
When assembling yoru cheese blend, prioritize flavor complexity and meltability. Sharp cheddar provides tang and depth, while Gruyère adds a subtle nuttiness and smooth melt. For creaminess, incorporate fontina or Monterey Jack. Avoid pre-shredded cheeses that frequently enough contain anti-caking agents that hinder melting. Grate your cheese fresh to ensure the silkiest sauce. Remember, a mix of about 4 cups total cheese strikes a balance – too little and the sauce lacks character; too much and it can become greasy.
Mastering the Sauce with Precise Roux Techniques
Creating the perfect béchamel-based cheese sauce demands technique and patience. Begin by melting butter over medium heat, then whisk in all-purpose flour to form a smooth roux. Cook this mixture for 2-3 minutes, stirring constantly until it turns bubbly and pale golden-this step cooks out the raw flour taste without browning it. Slowly whisk in warmed whole milk, adding it gradually to avoid lumps. Simmer until thickened to a creamy custard-like consistency before folding in your freshly grated cheese off the heat. This approach guarantees a velvety sauce that blankets your pasta with rich, silky goodness.
Selecting the Best pasta Shapes for Optimal Texture
Pasta shape influences how well the sauce clings and the overall mouthfeel. Classic elbow macaroni is the traditional favorite,its curves cradling the sauce elegantly. However, consider using cavatappi, shells, or radiatore for more surface area and extra sauce capture. Cook pasta just shy of al dente-about 1-2 minutes less than the package instructions-since it will continue cooking in the oven, achieving that tender yet firm bite that complements creamy cheese perfectly.
Baking to Golden perfection with Expert Temperature Tips
Once combined, transfer the mac and cheese to a buttered baking dish and top with a crisp layer of breadcrumbs mixed with a pinch of smoked paprika or Parmesan for added flavor. Baking at 350°F (175°C) for 25-30 minutes allows the sauce to thicken further while the topping browns beautifully.For extra golden results, finish with a few minutes under the broiler-watch closely to avoid burning-to achieve that coveted golden crust that crackles delightfully when served.
prep and Cook Time
- Prep: 20 minutes
- Cook: 40 minutes
- Total: 1 hour
Yield
Serves 6 generous portions
Difficulty Level
Medium – Perfect for cooks ready to elevate comfort food with practise and precision
Ingredients
- 1/4 cup (60g) unsalted butter, plus extra for greasing
- 1/4 cup (30g) all-purpose flour, sifted
- 4 cups (960ml) whole milk, warmed
- 2 cups (200g) sharp cheddar cheese, freshly grated
- 1 cup (100g) Gruyère cheese, freshly grated
- 1 cup (100g) Fontina cheese, freshly grated
- 12 ounces (340g) elbow macaroni or preferred pasta shape
- 1 cup panko breadcrumbs
- 1 teaspoon smoked paprika
- Salt and freshly ground black pepper, to taste
Instructions
- Preheat your oven to 350°F (175°C) and lightly butter a 9×13-inch baking dish.
- Bring a large pot of salted water to a boil. Add pasta and cook until just under al dente, about 6-7 minutes. Drain and set aside.
- In a large saucepan over medium heat, melt the butter. Whisk in the flour, stirring constantly to create a smooth roux. Cook for 2-3 minutes until slightly golden and aromatic.
- Gradually add the warmed milk in small increments, whisking thoroughly between additions to prevent lumps.Continue cooking while whisking until the mixture thickens and coats the back of a spoon.
- Remove the saucepan from heat and stir in all the grated cheeses until melted and fully integrated, creating a creamy cheese sauce. season with salt and black pepper.
- Add the cooked pasta to the cheese sauce, folding gently to coat each piece thoroughly.
- Pour the mac and cheese into the prepared baking dish, spreading evenly.
- In a small bowl, mix the panko breadcrumbs with smoked paprika and a pinch of salt. Sprinkle evenly over the top.
- Bake in the preheated oven for 25-30 minutes until bubbling and golden brown on top.
- For an extra-crisp crust, place the dish under the broiler for 2-3 minutes, watching closely to prevent burning.
- Allow to rest for 5 minutes before serving to let the sauce set slightly.
Tips for success
- Cheese Substitute: Swap Gruyère for Emmental or Swiss for a milder taste,and try adding a handful of Parmesan for sharper notes.
- Make-Ahead: Assemble mac and cheese up to step 8, cover tightly, and refrigerate for up to 24 hours before baking.
- Roux Consistency: Ensure the roux is bubbly but not browned to avoid a grainy texture in your sauce.
- Breadcrumb Crunch: Mix half panko and half crushed cornflakes or nuts for added texture variety.
- Milk temperature: Warm milk incorporates more smoothly into the roux,preventing clumps.
Serving Suggestions
Serve your golden baked mac and cheese piping hot, garnished with freshly chopped chives or parsley for a fresh green contrast. pair with a crisp side salad dressed lightly in lemon vinaigrette to cut through the richness. For an indulgent twist, top with crumbled crispy bacon or caramelized onions just before serving for bursts of smoky or sweet flavor.
| Nutrient | Per Serving |
|---|---|
| Calories | 530 |
| Protein | 27g |
| Carbohydrates | 45g |
| Fat | 27g |

Discover more creative twists on this classic by checking our Ultimate Cheesy Pasta Recipes collection. For expert insights on handling dairy in sauces, visit Serious eats’ in-depth guide.
Q&A
Q&A: Golden Comfort – The Art of Perfect Baked Mac and Cheese
Q1: What makes baked mac and cheese so universally beloved?
A1: baked mac and cheese taps into our deepest cravings for comfort food. Its creamy, cheesy interior paired with a golden, crunchy topping creates a harmonious contrast of textures that feels like a warm hug on a plate. It’s nostalgia and indulgence rolled into one – simple ingredients transformed by love and technique.
Q2: Is there a secret to achieving that perfect golden crust?
A2: Absolutely! The magic lies in a well-balanced breadcrumb topping, often mixed with melted butter or a sprinkle of parmesan for extra flavor. Baking at the right temperature ensures the crust crisps up evenly without drying out the cheese beneath. A rapid blast under the broiler at the end can add a stunning golden sheen.
Q3: What cheeses work best for that ooey-gooey interior?
A3: Classic cheddar is king, but blending it with cheeses like Gruyère, Fontina, or mozzarella elevates the flavor and meltiness. Gruyère adds nuttiness, Fontina brings creaminess, and mozzarella lends stringy stretch. Combining sharp and mild cheeses crafts depth, ensuring every bite is rich and satisfying.
Q4: How critically important is the béchamel sauce in the recipe?
A4: The béchamel sauce is the backbone of perfect baked mac and cheese. It’s where the magic of creaminess happens. Cooking butter, flour, and milk into a smooth, velvety sauce before melting in cheese ensures the pasta is enveloped in luscious, silky goodness rather than a greasy cheese puddle.
Q5: Can I make it ahead of time without losing that fresh-from-the-oven charm?
A5: Yes! Assemble your mac and cheese, then refrigerate or freeze it.When you’re ready, bake it from cold, adding a few extra minutes if needed, and finish with a broil for that coveted golden crown. This method helps the flavors meld while preserving the crispy topping and creamy center.Q6: any tips for adding a personal twist?
A6: The canvas is yours! Consider stirring in cooked bacon, caramelized onions, or a touch of smoked paprika for a smoky edge. For herb lovers, fresh thyme or chives add brightness. for a kick, a dash of cayenne or hot sauce awakens the palate without overpowering the comforting essence.
Q7: why does elbow macaroni reign supreme in this dish?
A7: Elbow macaroni’s curved shape and hollow center capture pockets of cheesy sauce perfectly,ensuring every bite is flavorful. Its sturdy texture holds up beautifully through baking and scooping, making it a tried-and-true hero in the mac and cheese world.
Mastering baked mac and cheese is about balancing textures and flavors – creamy, crispy, cheesy, and subtly seasoned. With a few thoughtful techniques, you can create your own golden comfort masterpiece that both soothes the soul and impresses the palate.
The Conclusion
As the aroma of bubbling cheese and buttery breadcrumbs fades, the magic of golden comfort lingers-a testament to the artful alchemy that transforms humble ingredients into a timeless masterpiece. Whether you favor a classic sharp cheddar embrace or a daring blend of gourmet cheeses, perfecting baked mac and cheese is an ode to patience, precision, and passion. So next time you crave a dish that soothes the soul and delights the palate,remember: beneath that golden crust lies a symphony of textures and flavors waiting to be savored. Embrace the craft, and let your kitchen become a haven where comfort meets culinary artistry.
Golden Crispy Air Fryer Potatoes: A Perfect Side Dish
Golden crispy air fryer potatoes are more than just an easy side; they capture the magic of perfectly crisp exteriors paired with tender, fluffy interiors. Whether you’re recounting family gatherings or whipping up a quick weeknight meal, these potatoes transform humble spuds into an irresistible golden crunch. Their beauty lies in technique and ingredient choice-a harmony that anyone can master to elevate every bite.
Prep and Cook time
- Readiness: 15 minutes
- Cooking (in air fryer): 20-25 minutes
- Total: 35-40 minutes
Yield
Serves 4 as a side dish
Difficulty Level
Easy
Ingredients
- 1.5 pounds Yukon Gold potatoes, scrubbed and cut into 1-inch cubes
- 2 tablespoons olive oil
- 1 teaspoon sea salt
- ½ teaspoon freshly ground black pepper
- 1 teaspoon garlic powder
- 1 teaspoon smoked paprika
- 2 tablespoons fresh rosemary, finely chopped
- Optional: ½ teaspoon chili flakes for a touch of heat
Instructions
- Soak the cut potatoes: To ensure maximum crispiness, soak the cubed Yukon Gold potatoes in cold water for at least 30 minutes. This step helps remove excess starch and prevents sogginess.
- Dry thoroughly: Drain and pat the potatoes wholly dry using a clean kitchen towel. moisture is the enemy of crispiness.
- Season the potatoes: In a large bowl, toss the potatoes with olive oil, sea salt, black pepper, garlic powder, smoked paprika, chili flakes (if using), and fresh rosemary. Coat each piece evenly for flavour-packed bites.
- Preheat your air fryer: Set it to 400°F (200°C) and let it heat for 3-5 minutes. preheating ensures immediate crisping upon contact.
- Air fry the potatoes: Place the potatoes in the air fryer basket in a single layer without overcrowding. Cook for 20-25 minutes, shaking the basket halfway through to promote even browning.
- Check for doneness: potatoes shoudl be a vibrant golden brown with crispy edges. If required, air fry for an additional 3-5 minutes to achieve your desired crunch.
- Serve immediately: For best taste and texture, enjoy your golden crispy air fryer potatoes hot from the basket.
Tips for Success
- Choosing the right potatoes: Yukon Gold are ideal due to their medium starch content and creamy texture, wich strike the perfect balance for crispiness without drying out. Russets will crisp well but can be fluffier inside.
- Don’t skip soaking: This removes surface starch and promotes a crisper crust, a vital step for perfect texture.
- Oil with care: Too little oil results in dry potatoes; too much oil will weigh them down. Use a light but even coating.
- Enhance flavor: Try experimenting with herbs like thyme or oregano or sprinkle Parmesan cheese immediately after air frying for an umami punch.
- Make ahead: You can prep and season potatoes in advance, refrigerating them covered for up to 2 hours before cooking.
Serving Suggestions to Elevate Your Golden Crispy Air Fryer Potatoes
These golden crispy air fryer potatoes shine alongside grilled proteins, roasted veggies, or a fresh garden salad. For an irresistible presentation,garnish with freshly chopped parsley,a sprinkle of flaky sea salt,and a drizzle of aioli or tangy sour cream dip. For brunch, pair them with a perfectly cooked fried egg and crispy bacon for a feast of textures and flavors. The key is to maintain contrasts-crispy, creamy, fresh, and bold-that transform this side dish into a memorable star of your table.
| Nutritional Info | Per Serving |
|---|---|
| Calories | 180 kcal |
| Protein | 3 g |
| Carbohydrates | 34 g |
| Fat | 5 g |
For more delicious sides, check out our crispy Roasted Brussels sprouts recipe and master balanced meals. Curious about the science behind potato starch and crisping? Visit Serious Eats for an expert breakdown.

Q&A
Q&A: Golden Crispy Air Fryer Potatoes – A Perfect Side Dish
Q1: What makes air fryer potatoes so special compared to traditional methods?
A1: Air fryer potatoes achieve that coveted golden, crispy exterior with a tender, fluffy inside – all without drowning in oil.Thanks to rapid air circulation, they cook evenly and quickly, giving you fries or wedges that are crunchy on every edge and perfectly cooked in minutes. Plus, they use significantly less fat than deep frying, making them a healthier indulgence.
Q2: Can I use any type of potato for this recipe?
A2: Absolutely! While starchy varieties like Russet potatoes yield super fluffy interiors and crispy skins, waxy potatoes like Yukon Gold work beautifully too, offering a creamier bite. The key is uniform cutting to ensure even cooking and consistent crispness all around.
Q3: How do I achieve that perfect crispy texture without sogginess?
A3: the secret lies in a few simple steps: soak your cut potatoes in cold water to remove excess starch, dry them thoroughly, then toss with just enough oil to coat evenly. Preheating your air fryer ensures immediate crisping upon contact. Also, avoid overcrowding-the potatoes need airflow to crisp up properly.
Q4: What seasonings work best to elevate these air fryer potatoes?
A4: The beauty of this side dish is its versatility! Classic sea salt and cracked black pepper are timeless, but feel free to get creative-smoky paprika, garlic powder, fresh rosemary, or even a sprinkle of Parmesan can add layers of flavor. A squeeze of lemon juice or a dip in garlic aioli can turn them from simple to impressive.
Q5: How long do air fryer potatoes take to cook?
A5: Typically,they need about 15-20 minutes at 400°F (200°C),tossed halfway through to ensure all sides crisp evenly.The exact time can vary based on potato size and air fryer model, so keep an eye (and nose!) on them to catch that perfect golden moment.
Q6: are air fryer potatoes a healthy side dish option?
A6: yes! Using an air fryer significantly cuts down on oil usage, slashing calories and fats commonly found in deep-fried potatoes. You still get satisfying crunch and flavor but with a lighter footprint-perfect for those balancing taste and wellness.
Q7: Can I prepare them ahead of time?
A7: You can cut and soak the potatoes in advance, storing them in cold water in the fridge to prevent browning. However, for optimal crispiness, it’s best to air fry them fresh just before serving. Leftovers can be reheated in the air fryer to restore some crunch.
Golden Crispy Air Fryer Potatoes are more than just a side-they’re a gateway to endless culinary creativity, a crowd-pleaser that’s quick, healthy, and utterly delicious. Ready to transform your meals? Just grab your air fryer and let the sizzle begin!
To Wrap It Up
In the world of simple pleasures, golden crispy air fryer potatoes stand out as a timeless favorite-a side dish that marries convenience with crave-worthy crunch. Whether paired with a juicy steak, a fresh garden salad, or enjoyed on their own as a snack, these potatoes bring a burst of flavor and texture to every bite. Thanks to the magic of the air fryer,achieving that perfect balance of crispy exterior and fluffy interior has never been easier or healthier. So next time you’re pondering how to elevate your meal, remember that the humble potato, transformed by hot circulating air, might just be your new culinary secret weapon. Golden, crispy, and irresistibly satisfying-these air fryer potatoes are more than a side; they’re a festivity of easy, delicious cooking.
Golden French Toast Delight Drizzled with Maple Syrup awakens yoru senses with a perfect balance of crispy edges and tender, custardy centers. This breakfast classic, rooted in centuries-old European tradition, has been cherished as comfort food worldwide. My journey with this recipe began on a chilly Sunday morning when a humble slice of bread transformed into a golden masterpiece, warming both heart and home. What sets this rendition apart is the intentional selection of ingredients and an artful maple syrup drizzle that turns every bite into a luscious indulgence.
Prep and Cook Time
- Preparation: 10 minutes
- cooking: 15 minutes
- Total: 25 minutes
Yield
Serves 4 generously
Difficulty Level
easy – perfect for both beginners and seasoned home chefs
Selecting the Ideal Bread and Ingredients for Maximum Flavor
The foundation of perfectly golden French toast starts with choosing the right bread. Opt for thick slices of brioche or day-old challah,whose airy,slightly sweet crumb soaks up the custard without falling apart.Avoid ultra-soft sandwich bread as it tends to become soggy and lacks the needed texture. The key ingredients include fresh eggs, whole milk or cream for richness, a hint of vanilla extract, and a delicate sprinkle of cinnamon to add warmth.
Ingredients
- 4 large eggs, beaten
- 1 cup whole milk (or heavy cream for extra richness)
- 1 tablespoon pure vanilla extract
- 1 teaspoon ground cinnamon
- 4 thick slices brioche or challah bread, day-old
- 2 tablespoons unsalted butter, softened
- Pinch of salt
- Maple syrup (for drizzling)
- Powdered sugar (optional, for garnish)
- Fresh berries or sliced bananas (optional, for serving)
Mastering the Maple Syrup Drizzle for a Luscious Finish
To elevate the golden French toast delight drizzled with maple syrup, select a high-quality 100% pure maple syrup with a rich amber hue. Warm the syrup gently on low heat to enhance its viscosity and aroma, allowing it to cascade like liquid gold over the toast’s crisp edges and moist center. For a subtle twist, mix in a touch of melted butter or a dash of cinnamon to the syrup before drizzling. This adds complexity and a velvety finish that complements the custard-soaked bread beautifully.
Instructions
- whisk together the eggs, milk, vanilla extract, cinnamon, and a pinch of salt in a wide, shallow dish until fully combined and slightly frothy.
- Preheat a non-stick skillet or griddle over medium heat. Add a small knob of butter and allow it to melt fully, swirling to coat the surface evenly.
- Dip each slice of bread into the egg mixture, allowing it to soak for about 20 seconds per side. Ensure the bread absorbs the custard but does not become overly saturated to prevent sogginess.
- Place the soaked bread onto the skillet. Cook for approximately 3-4 minutes per side or until each side is deep golden brown and slightly crisp. Flip gently with a spatula to maintain the full slice.
- Repeat the process,adding more butter as needed, until all slices are cooked.
- Warm the maple syrup gently in a small saucepan, then generously drizzle over the hot French toast slices just before serving.
- Optionally, dust with powdered sugar and garnish with fresh berries or sliced bananas to add a fresh, vibrant contrast.
Tips for success
- Use day-old bread: Slightly stale slices absorb custard without falling apart, creating a perfect texture.
- Control the soak time: Watch closely when dipping the bread to prevent it from becoming to soggy.
- Medium heat is key: Too high, and the exterior burns before the inside cooks; too low, and the toast will dry out.
- Make-ahead option: prepare the custard mixture in advance and refrigerate up to 24 hours.
- For an indulgent twist, add a splash of orange liqueur to the custard for a subtle citrus aroma.
Creative Serving Suggestions to Elevate Your Breakfast Experience
Transform your golden French toast delight drizzled with maple syrup into a visually stunning breakfast. Layer the slices with dollops of whipped cream or mascarpone. Sprinkle toasted pecans or sliced almonds to introduce a nutty crunch. Accompany the plate with colorful fruit compotes such as warm berry reduction or caramelized peaches for sweetness and acidity. For savory contrast, a side of crispy bacon or turkey sausage complements perfectly.Present your dish on rustic wooden platters or vintage china to enhance the homey yet elegant vibe.
| Nutrient | Per Serving |
|---|---|
| Calories | 350 kcal |
| Protein | 10 g |
| Carbohydrates | 45 g |
| Fat | 12 g |
Try our delightful pancake recipe for another maple-syrup-infused morning treat. For additional insights on maple syrup grades and benefits, visit U.S. Maple Syrup Producers Association.

Q&A
Q&A: Golden French Toast Delight Drizzled with Maple Syrup
Q1: What makes the golden French Toast Delight so special?
A1: The Golden French Toast Delight is not your everyday breakfast staple-it’s a perfect harmony of crispy edges and custardy centers, achieved by soaking thick slices of bread in a rich blend of eggs, cream, vanilla, and a hint of cinnamon. Once griddled to a golden-brown perfection, it becomes the ultimate comfort food that’s both indulgent and nostalgic.
Q2: Why is maple syrup the ideal topping for this French toast?
A2: Maple syrup brings a natural sweetness and a luscious, silky texture that complements the warm, buttery toast. Its deep amber color and complex flavors-earthy, caramelized, and slightly woody-elevate the dish, adding an aromatic finish that makes each bite a little celebration of breakfast bliss.
Q3: Can you use any bread for this recipe?
A3: While you can experiment, the best results come from using thick-cut, sturdy bread like brioche, challah, or Texas toast.These breads soak up the custard without falling apart and reward you with a tender yet firm bite that’s irresistibly satisfying.Q4: Is there a secret ingredient to make this French toast truly delightful?
A4: Yes! A touch of nutmeg or cinnamon in the egg mixture,along with a splash of vanilla extract,adds warmth and depth to the flavor. Also, a pinch of salt balances the sweetness and highlights all the other ingredients beautifully.Q5: How do you achieve that perfect golden crust?
A5: Cooking the soaked bread over medium heat with butter is the key. The butter browns gently, crisping the outside without burning while keeping the inside soft. Patience is essential-flip only once the first side reaches that signature golden hue.
Q6: Are there ways to customize the Golden French Toast Delight?
A6: Absolutely! Top it with fresh berries for a fruity zing, sprinkle powdered sugar for an elegant touch, or add whipped cream and toasted nuts for texture. you can even drizzle flavored syrups or add a dollop of mascarpone for an extra layer of richness.
Q7: Can this recipe be made vegan or gluten-free?
A7: With some clever substitutions, yes! Use plant-based milk and egg replacers to create a vegan custard, and swap regular bread with gluten-free varieties.Just keep in mind that texture and flavor may vary slightly, but the golden magic remains!
Q8: What makes this dish a perfect meal any time of day?
A8: The Golden French Toast Delight balances sweetness, creaminess, and a touch of spice, making it comforting enough for breakfast but satisfying enough for brunch, lunch, or even dessert. Paired with coffee or tea, it transforms ordinary moments into special experiences.
Wrapping Up
As the final drizzle of amber maple syrup cascades over your golden French toast, you’re reminded that this delightful dish is more than just breakfast-it’s a celebration of simple pleasures transformed into a sweet, comforting experience. Whether enjoyed on a leisurely weekend morning or as a special treat to brighten any day, the Golden French toast Delight invites you to savor every bite and relish the cozy warmth it brings to your table. So next time you crave a touch of indulgence, remember: a plate of this golden goodness, lovingly drizzled with maple syrup, is all you need to start your day off right.
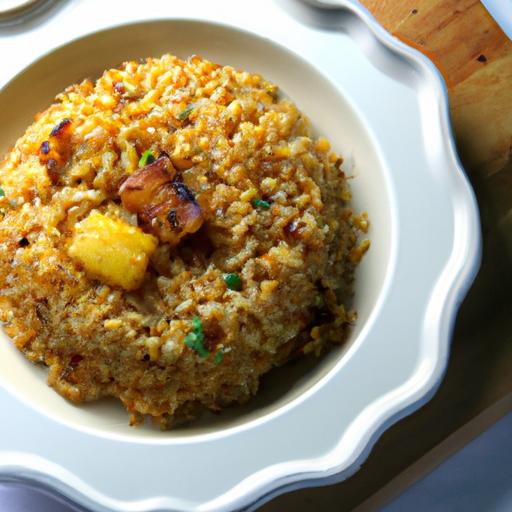
Golden Baked Rice is not just a dish; it’s a celebration of texture and flavor that transforms everyday rice into a crispy, comforting masterpiece. Achieving that coveted golden crust while maintaining tender, fluffy rice underneath is an art form cherished across cultures. Whether you’re craving a nostalgic comfort meal or a modern twist on a classic staple,mastering this crispy texture elevates your culinary game and invites endless creative possibilities.
Prep and Cook time
- Preparation: 15 minutes
- Cooking: 45 minutes
- Total: 1 hour
yield
Serves 6 generously
Difficulty Level
Medium – approachable with some attention to detail
Selecting the Best Rice Varieties for Golden Baked Rice Success
Choosing the right rice is foundational to perfecting golden baked rice. medium-grain rice varieties like Arborio or Calrose are exceptional-they offer a creamy yet tender texture that crisps beautifully without becoming mushy. For a nuttier bite, try short-grain japonica rice, which holds its shape and provides an irresistibly chewy crust. Avoid long-grain rice as it tends to stay too loose and less cohesive for forming a golden crust.
Ingredients
- 2 cups medium-grain rice, rinsed and drained
- 4 cups chicken or vegetable broth (for richer flavor)
- 1 medium onion, finely chopped
- 3 cloves garlic, minced
- 2 tablespoons olive oil or unsalted butter
- 1 teaspoon smoked paprika
- 1/2 teaspoon turmeric (for warm golden color)
- Salt and cracked black pepper, to taste
- 1 cup shredded sharp cheddar or Gruyère cheese (optional)
- 1/4 cup fresh herbs (parsley, thyme, or chives), finely chopped
- 1/3 cup toasted nuts (pine nuts or almonds, optional)
- 1 tablespoon lemon zest (optional, for brightness)
Instructions
- Preheat your oven to 375°F (190°C). Grease a 9×13-inch baking dish with olive oil or butter to encourage an even, crispy base.
- Heat olive oil or butter in a large skillet over medium heat. Add the chopped onion and sauté until translucent and fragrant, about 5 minutes. Stir in garlic and cook for an additional minute.
- Add rinsed rice to the skillet, stirring to coat grains in the aromatics and fat.Cook for 2-3 minutes until rice begins to look glossy.
- Season with smoked paprika,turmeric,salt,and cracked black pepper. Stir to evenly distribute the spices.
- Pour in the broth and bring it to a gentle boil. Reduce heat, cover, and simmer for 15 minutes until most of the liquid is absorbed but rice is still slightly al dente.
- Transfer the rice mixture to your prepared baking dish and spread evenly for consistent browning.
- Sprinkle shredded cheese evenly on top if using. This enhances flavor and encourages a golden, bubbly crust.
- Bake uncovered for 25-30 minutes or until the edges develop a deep golden-brown crust. For extra crispiness, switch to the broiler in the final 2-3 minutes – but watch carefully to avoid burning.
- Remove from the oven and let it rest for 5 minutes; this helps the crispy crust set and makes slicing easier.
- Before serving,garnish with fresh herbs,lemon zest,and toasted nuts for added texture and luminous flavor contrasts.
Expert Tips for Baking and Serving Golden Baked Rice
- Achieving Crispy texture: Use a well-oiled baking dish and consider adding a small splash of broth to wet the surface before baking. This steams the top layer slightly yet helps build a crunchy bottom crust.
- Flavor Infusions: Incorporate infusions like saffron threads soaked in warm broth or a drizzle of browned butter before baking for a nutty depth.
- Toppings to Elevate: Try crispy fried shallots, toasted breadcrumbs, or crumbled cooked bacon for irresistible toppings.
- Make-ahead: Assemble the rice base a day ahead; keep refrigerated and bake just before serving for freshness with convenience.
- Alternative Cheeses: Parmesan,feta,or even a smoky mozzarella transform the flavor profile beautifully-feel free to experiment.
Serving Suggestions
golden baked rice pairs exquisitely with roasted vegetables, grilled chicken, or a zesty salad to balance the crunch. Serve straight from the dish onto warm plates, topped with a scattering of fresh herbs and a wedge of lemon for an inviting pop of color. Invite guests to customize with hot sauce, yogurt, or a drizzle of herb oil to create an interactive and satisfying experience.
| Nutrient | Per Serving |
|---|---|
| Calories | 320 kcal |
| Protein | 8 g |
| Carbohydrates | 45 g |
| Fat | 9 g |
Explore more crispy rice bowl recipes for inspired comfort food variations. For cooking techniques exploring rice chemistry, visit the Cook’s Illustrated guide to perfect rice.

Q&A
Q&A: Golden Baked Rice – A crispy Comfort Food Reinvented
Q1: What exactly is Golden Baked Rice?
A: Golden Baked Rice is a delicious twist on traditional rice dishes, where fluffy grains are transformed by baking into a crispy, golden crust. Think of it as comfort food with a crunchy crown – the perfect marriage of softness and crispiness that elevates simple rice into a standout dish.
Q2: How is Golden Baked Rice different from regular rice dishes?
A: Unlike steamed or boiled rice, Golden Baked Rice is baked in the oven until the top and sometimes the edges turn a stunning amber hue and develop a satisfying crunch. This textural contrast creates a unique eating experience – soft interior, crispy exterior – that reinvents how we enjoy a staple grain.
Q3: What ingredients are typically used in Golden Baked Rice?
A: At its core, the dish relies on cooked rice, butter or oil, and a touch of seasoning such as salt, pepper, and sometimes herbs or cheese for extra flavor and richness. Variations may include vegetables, proteins, or spices, making it highly versatile and customizable.
Q4: Is Golden Baked Rice healthy?
A: It can be! By using wholesome ingredients like brown rice, adding vegetables, and moderating the amount of fat, Golden Baked Rice becomes a nourishing comfort food. Plus, baking rather than frying reduces oil usage, making it a lighter alternative to greasy rice preparations.
Q5: Can Golden Baked Rice be served as a side dish or a main course?
A: absolutely! It shines as a side dish accompanying roasted meats or sautéed vegetables. But give it a culinary upgrade by mixing in hearty ingredients like beans, mushrooms, or chicken – it transforms effortlessly into a comforting main event.
Q6: Any tips for achieving the perfect crispy crust?
A: Yes! Spread the rice in an even layer in a well-buttered or oiled baking dish, and bake at moderate-high heat.For extra crunch, sprinkle a bit of cheese or breadcrumbs on top before baking. Don’t forget to allow the rice to rest for a few minutes after baking to let the crust set beautifully.
Q7: What inspired the reinvention of this classic comfort food?
A: The idea emerged from a desire to breathe new life into humble rice, turning it into something more texturally exciting. Taking inspiration from crispy paella socarrat and golden baked casseroles, chefs and home cooks alike have embraced this technique to create a nostalgic yet novel comfort food experience.Q8: Where can someone start experimenting with Golden Baked Rice at home?
A: Start simple! Use leftover cooked rice, toss it with butter, salt, and your favorite seasonings, then bake until golden. From there, get creative by adding cheeses, herbs, or diced veggies. It’s a forgiving dish, perfect for culinary exploration with delicious results.
Closing Remarks
As the comforting warmth of golden baked rice fills your kitchen, you’re reminded that even the simplest ingredients can be transformed into a celebration of texture and flavor. This crispy twist on a beloved staple not only satisfies the soul but also invites endless creativity-whether layered with savory spices, folded with fresh herbs, or crowned with melting cheese. Golden baked rice is more than just a dish; it’s a delicious invitation to reinvent comfort food, one crispy bite at a time. So next time you crave something familiar yet fresh, let golden baked rice be your go-to canvas for culinary exploration.
Golden Perfection in crispy roasted potatoes begins with the careful selection of each component and a mastery over every step. Achieving that exquisite crunch on the outside while maintaining a fluffy,tender interior requires more then just tossing spuds in oil and heat-it’s a nuanced dance of potato variety,parboiling technique,seasoning finesse,and roasting precision. Let’s dive deep into transforming humble potatoes into a golden masterpiece that will elevate your feast to unforgettable heights.
Prep and Cook Time
- Preparation: 15 minutes
- Cook Time: 45 minutes
- Total Time: 1 hour
Yield
Serves 4 as a side dish
Difficulty Level
Easy to Medium – Perfect for home cooks wanting to impress!
Ingredients
- 2 pounds Yukon Gold potatoes, peeled and cut into even chunks
- 3 tablespoons high-smoke point oil (grapeseed or sunflower)
- 1 teaspoon kosher salt (plus extra for seasoning)
- 1 teaspoon freshly ground black pepper
- 1 teaspoon smoked paprika
- 2 cloves garlic, smashed
- 2 sprigs fresh rosemary or thyme
- Optional: a pinch of chili flakes for gentle heat
Instructions
- Choosing the Right Potatoes: Begin with Yukon Gold for their creamy interiors and balanced starch content, ideal for crispiness. Alternatively, a high-starch Russet potato delivers an ultra-crispy finish but with a drier interior.
- Parboiling for Texture: Place potatoes in a large pot of cold, salted water (about 1 teaspoon salt). Bring to a gentle boil and cook for exactly 8 minutes-enough to soften edges but keep firmness inside. Test with a fork; it should meet slight resistance.
- Draining and Roughing Edges: Drain thoroughly, then shake the potatoes gently in the colander or pot to create a roughened surface-this tiny texture difference captures oil and boosts crispiness.
- Preheating the Oil and Baking Tray: Pour oil into a large roasting tray and place it in the oven at 425°F (220°C) for 5 minutes until smoking hot. This step helps form that coveted crisp exterior promptly.
- Seasoning: Toss parboiled potatoes with garlic cloves, rosemary sprigs, smoked paprika, black pepper, and a pinch of chili flakes in a large bowl. Gently fold to avoid breaking your chunks but ensuring even coating.
- Roasting: Carefully add potatoes to the hot oil tray, spacing them evenly for maximum heat exposure. Roast for 40-45 minutes, turning every 15 minutes until the color deepens to a rich golden brown and edges feel crunchy.
- Final Touch: Once out of the oven, sprinkle additional kosher salt and freshly chopped herbs for a burst of fresh flavor and visual contrast.
chef’s Notes: Tips for Success
- Parboil Timing: Avoid overcooking in the parboil step; to soft and your potatoes will disintegrate. Stick to 8 minutes for ideal texture.
- Oil Choices: Use oils with high smoke points-not olive oil-to withstand roasting temperatures without burning.
- Herbs & Aromatics: Fresh rosemary or thyme are classic-experiment with sage or even a sprig of tarragon for an herbaceous twist.
- Make-Ahead: Potatoes can be parboiled and refrigerated up to 24 hours before roasting. Bring to room temperature to avoid baking cold items.
- Batch Roasting: Avoid overcrowding the tray; crowded potatoes steam rather than roast, compromising crispiness.
Serving Suggestions
Serve these golden wonders alongside roasted meats, grilled vegetables, or hearty stews. Garnish with a sprinkle of flaky sea salt,a drizzle of garlic-infused olive oil,and a fresh herb bouquet for that restaurant-quality finish. pair with tangy aioli or a lemony yogurt dip to cut through richness. For a festive touch, scatter pomegranate seeds or add a squeeze of fresh lemon juice just before serving to brighten flavors.

| Nutrient | Per Serving (approx.) |
|---|---|
| Calories | 210 kcal |
| Protein | 4g |
| Carbohydrates | 35g |
| Fat | 7g |
Explore more ways to enhance your potato dishes in our guide to perfect potatoes. For the science behind starch and crispiness, visit this research article from Science Daily.
Q&A
Q&A: Golden Perfection – Your Guide to crispy roasted Potatoes
Q1: What’s the secret to achieving that irresistible golden crisp on roasted potatoes?
A: The magic lies in a few key steps: start by parboiling your potatoes to soften the inside, then rough them up by shaking them gently in the pot. This creates those perfect nooks and crannies that turn extra crispy. don’t skimp on oil – a generous drizzle of olive oil or duck fat ensures a luscious, golden crust. roast at a high temperature (around 425°F/220°C) to lock in the crunch.
Q2: Which type of potatoes work best for roasting to crispy perfection?
A: Starchy potatoes like Russets or Yukon Golds are your best pals here. Their fluffy interiors respond beautifully to roasting, creating that wonderful contrast between a crispy outside and a soft inside. Waxy potatoes, while delicious, tend to stay a bit firmer and less fluffy.
Q3: Can I flavor my roasted potatoes beyond just salt and pepper?
A: Absolutely! Crispy roasted potatoes are a blank canvas. Toss them with fresh herbs like rosemary,thyme,or sage right before roasting. Garlic cloves or garlic powder add depth, while a sprinkle of smoked paprika or chili flakes brings a smoky kick.For a Mediterranean twist, try lemon zest and oregano. The possibilities are endless-and delicious.Q4: How do I keep my roasted potatoes crispy when serving?
A: Timing is everything. Serve potatoes fresh out of the oven; their crunch diminishes as they cool. If you need to hold them, keep them warm in a low oven on a wire rack to allow moisture to escape. Avoid covering them, or they’ll steam and lose their crunch.
Q5: Can I prepare crispy roasted potatoes ahead of time?
A: You can partially prep by parboiling and roughing up the potatoes ahead,then refrigerate them. When you’re ready to serve, toss them in oil and roast from cold for a crispy finish. Just know that fresh-out-of-the-oven always tastes best!
Q6: Is there a healthier way to make roasted potatoes crispy without drowning them in oil?
A: Yes! Use just enough oil to coat the potatoes lightly, and try tossing them with non-stick spray or brushing them with a bit of oil to reduce excess. Roasting on a wire rack allows air to circulate,promoting crispiness. Additionally,baking soda added to the boiling water can definitely help break down potato surfaces for extra crunch without more oil.
Q7: what’s the best way to serve crispy roasted potatoes?
A: Think of crispy roasted potatoes as the ultimate sidekick to your mains.They shine beside roast chicken, steak, or a hearty vegetarian stew. For a twist, toss them warm with Parmesan and fresh parsley or drizzle with a garlicky aioli. Their golden crunch and fluffy heart can steal the spotlight too!
So there you have it-your golden ticket to perfectly crispy roasted potatoes. Ready to crunch your way to culinary bliss? Let these tips lead your way to that coveted crispy, golden perfection!
The Conclusion
As the aroma of golden, crispy roasted potatoes fills your kitchen, you’ll know you’ve unlocked a little piece of culinary perfection. With the right balance of heat, seasoning, and technique, these humble spuds transform into a dazzling side that steals the spotlight on any plate. Whether you’re aiming for that perfectly crackling skin or a fluffy, tender heart, this guide has equipped you with the secrets to elevate your roasting game. So next time you crave that irresistible crunch and comforting warmth,remember: golden perfection is just a roast away.Happy cooking!
