
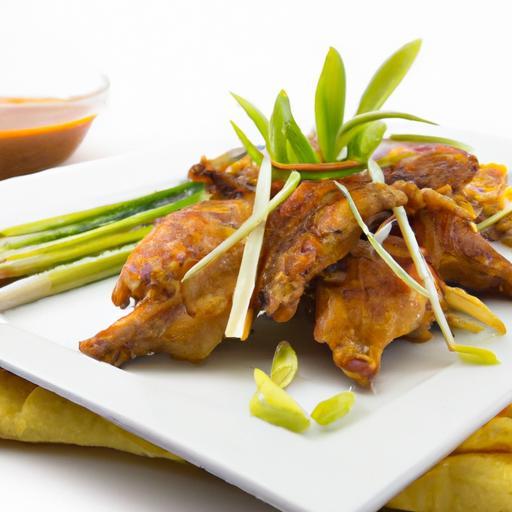
There’s something undeniably satisfying about biting into a piece of chicken with a golden, crackling crust that shatters effortlessly, revealing juicy, tender meat beneath. Achieving that perfect harmony of crispiness and moistness can feel like an elusive culinary feat-one that separates home cooks from kitchen maestros.But what if mastering this art wasn’t just a matter of luck or secret ingredients? In this article, we’ll peel back the layers on the science and techniques behind perfectly crispy chicken, unlocking expert tips and tricks that guarantee a crunch worthy of applause every single time. Prepare to transform yoru chicken game and impress your taste buds like never before.
Unlocking the Secrets to Perfectly Crispy Chicken begins with selecting the ideal cut and mastering every step-from seasoning to cooking-to achieve that irresistible crunch and deep, savory flavor. Whether you’re aiming for a golden fried thigh or a delightfully crispy breast, understanding these fundamentals will elevate your homemade chicken to restaurant-quality heights.
prep and Cook Time
- Preparation: 20 minutes (including marinating)
- Cooking: 15-20 minutes
- Total Time: Approximately 40 minutes
Yield
- Serves 4 generously
Difficulty Level
- Medium – perfect for home cooks ready to sharpen their frying skills
Ingredients
- 4 bone-in, skin-on chicken thighs, trimmed of excess fat
- 1 ½ cups buttermilk (for tenderizing)
- 2 cups all-purpose flour, sifted
- 1 tablespoon smoked paprika
- 1 teaspoon garlic powder
- 1 teaspoon onion powder
- 1 teaspoon cayenne pepper (adjust to taste)
- 1 teaspoon kosher salt
- 1 teaspoon freshly ground black pepper
- Vegetable oil (for frying, enough to fill 2 inches of the pan)
- Optional: 1 tablespoon cornstarch (to boost crispiness)
instructions
- Choose the right cut: Opt for bone-in, skin-on chicken thighs. The skin protects the meat from drying while the bone helps cook evenly, producing juicier, crispier results.
- Marinate: Immerse the chicken thighs in the buttermilk and let rest for at least 20 minutes. This tenderizes the meat, adds moisture, and also creates a sticky surface for the coating.
- Mix your dredge: In a large bowl, combine the flour, smoked paprika, garlic powder, onion powder, cayenne, salt, pepper, and optional cornstarch. The cornstarch is a secret weapon for extra crunch.
- Coat the chicken: Remove each chicken piece from the buttermilk, letting excess liquid drip off. Thoroughly dredge in the seasoned flour, pressing gently to ensure the coating adheres firmly.
- Rest the coated chicken: Place the coated thighs on a wire rack for 10 minutes to set the crust-this prevents it from falling off during frying.
- Heat the oil: Fill a heavy skillet or Dutch oven with 2 inches of vegetable oil and heat to 350°F (175°C). Use a kitchen thermometer for accurate temperature control.
- Fry in batches: Add chicken skin side down, avoid overcrowding. Fry for about 7-9 minutes per side, turning carefully until skin is golden brown and an internal temperature of 165°F (74°C) is reached.
- Drain and rest: Transfer to a wire rack set over a baking sheet to drain excess oil, and let rest for 5 minutes-this helps the crust firm up and juices redistribute.
Chef’s Notes: Tips for Success
- Selecting your chicken: Skin-on, bone-in pieces yield superior crispiness and flavor compared to boneless breasts.
- Marinades Matter: Buttermilk is acidic and tenderizes the chicken while creating a base for the dredge to stick; consider adding a splash of hot sauce for an extra punch.
- Season your flour well: Don’t skimp on spices, as your crispy coating must be flavorful inside and out.
- Oil Temperature Control: Maintaining the oil at a consistent 350°F is critical to cooking thoroughly without burning the crust.
- Double Dredge Technique: For extra crunch, dip the chicken back into the buttermilk and then again into the seasoned flour before frying.
- Make-ahead tip: Coat and chill the chicken for up to 2 hours before frying; this firms up the crust for even better texture.
Serving Suggestions
Present your perfectly crispy chicken atop a bed of rustic mashed potatoes or alongside a fresh,tangy slaw for contrast. Garnish with freshly chopped parsley or a wedge of lemon to brighten the flavors. For an indulgent Southern-style feast, add warm buttermilk biscuits and honey-drizzled hot sauce on the side.

| Nutrient | Per Serving |
|---|---|
| Calories | 440 kcal |
| Protein | 35 g |
| Carbohydrates | 16 g |
| Fat | 24 g |
For more on balancing heat and timing to achieve ultimate crispness, check out our related Crispy Frying Techniques guide. Additionally, explore the science of proper oil temperature and frying time with this authoritative resource from Serious Eats.
Q&A
Q&A: Unlocking the Secrets to Perfectly Crispy Chicken Every Time
Q1: Why is achieving crispy chicken such a challenge for home cooks?
A1: crispy chicken seems deceptively simple but requires a delicate balance of moisture control, temperature precision, and coating technique. Home kitchens often struggle with inconsistent heat, excess oil, or batter that’s too thick-all of which can result in soggy or greasy chicken instead of that coveted crunch.
Q2: what’s the first key step to ensuring your chicken comes out crispy?
A2: Drying the chicken thoroughly before cooking is crucial.Moisture is the enemy of crispiness as steam softens the coating. Pat your chicken dry with paper towels and, if possible, let it air-dry in the fridge for 30 minutes to an hour to remove excess surface moisture.


Q3: Does brining the chicken help or hinder crispiness?
A3: Brining can be a secret weapon-when done correctly. A saltwater brine helps keep the meat juicy inside but can introduce extra moisture on the surface, which may interfere with crisping. To counter this, make sure to dry the chicken well after brining or use a dry brine so the skin tightens up and crisps beautifully.
Q4: What kind of coating produces the crispiest exterior?
A4: A combination of flour and starch (like cornstarch or potato starch) creates a light, shatteringly crisp crust. The starch absorbs moisture and crisps up faster than flour alone. For extra crunch, some chefs add crushed cornflakes, panko, or even a dusting of baking powder into their coating mix.
Q5: Is oil temperature really that vital?
A5: Absolutely. Oil that’s too cool causes greasy, soggy chicken because it soaks up more oil before crisping. Too hot, and the coating burns before the meat cooks through. Aim for around 350-375°F (175-190°C) and use a thermometer to keep it steady. This ensures a golden, crunchy exterior with juicy meat inside.
Q6: Can baking produce crispy chicken or is frying the only way?
A6: While deep frying is classic, oven-baked chicken can also turn out crispy-especially if you use a wire rack to air-circulate heat and apply a light coating or breadcrumbs. Finishing with a quick broil or using an air fryer mimics frying’s effect with less oil.
Q7: How do resting and serving affect crispiness?
A7: Let the chicken rest on a wire rack after cooking-not paper towels, which trap steam and soften the crust. Serve instantly for the best crunch,or keep warm in a low oven without covering.
Q8: Any secret tips for extra crunch?
A8: Yes! For an ultra-crisp finish, double dredge your chicken-dip it in buttermilk or egg wash, coat in seasoned flour, then repeat once more before frying. Also, a pinch of baking soda in the coating can create tiny bubbles that elevate crunchiness.
by mastering these secrets-you control moisture, coating, and heat-crispy chicken perfection is no longer just a dream but a flavorful reality every time!
Concluding Remarks
Unlocking the secrets to perfectly crispy chicken is more than just a cooking feat-it’s an art form that transforms everyday meals into unforgettable experiences. Armed with the right techniques,a touch of patience,and a sprinkle of culinary curiosity,you can elevate your chicken from ordinary to extraordinary,achieving that golden crunch that delights the senses every time. So, next time you crave that satisfying crackle beneath your fork, remember these tips and embrace the crispy journey ahead. Your taste buds-and your guests-will thank you.